
Project: HiCAD Profile Installation
Profile Installation > New/Change > Profile installation
The Profile installation can be opened in two ways:
Profile Installation > New/Change > Profile installation or
In the Profile installation dialogue window, first select the sketch that you want to use as a basis for your installation. For this purpose you can choose an existing sketch beneath Sketch at the top of the dialogue window. Alternatively, you can use the options Process sketch and New sketch in plane in the pull-down menu of the function. If a sketch in the drawing is active when you choose the Profile installation function, this sketch will be chosen automatically.
The sketch must not contain any gaps or double lines.
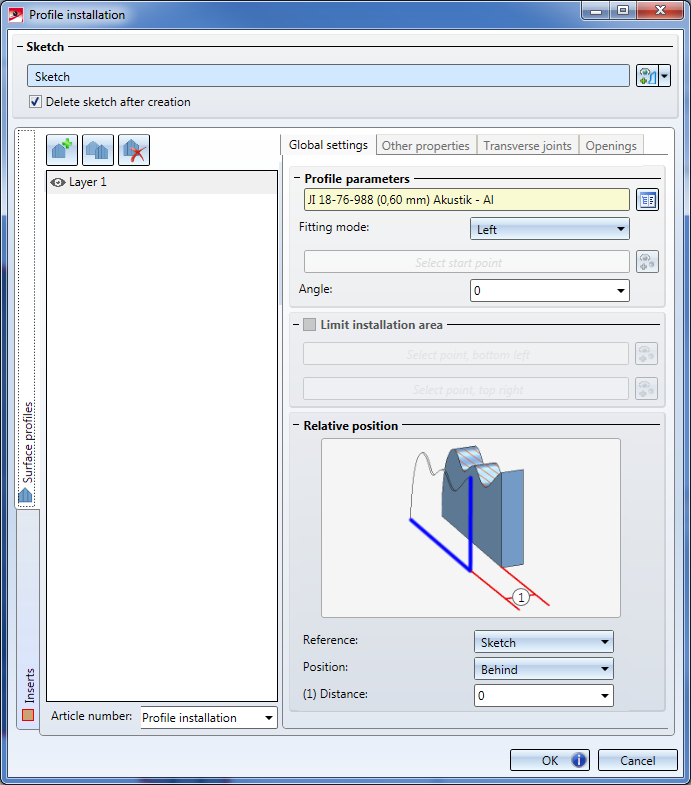
The dialogue window has two side tabs on the left hand side: Surface profiles and Inserts.
ON Surface profile you can specify settings that concern the installing of profiles on the surface of the sketch.
Further down on the left hand side of the dialogue you can find a list of all layers for this profile installation as well as an input field for the Article number for the profile installation. On the right hand side you will find various tabs where you can specify the settings for the selected layer:
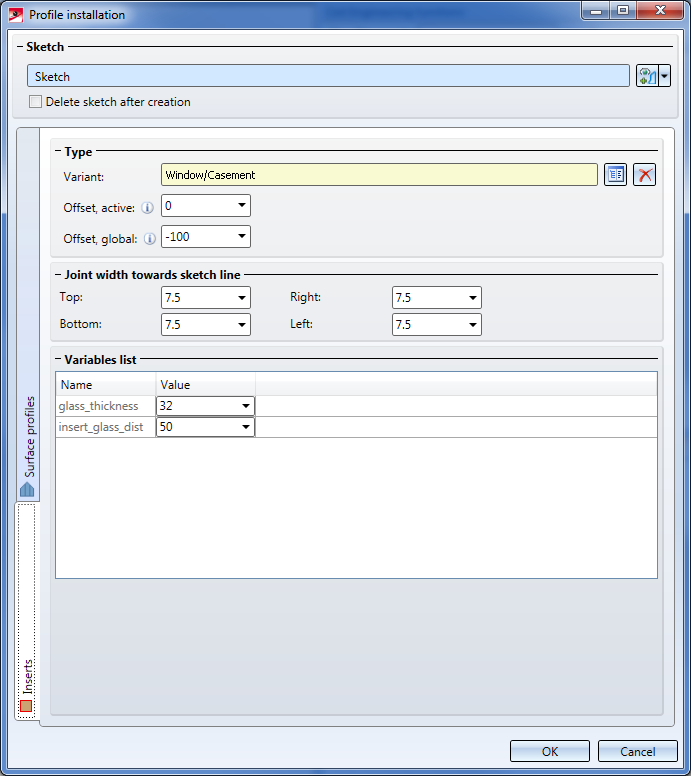
On the Inserts tab you can specify settings that concern the placing of inserts into openings in the sketch.
In the background a preview of the profile installation will always be displayed. This preview is always shown in the representation mode Contour, uncut and represents the state of the profile installation without any further modifications by he user.
Generally, the Profile Installation module always attempts to preserve processings on profiles if possible. For instance, the positions of bores or subtractions in profiles will even be preserved in case of a change (and recalculation) of the profile installation. That is, profiles that you moved or rotated will even preserve their position afterwards even if, for instance, the position of the entire layer of the profile installation will be changed.
When you click on the OK button, the profile installation will be carried out. If any errors occur, an appropriate error message will be displayed. Otherwise, the dialogue window will be closed and the profile installation will appear in the drawing area.
The profile installation is structured into assemblies: An assembly containing the profile installation is created. There, you will find one assembly per layer. The layers in turn consist the individual profiles. The top assembly contains the Feature called Profile installation. Double-clicking the feature reopens the Profile installation dialogue, enabling you to apply changes to the installation if required.
When you click on the Apply button the dialogue window will be closed without applying any changes.

|
© Copyright 1994-2019, ISD Software und Systeme GmbH |