Point Cloud > Clipping box
Since point clouds are usually very large, they can only be used sensibly if parts of the point cloud that are not required are temporarily hidden. To make this possible, HiCAD creates a so-called clipping box when inserting a point cloud, which completely encloses the point cloud. By moving and rotating the clipping box and by defining subtractions in this clipping box, areas of the point cloud can be temporarily "cut away" so that the remaining area of the point cloud can be better measured or processed.
For example, only the back wall or floor of a building can be displayed and edited in this way.
The following functions are available:
|
|
|
|
|
|
|
|
|
|
|
The point cloud used in the following paragraphs is an example provided by the company VHV-Anlagenbau GmbH, Hörstel, Germany.

Edit clipping box
Point Cloud > Clipping box > Edit clip... 
When inserting a point cloud, HiCAD automatically creates a so-called clipping box that completely encloses the point cloud. This box cannot be deleted and no further clipping boxes can be created.
When the Edit clipping box function is called
-
arrows in positive and negative direction of the X-, Y- and Z-axis as well as
- point symbols
 at the corners of the clipping box
are displayed..
When you point the cursor at a directional arrow, the corresponding area is highlighted and you can shrink or enlarge the box by dynamically dragging the area in the selected direction. Specifying a point will change the clipping box. This can be done by dropping the cursor, by taking over a snap point displayed by the autopilot or with any other point option, e.g. the point option Point from point cloud (PW).
In addition, you can also drag the point symbols . Again, you can use point options from the Autopilot and the Point options menu.
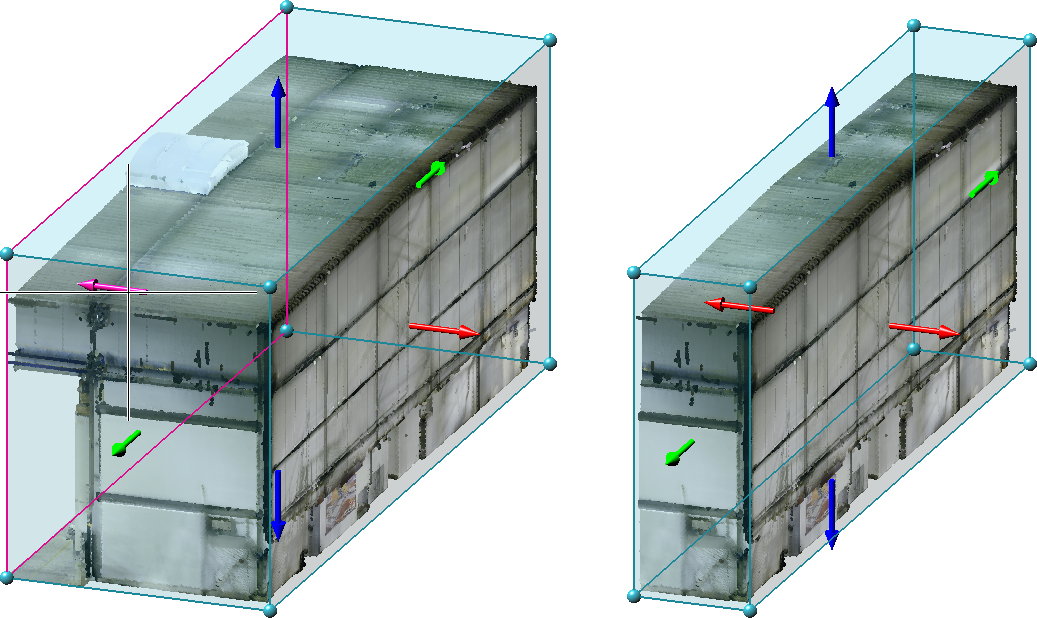
With the right mouse button you can activate a context menu with further functions. These functions can be used to rotate or move the current clipping box.

If Rotate is selected, the clipping box can be rotated around an axis by selecting the rotation circle of the respective axis with the cursor and then dynamically rotating it with the cursor
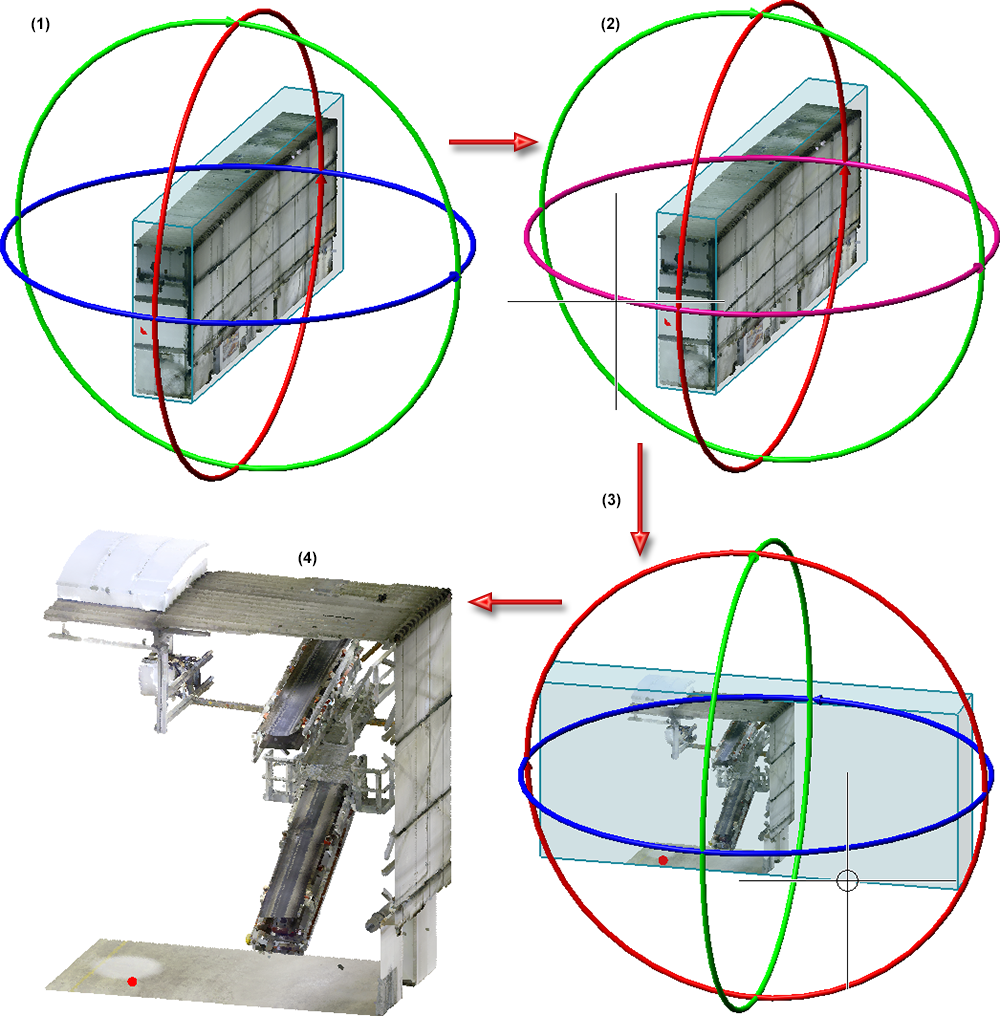
(1) Current clipping box, (2) Selection of the Z-axis as rotation axis, (3) Rotated clipping box, (4) Clipped point cloud
If Move is selected, the corner points and the centroid of the clipping box are visualized in the drawing. You then select the point to be moved and determine the new position with the cursor.
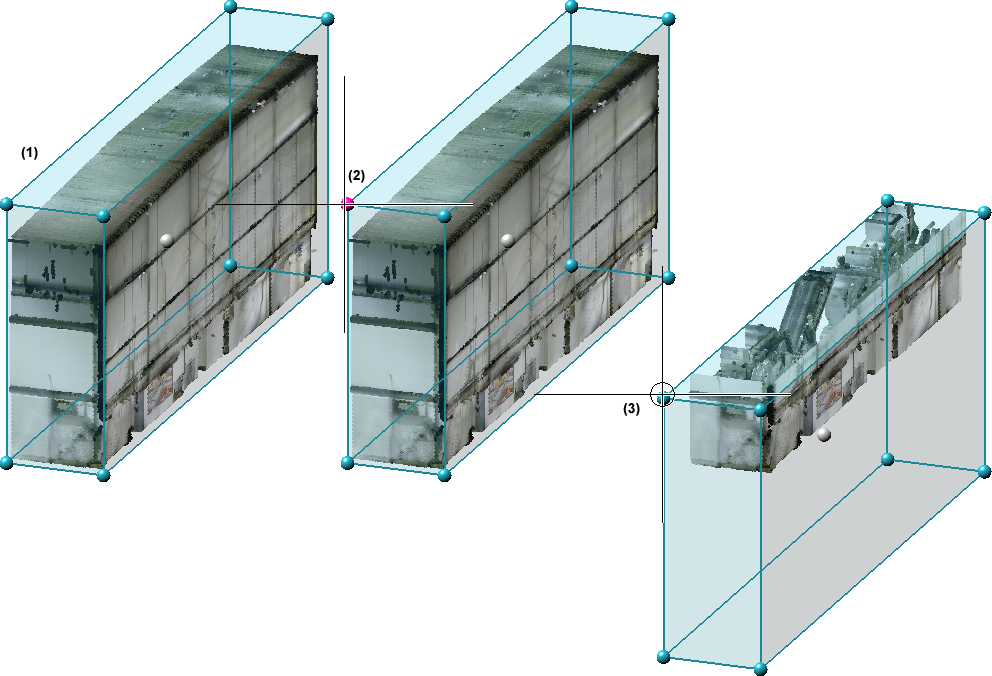
(1) Current clipping box with visualized corner points, (2) Selection of a point, (3) Moved clipping box
The preview of the clipped point cloud is always updated immediately in the drawing. The current representation is taken over by pressing the middle mouse button.
Tip:
In practice, it may be more useful to create the clipping boxes in the standard views (front view, side view, top view) instead of in perspective.
![]() Please note:
Please note:
If a drawing created with an earlier HiCAD version is loaded with point clouds, the following will happen:
- If no clipping box is defined in the drawing, then a correspondingly large box is automatically created.
- If several clipping boxes are defined in the construction, then these are retained. These boxes can then be removed with the Delete subtraction function except for one of the boxes.
Subtract
Point Cloud > Clipping box > Subt.
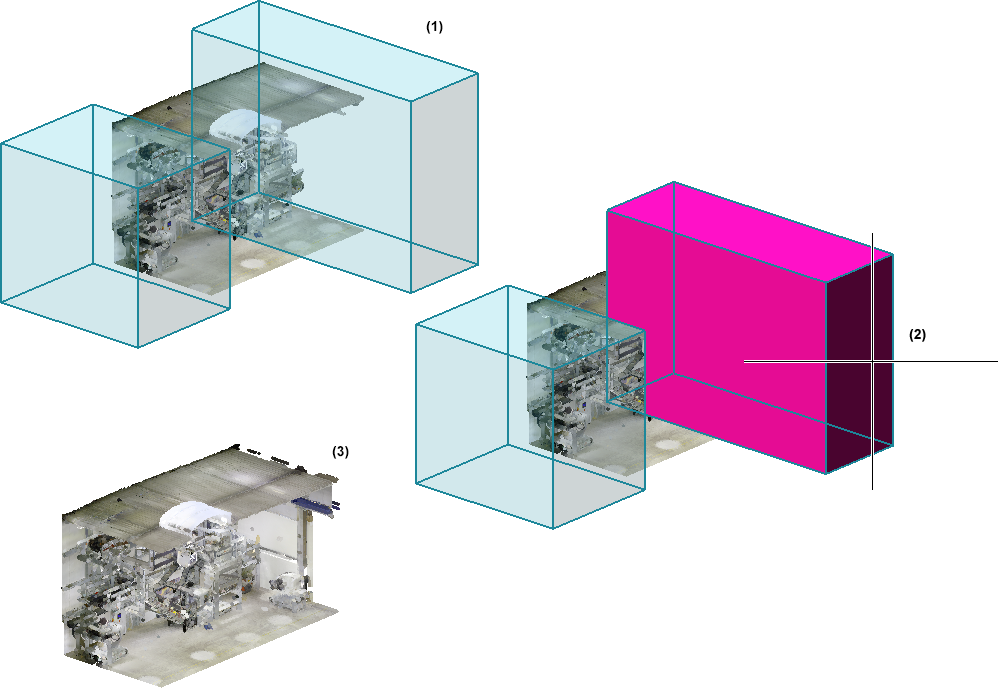
This function can be used to define subtractions of the clipping box and thus cut away areas of the point cloud.
To define a subtraction, i.e. a "negative clipping box", determine the center of the box after calling the function and drag it with the cursor. As with the Edit clipping box function, direction arrows and point symbols are displayed, which you can use to reduce and enlarge the box for the clipping. With a right-click, a context menu can also be opened here, with whose function the subtraction can be rotated and moved.
Apply the subtraction by pressing the middle mouse button.
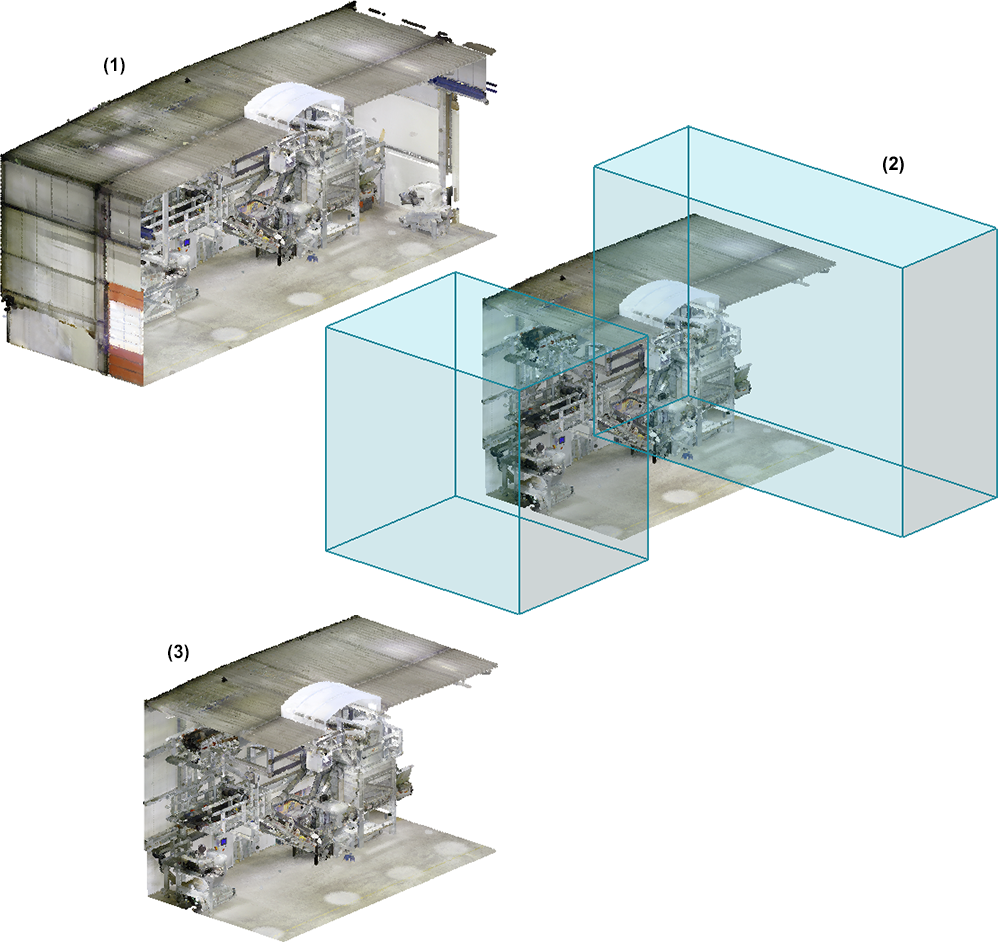
(1) Point cloud, (2) two subtractions, (3) Result
Edit subtractions
Point Cloud > Clipping box > EditSubt 
This function can be used to edit subtractions. After calling the function, all defined subtractions are displayed with direction arrows and corner points.
The subtractions are edited in the same way as the clipping box with the Edit clipping box function.

Delete subtractions
Point Cloud > Clipping box > DelSubt 
Use this function to delete subtractions. Select the subtractions to be deleted one after the other and finish the selection by pressing the middle mouse button.
(1) Defined subtractions, (2) Delete the upper subtraction, (3) Result

Procedure • Point Cloud Functions • Working with Point Clouds - An Example