Working with Point Clouds - An Example
-
- Retracing of walls and floors for the later fitting of the plant
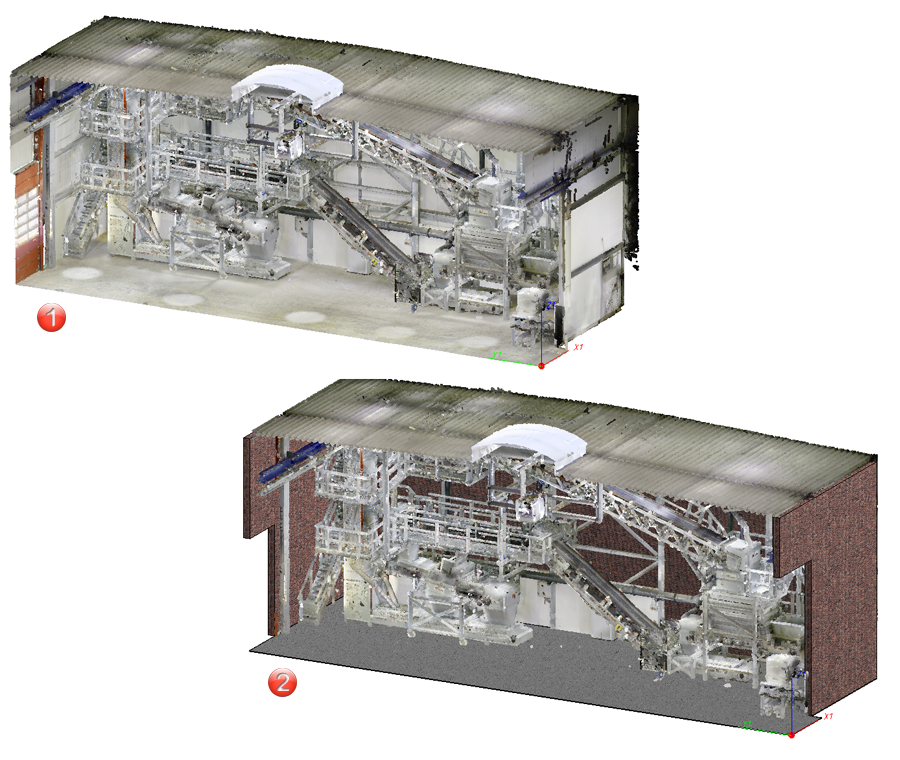
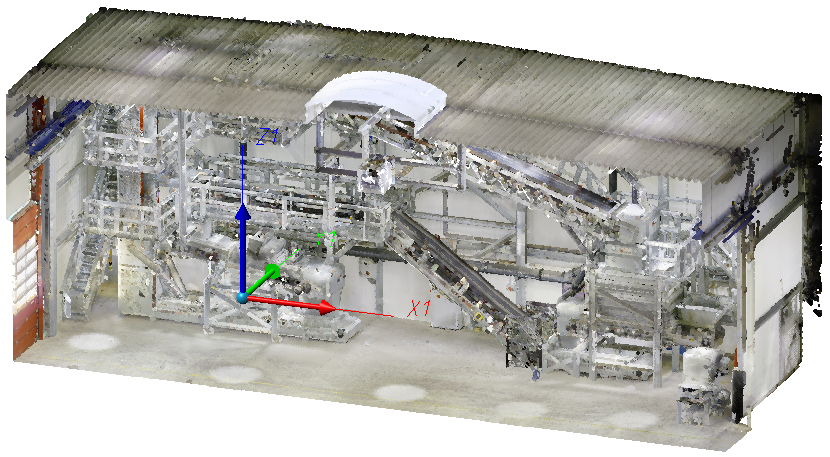
(1) Point cloud in HiCAD
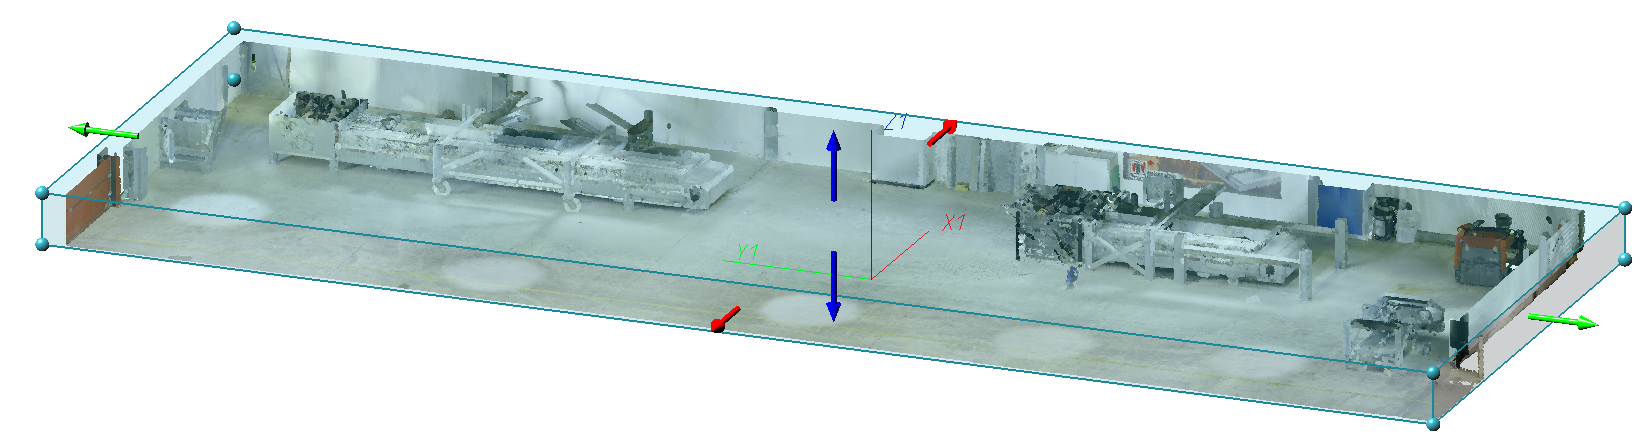
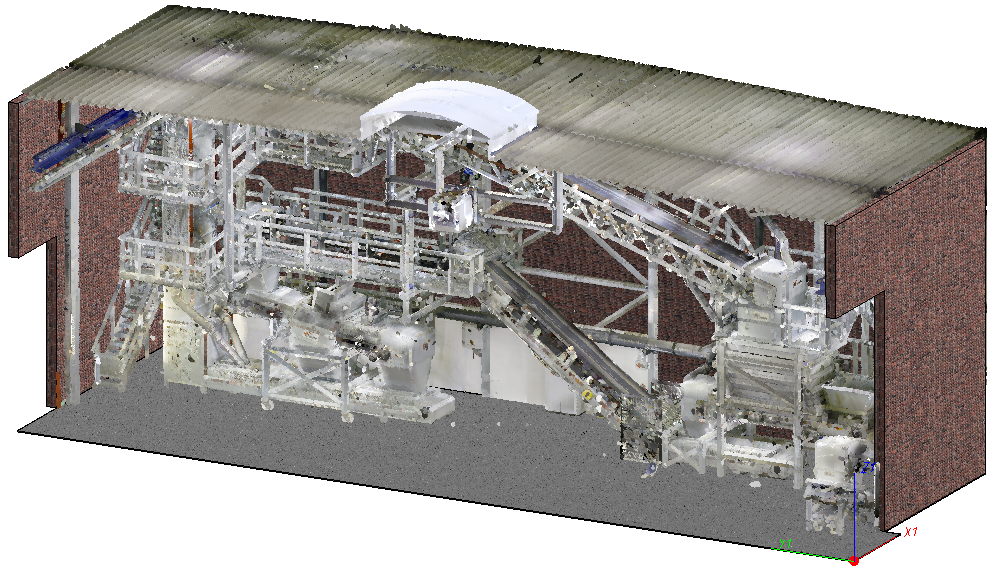
(2) Point cloud with hall

Converting and loading of a point cloud in HiCAD
- Start HiCAD and create a new drawing file.
- On the Point cloud Ribbon tab, choose Convert point cloud
 .
.
The converter will then be started.
- Choose Add point cloud file
 to load the prepared 3-D scan (e.g. *.E57).
Drive N (..\HiCAD\Punktwolken\) from Filegrup.DAT is preset as the target path.
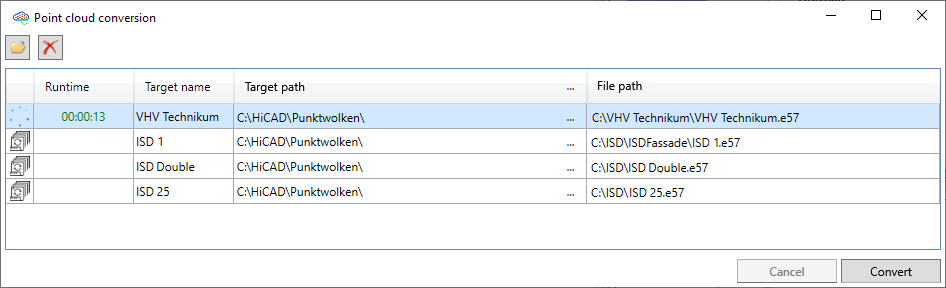
After the conversion you will find the point cloud file *.LSPROJ in directory N (Filegrup.DAT).

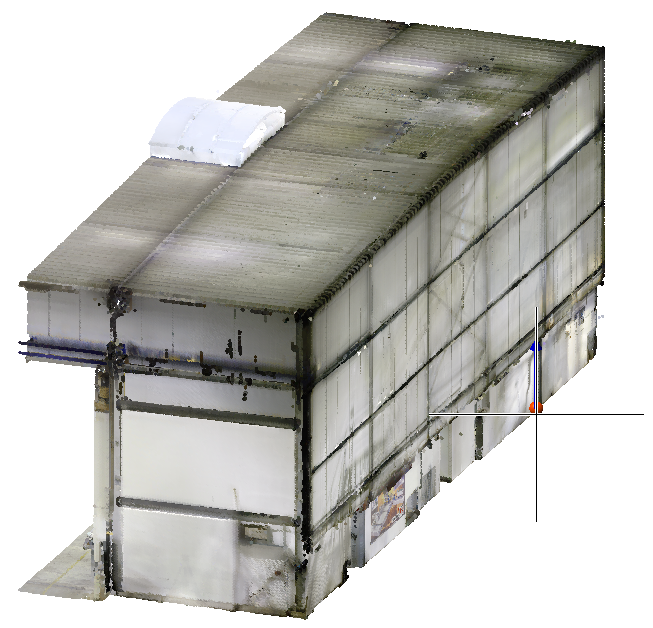
- Use the Insert point cloud
 to load the *.LSPROJ file into your HiCAD model drawing.
Right-click to apply the coordinate system of the point cloud.
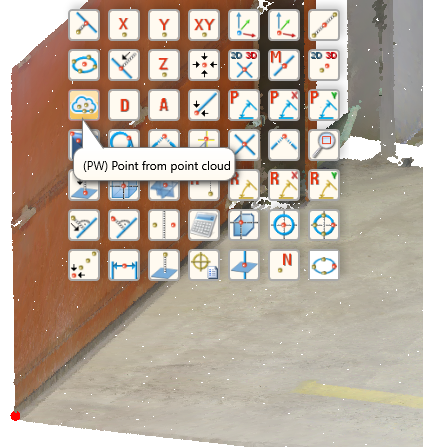
To determine the point cloud points, HiCAD automatically activates the point option (PW) Point from point cloud  .
.
- The second point cloud point determines the X-direction of the Part CS.
Here, too, right-click to apply the X-axis of the point cloud.
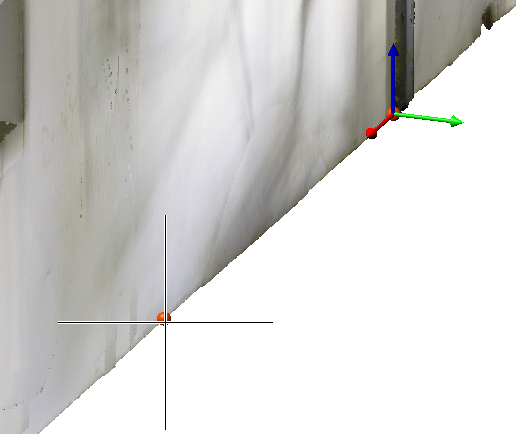
After determining the points the point cloud is rotated in such a way that the Part CS coincides with the World CS.
- Save the drawing.
Retracing of walls and floors for the later fitting of the plant
When inserting a point cloud, a clipping box is automatically created that completely encloses the point cloud. This box can be scaled, moved and rotated using the Edit clipping box  function. To have a clear view on the ground, first create a subtraction that surrounds the machines.
- Select the Subtract
 function, click in the center of the machines and draw a box.
 - Activate the green arrow on the side for the Y-direction by clicking on it and then move the cursor until the plant is no longer visible in the positive Y-direction.
- Proceed in the same way with the other directions.
- Apply the subtraction by pressing the middle mouse button.
- On the Point Cloud Ribbon, select Edit clipping box .
- Activate the upper blue arrow for the Z-direction by clicking and then move the cursor in the opposite direction until only the floor of the hall is visible.
- Apply the editing by pressing the middle mouse button.
Use the Sketch functions to redraw the floor.
- Create a Sketch
 and select the plane using the point option (PW) Point from point cloud .
- Then draw the floor, e.g. with the Sketch polyline
 function.
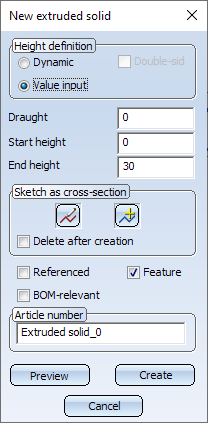
 - Now select the Extruded solid
 function, then identify the sketch and enter, for example, 30 for the thickness of the base plate for the floor.
- Select the point cloud in the ICN and then the Delete subtractions
 function.
 - Activate the subtraction with the right mouse button and select the middle mouse button to execute it.
- Now select the function Edit clipping box .
- Activate the upper blue arrow for the Z-direction by clicking and then move the cursor in the direction of the arrow until the hall is visible. Then drop it with a left-click. Select the X-direction and move the arrow until the outer wall can be traced.
- Apply the editing by pressing the middle mouse button.
Now retrace the wall:
- Create a Sketch and select the plane using the point option (PW) Point from point cloud point option.
- Then use the Sketch polyline function to redraw the wall.
- Now select the Extruded solid function, then identify the sketch and enter, for example, 300 for the wall thickness.
- Proceed likewise for the other walls.
With the help of the point cloud, you can quickly transfer the dimensions of a hall into your drawing.
Also note the functions for creating processing planes and the notes on the Z-direction.
