Point cloud > Proc. pl. > From PtCloud 
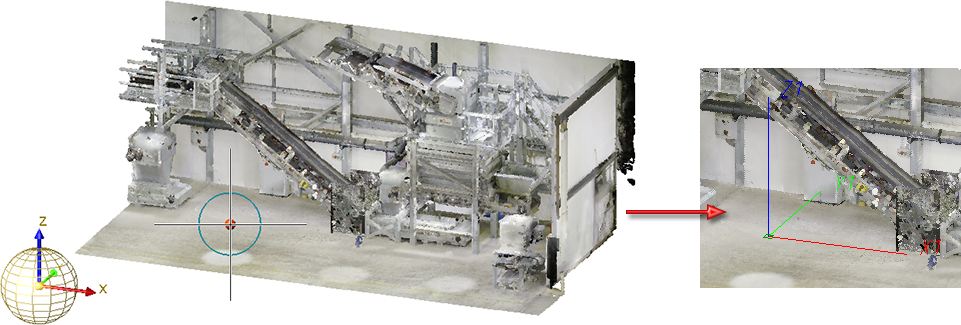
This function allows you to place a processing plane directly in a point cloud. This simplifies design and machining in the spatial view, for example, if a new building is to be fitted into an environment or a plant is to be installed in a room.
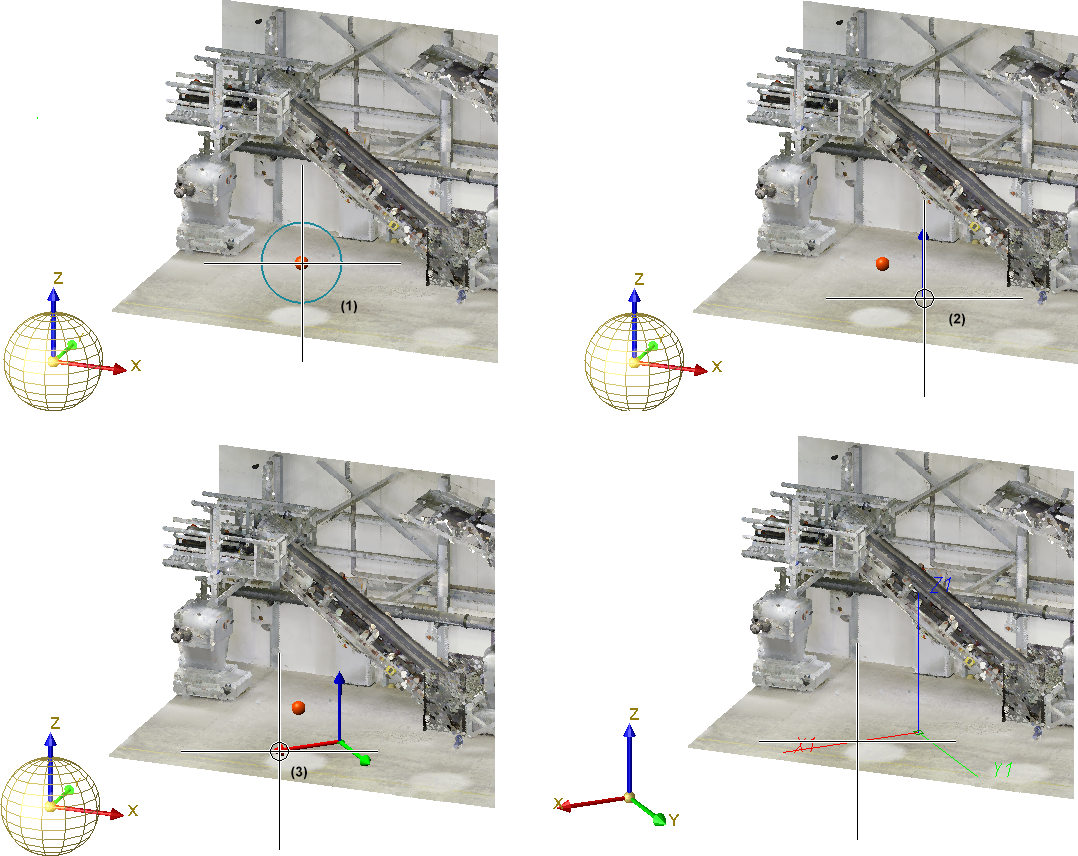
To define a processing plane, move the cursor to the desired position in the point cloud. HiCAD symbolizes the area around the current cursor position by a circle. By clicking with the mouse, the marked area is used to define the processing plane. Proceed as follows:
-
If the plane is more vertical, then the X-axis is chosen so that it is perpendicular to the Z-axis of the world coordinate system. The Y-axis is chosen so that it forms a positive scalar product with the Z-axis of the world coordinate system, i.e. the angle is between 0° and 90°.
- If the plane is more horizontal, then the X- and Y-direction of the world coordinate system are adopted as far as possible. taken over.

Click  to open a pull-down menu with the function Plane from point cloud, with X-axis
  . Here you define the plane by two additional points - the origin and a point on the X-axis.
|
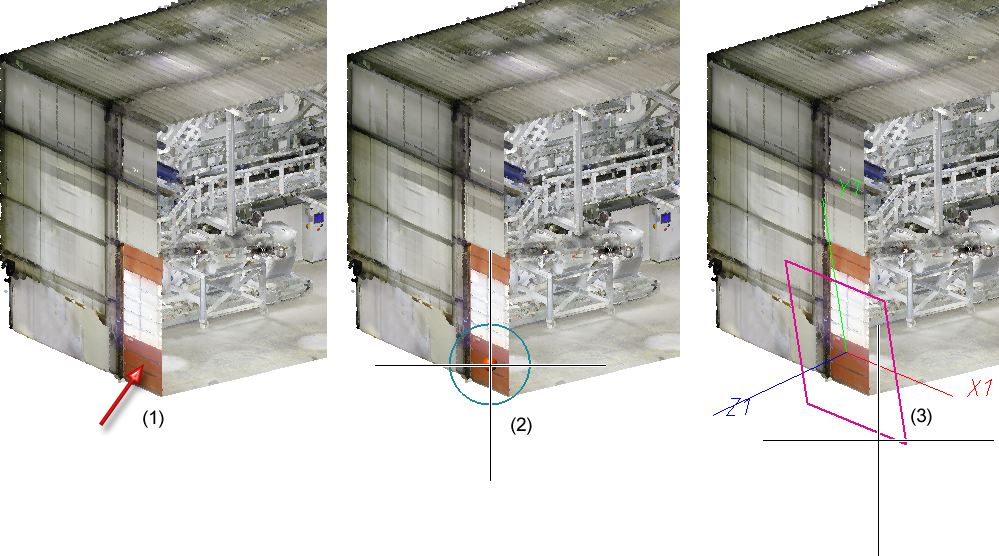
When determining the processing plane, you should make sure that the circle around the click point contains only points of the desired processing plane, otherwise undesired results may occur. Let us take a look at the following example: A processing plane is to be placed in the marked area of the outer wall (1), for example to draw a sketch in this plane. If the click point were to be determined as shown (2), the circle around the click point would also contain points that lie outside the desired plane, for example points on the hall floor. The resulting processing plane (3) does not give the desired result:
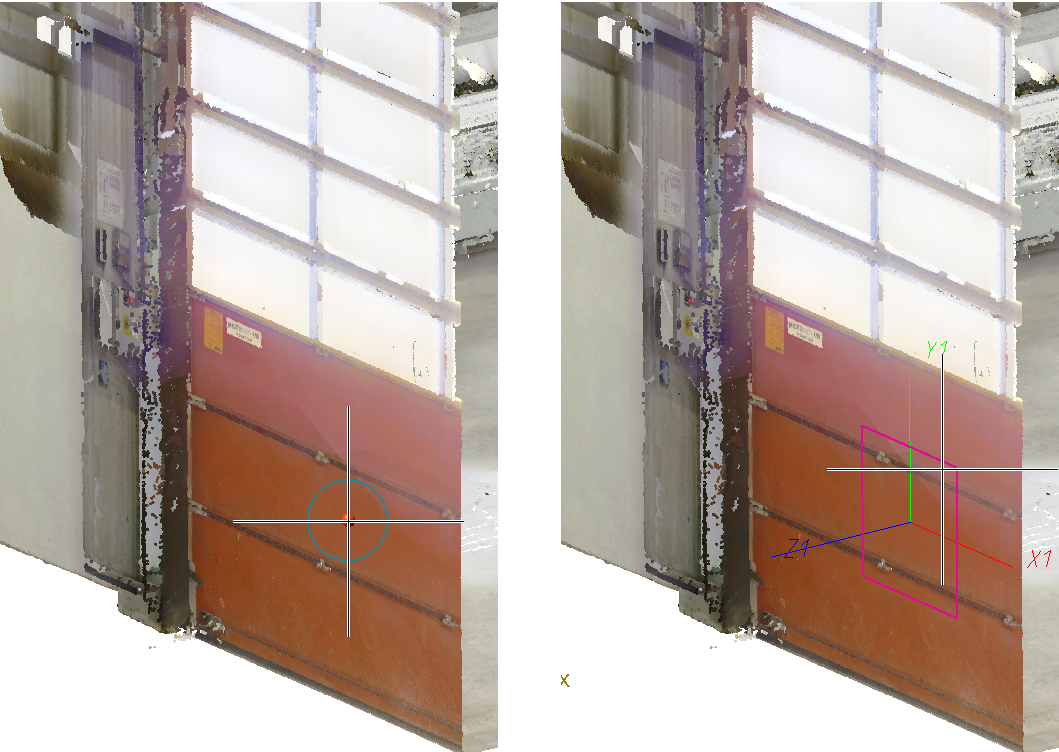
If, on the other hand, you zoom - as shown below - before determining the click point, you will achieve the desired result:
|
![]() Please note:
Please note:
The function can also be accessed via the context menu for point clouds.


Procedure • Point Cloud Functions • Working with Point Clouds - An Example