
Project: HiCAD Point Cloud
Both when creating and editing clipping boxes, the autopilot now displays snap points. This allows you to set the edges of clipping boxes to exactly one point. You can also use the options of the Point Options menu to set the clipping box edges, especially the (PW) Point from point cloud point option.
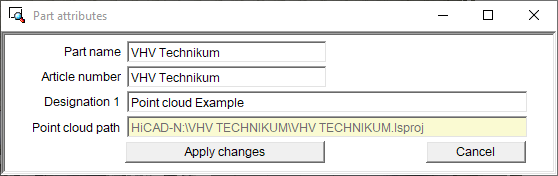
The Part attributes dialogue window for point clouds has been optimized.
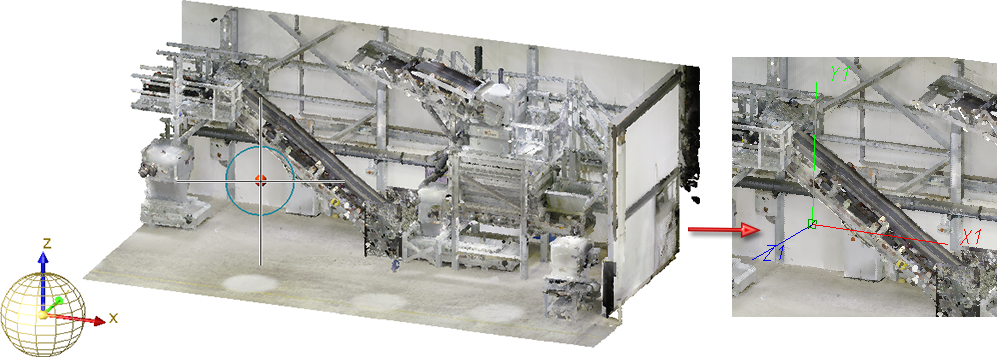
New in the Point cloud Ribbon tab is the function Align point cloud ![]() . This function allows you to change the alignment selected when inserting a point cloud into the model drawing.
. This function allows you to change the alignment selected when inserting a point cloud into the model drawing.
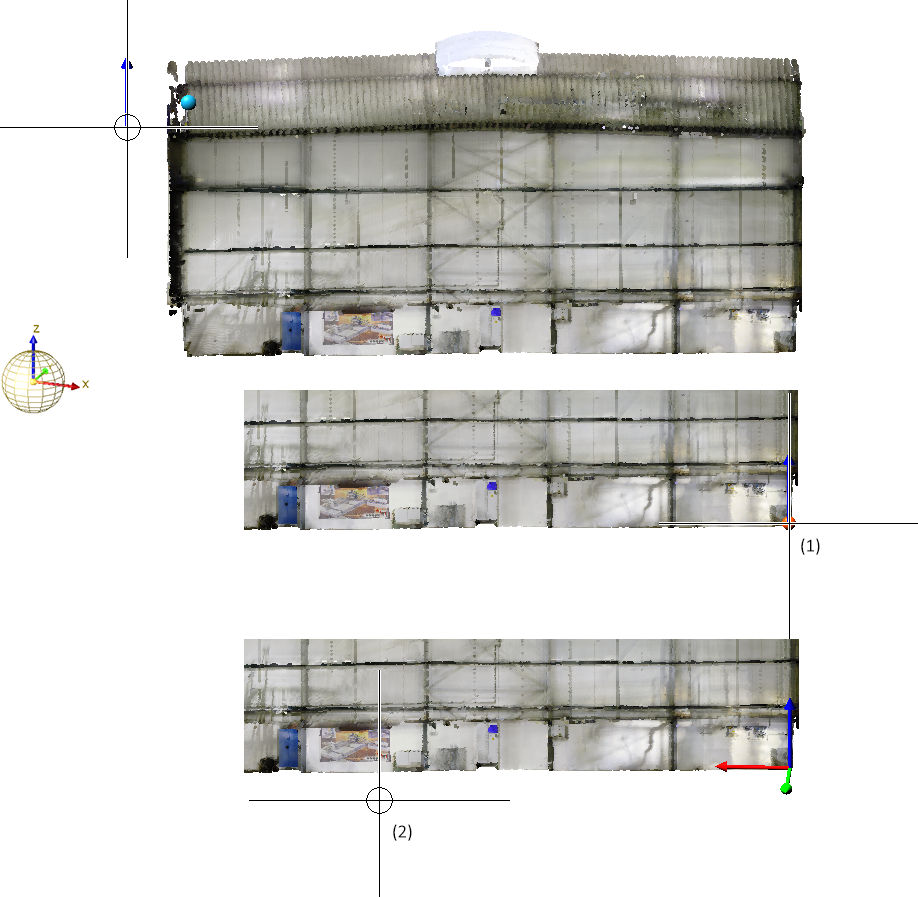
The alignment is changed by defining two points.
The determination of the two points and the installation direction are graphically visualized in the drawing. To determine the points, you can also use the point option Point cloud point (PW) (not automatically active). Point cloud points always lie on the visible part of the point cloud and are represented by a red point on the cursor.
Result:
Tip:
The Point cloud point (PW) point option is not automatically active when determining the points required to perform this function. In certain situations, it may therefore be useful to determine isolated points before alignment in order to better select the origin and X-direction of the point cloud. Isolated points can also be point cloud points.
New on the Point Cloud Ribbon tab is the Update point cloud references function.

This function allows point cloud references to be updated, for example to replace point clouds imported into a model drawing with other point clouds or to change the path where the point cloud was stored.
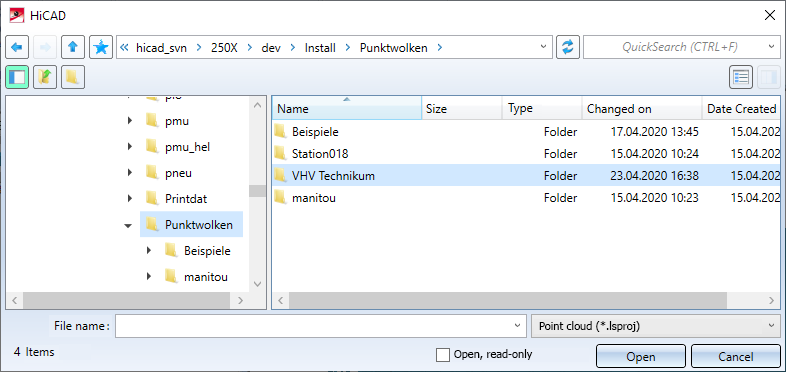
Select the new point cloud or point cloud path in the dialogue window and click Open.
The point cloud will be replaced or the point cloud reference will be updated.
HiCAD model drawings or parts with point clouds do not contain the point cloud data but only a reference to the corresponding project point cloud, i.e. to the path in which the point cloud is located during import. If you transfer files with point clouds to a third party, i.e. to another HiCAD workstation, then you must also pass on the folder with the project point cloud in addition to the SZA or KRA file. At the same time, it had to be ensured that this folder also existed on the "new workstation". From HiCAD 2020 SP1 on, the updating of point cloud references when opening a corresponding SZA or KRA file has been improved.
An example:
The directory C:\HiCAD\Point clouds is set as drive N. The point cloud file VHV Technikum.lsproj is located in the folder C:\HiCAD\Punktwolken\Examples\User\VHVTechnikum The model drawing with the point cloud is saved.
The model drawing is then opened on a computer on which the same directory is set for drive N. The point cloud file VHV Technikum.lsproj is located there in the folder C:\HiCAD\Punktwolken\VHVTechnikum.
-> The point cloud is found.
If HiCAD does not find a point cloud contained in a model drawing when loading it, the Update point cloud references dialogue window is automatically displayed. If you move the cursor over the  symbol, further information will be displayed.
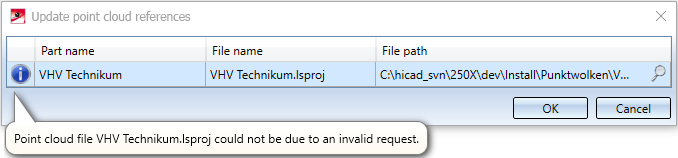
After clicking on the magnifying glass symbol and selecting the desired path / file, close the dialogue window with OK.
The point cloud reference will be updated and the point cloud will be exchanged if necessary.
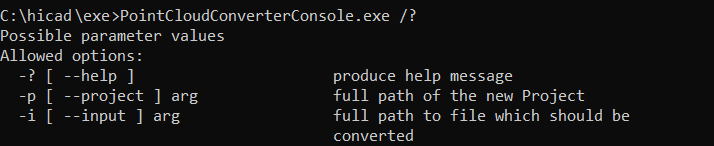
When calling the Point Cloud Converter (PointCloudConverterConsole.exe) from the command line, the parameter for colour/intensity of point clouds is no longer available
The import of E57 files uses the colour by default.
When creating and editing clipping boxes, if you point the cursor at a directional arrow, the corresponding area will now be marked and you can reduce or enlarge the box by dynamically dragging the area in the selected direction.
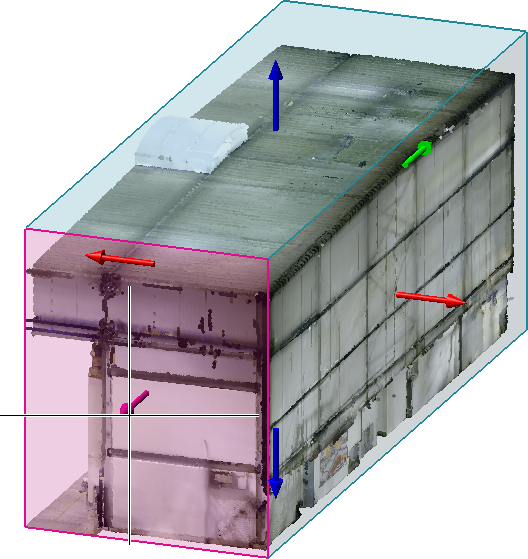
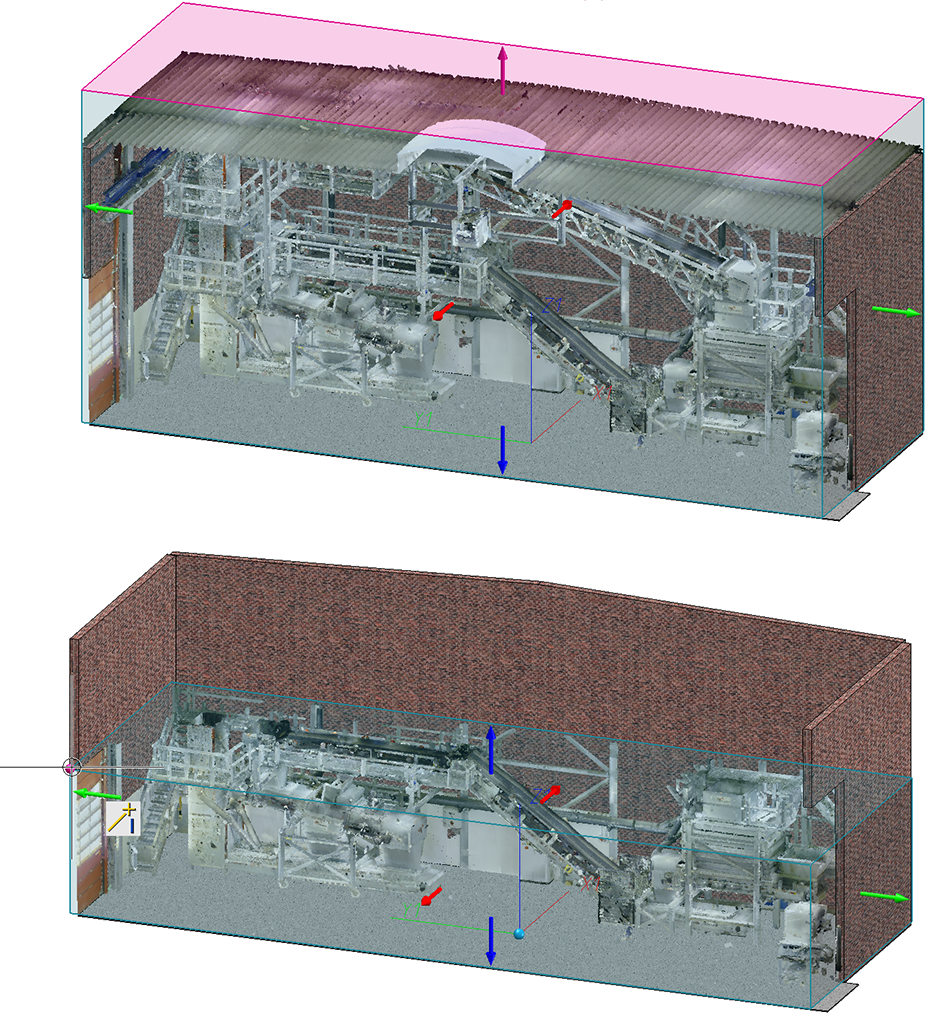
To align the point cloud in the construction, HiCAD now requests the determination of two point cloud points after importing a point cloud. These are always located on the visible part of the scanned object. These points, together with the Z-direction of the point cloud, define the part coordinate system. To determine the point cloud points, HiCAD automatically activates the point option (PW) Point from point cloud.
The determination of the two points and the installation direction are graphically visualized in the model drawing. Point cloud points are represented by a red point.
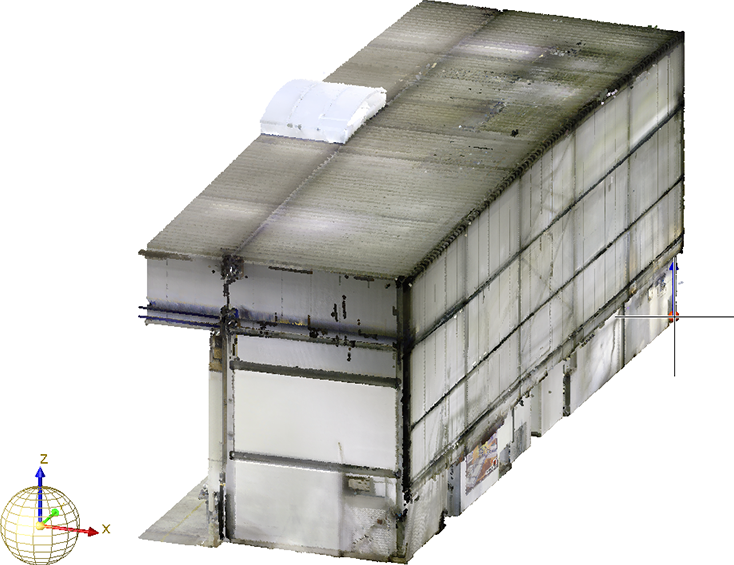
Determining of first point (Image: VHV Anlagenbau GmbH, Hörstel)
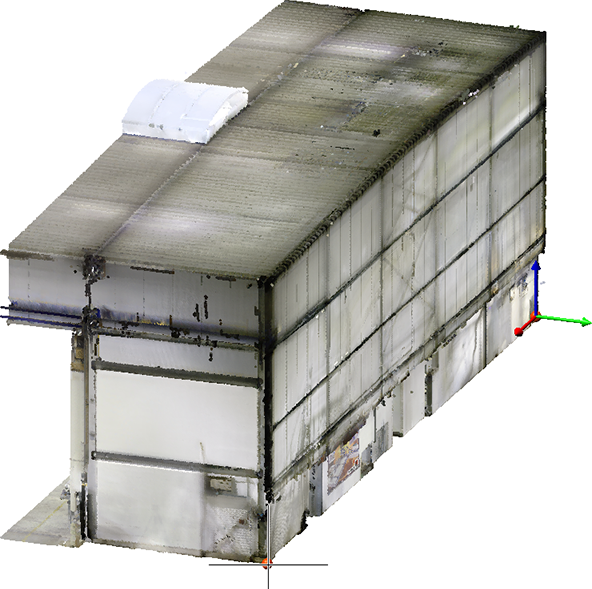
Determining of second point and visualisation of fitting direction (Image: VHV Anlagenbau GmbH, Hörstel)
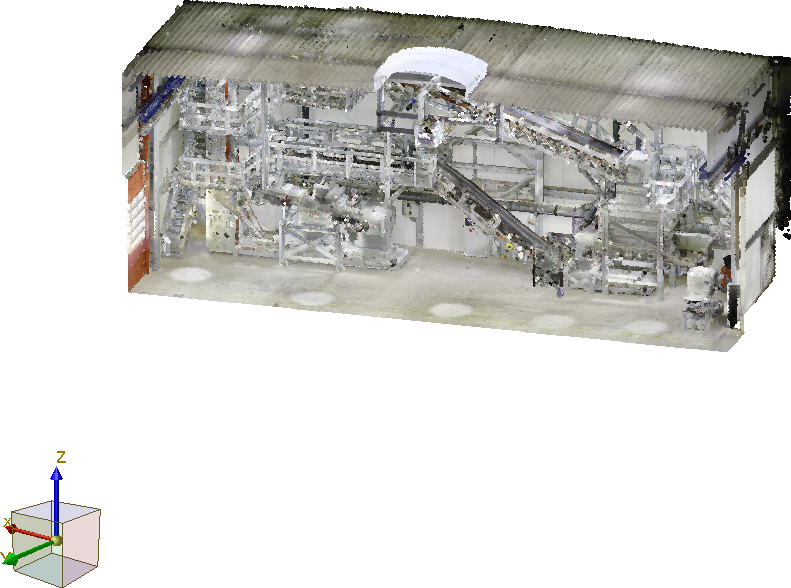
After determining the points, the point cloud is rotated so that the Part CS coincides with the World CS.
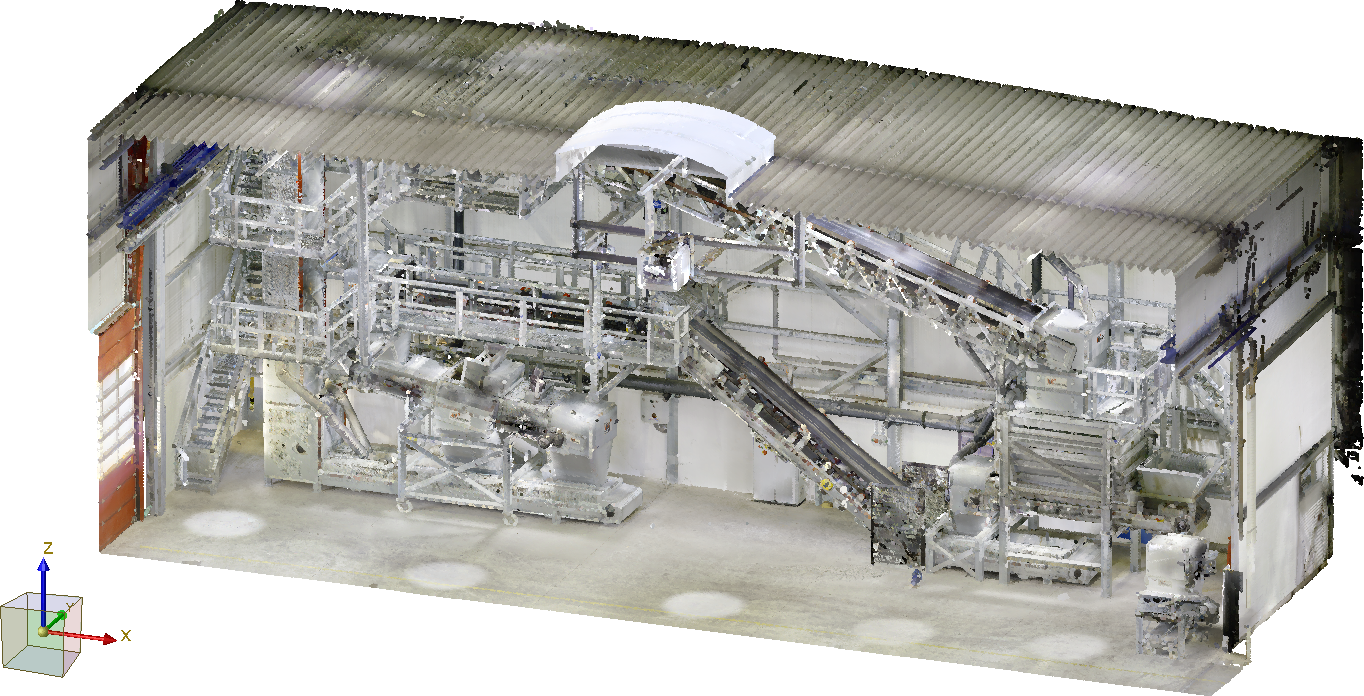
Example of a point cloud imported to HiCAD with Part CS (Image: VHV Anlagenbau GmbH, Hörstel)
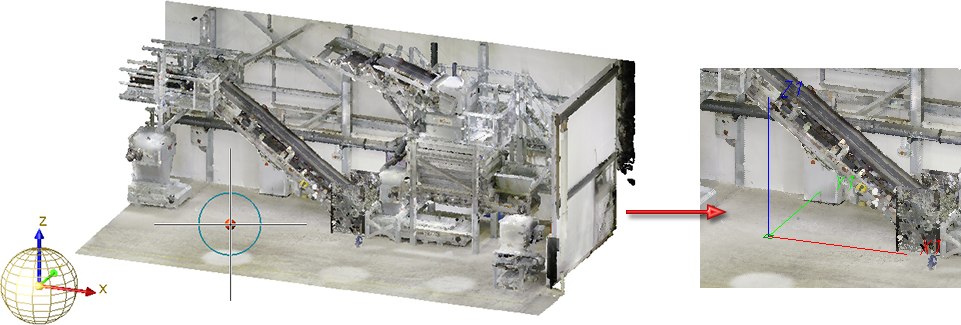
The new Select plane from point cloud  function allows you to place a processing plane directly in a point cloud. This simplifies design and machining in the spatial view, for example, if a new building is to be fitted into an environment or a plant is to be installed in a room.
To define a processing plane, move the cursor to the desired position in the point cloud. HiCAD symbolizes the area around the current cursor position by a circle. By clicking with the mouse, the marked area is used to define the processing plane. Proceed as follows:
If the plane is more vertical, then the X-axis is chosen so that it is perpendicular to the Z-axis of the world coordinate system. The Y-axis is chosen so that it forms a positive scalar product with the Z-axis of the world coordinate system, i.e. the angle is between 0° and 90°.
Please note:
When determining the processing plane you should make sure that the circle around the click point contains only points of the desired processing plane. To avoid unwanted results, it may be useful to zoom in before determining the click point. You can also use the mouse wheel while the circle is displayed.
Click  to open a pull-down menu with the function Plane from point cloud, with X-axis
  . Here you define the plane by two additional points - the origin and a point on the X-axis.

Element Installation • Railing Variants
|
© Copyright 1994-2020, ISD Software und Systeme GmbH |
Data protection • Terms and Conditions • Cookies • Contact • Legal notes and Disclaimer