Now we will generate the assembly drawings and detail drawings for the entire model drawing. This is the ISD default setting. Therefore, the generation of the drawings can take place automatically.
- Choose Management+BIM > Workshop > Drawing
 . In the selection window below, all parts (articles) for which no drawings exist yet will be listed, that is, all parts with the link Without drawing.
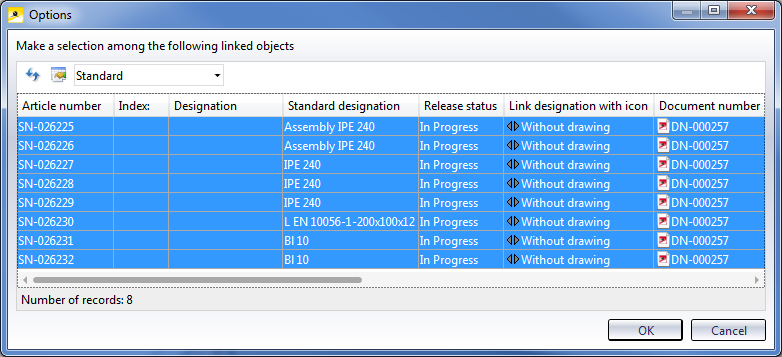
Mark all items "Without drawing" and click OK..
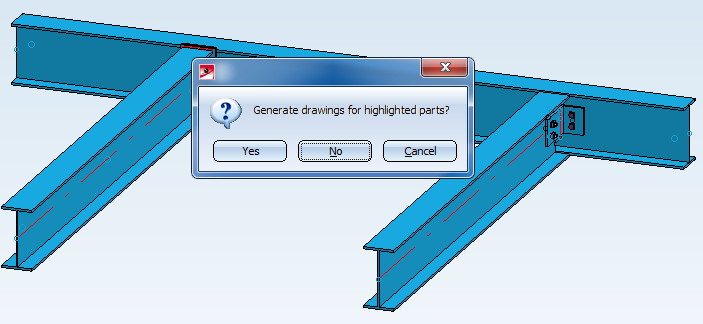
- The corresponding parts will be highlighted and you will be asked whether you want to generate the drawings for these parts. Confirm with Yes.
HiCAD starts the generation of the drawings -- first for the assemblies, then, automatically, for the main parts and sub-parts.
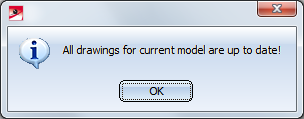
- When you now choose Management+BIM > Workshop > Drawing again, the following message will be displayed:
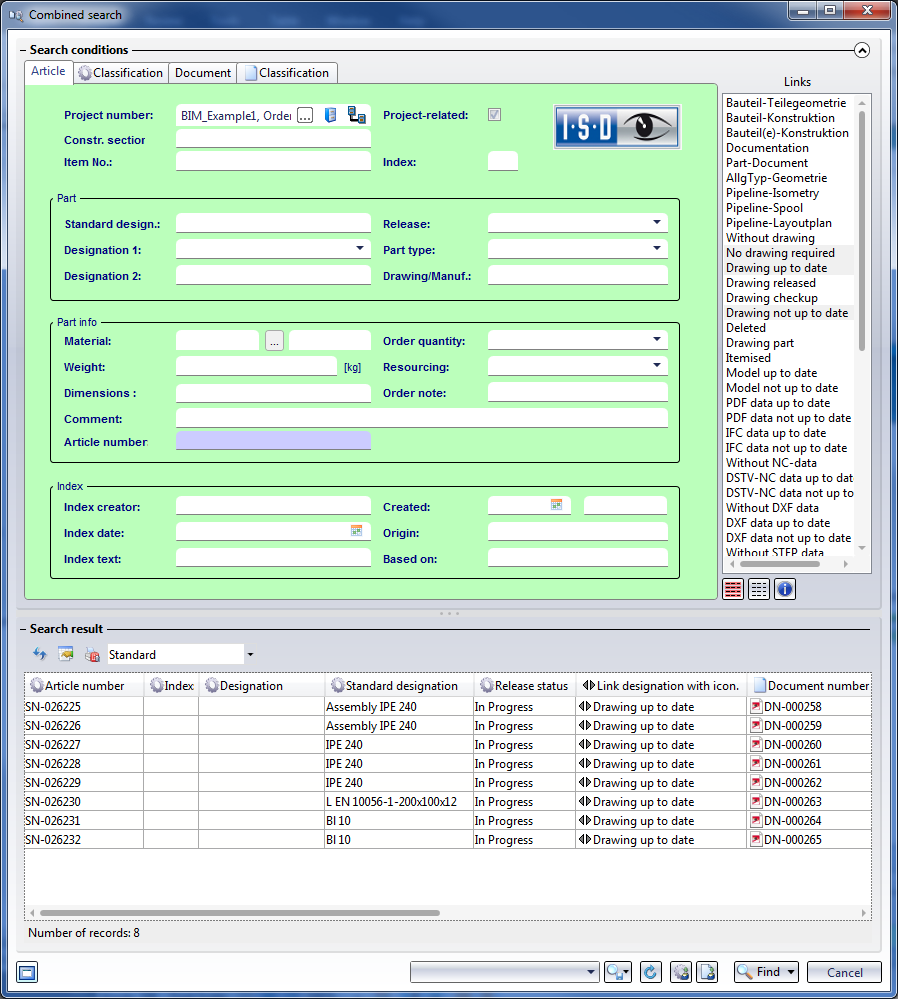
In the HELiOS Desktop you can also see that all drawings are up to date, e.g. via the Combined search function:
In the workshop/detail drawings, the title blocks contain an "in progress" note. In the ICN you can see (while the workshop/detail drawing is open) that the parts in the drawing are referenced. Referenced parts are marked with the  symbol. The referencing here is an "unilateral" referencing, which means that the workshop/detail drawing can be automatically updated when changes have been applied to the model drawing. The parts in the workshop/detail drawings, in contrast, cannot be changed.

Please also note:
In this example the option Main parts and sub-parts, if detail drws created for them has been set for the parameter Condition for 'Drawing is up to date' in the Configuration Editor (default). Therefore, the drawings for the assemblies and the main/sub-parts must be generated separately! The automatic drawing derivation in our example does this automatically.
In contrast, if you create the drawing manually using the function Management+BIM > Workshop > Drawing  > Manual
 , you need to keep this in mind. In the settings for drawing derivation you must first choose the assemblies beneath View groups to be created for::
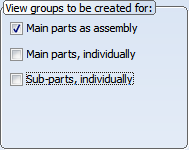
When you confirm with OK, HiCAD will create the assembly drawings. After this, the dialogue windows for the drawing derivation settings will be shown again. Now, choose the main parts and sub-parts beneath View groups to be created for::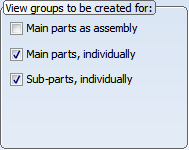
When you confirm with OK, HiCAD will create the detail drawings for main parts and sub-parts.
 Step 4: Derive Mounting Drawing
 Step 2: Itemise and Save Model Drawing


Requirements for a Smooth Operation (ManBIM) • Pre-planning of the Construction Process (ManBIM) • Overview of functions (ManBIM)