Attribute Assignments: Export from HELiOS
At the bottom of the HELiOS-Options dialogue window you can find the Export from HELiOS... button beneath Attribute assignment.
Clicking on this button opens the configuration dialogue for the attribute assignment during the export of HELiOS data to the CAD system (e.g. for the filling in of title blocks):
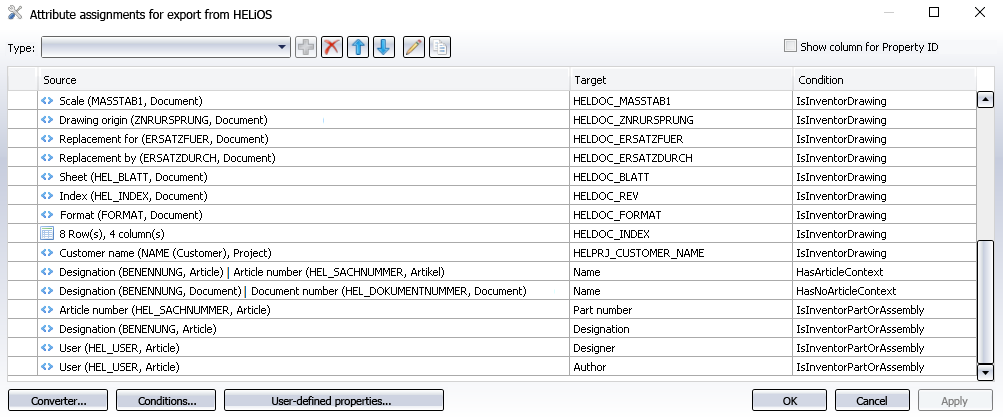
By default, some assignments have already been made available there.
In the Source column you can see the master data attribute of the HELiOS database, to which a CAD attribute is assigned in the Target column.
The type of the assignment is indicated by a symbol in the Source column:
-
 Index table (via index tables, attributes can be written to iProperties, which will then also be visible in title blocks of drawings; the displayed name in SOLIDWORKS etc.)
 -
 Model property (Properties such as Weight, Volume etc.)
If the assignment is linked to a particular Condition that needs to be fulfilled in order that a synchronization of HELiOS attribute and CAD attribute can take place, this condition will be shown in the same-named column.
Use the Show column for Property ID checkbox to show or hide the exact Property ID of the target attribute in a same-named result list column.
If errors occur during attribute synchronization, e.g. because an attribute has been deleted or renamed by mistake and can therefore not be found, this will be indicated in the corresponding field of the result list by a  symbol.

Add, edit, copy, delete attribute assignments
If you want to add an attribute assignment via , you first need to make a selection in the Type pull-down menu: Index table or Model property (s.a.).
Clicking on removes a marked attribute assignment.
To edit a existing row, double-click the row, or mark the row with a single click and then click on (Edit attribute assignment). A dialogue window with the details of the assignment will be displayed, enabling to edit them:
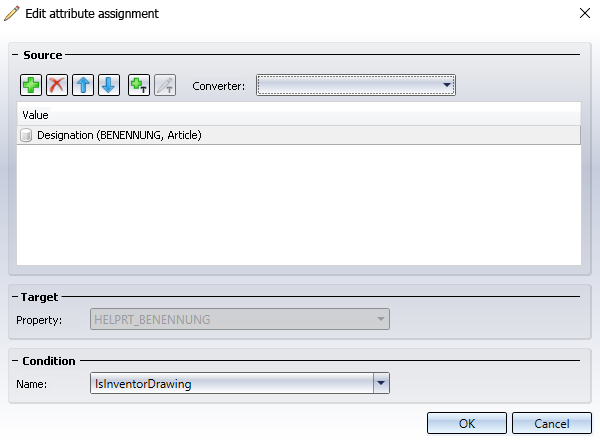
Make the required modifications and close the window with OK.
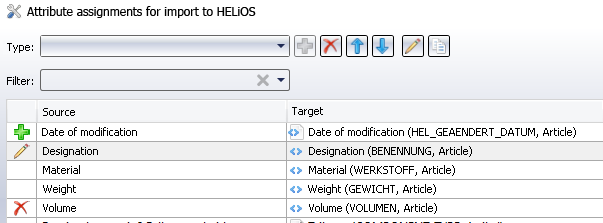
Recently edited attribute assignments are marked in the overview with a  symbol, added new attribute assignments with a
  symbol and deleted attribute assignments with a
  symbol.
![]() Please note:
Please note:
Changes will only take effect after clicking on Apply in the Attributes assignments window or closing it with OK. If you close the dialogue window with Cancel, rows that were previously removed from the result list will reappear when you call the function again.
Use the arrow buttons 
 at the top of the window to move a marked row up or down in the list.
Click on  Copy attribute assignment to take over the properties of the currently marked attribute assignment, in order to apply changes to it and save it as another one. A dialogue will be displayed, enabling you to apply the desired changes. This can help you save time, e.g. if you want to add a variation of an existing mapping between CAD and HELiOS attributes under different Conditions.
![]() Please note:
Please note:
A copied attribute assignment cannot be saved twice in unmodified state; it must always be unique.
Converter, Conditions and User-defined properties
A click on Converter... at the bottom of the window opens a dialogue window that allows you to specify conversion properties for the data types Text (String), Floating point (Float), Integer (Integer) and Bool (Boolean).
The Conditions... button calls the Helios.TransferConditions.xml file in the Notepad, where you can view and, if required, edit the conditions for the transfer.
Click on the User-defined properties... button to add or delete further properties in a dialogue window.
