Combined Search
Find > Combined search > Documents and Articles 
To call the function for a combined search for documents and articles, select (Find > Combined search > Documents and Articles .
The function refers to Articles, Documents and their links.
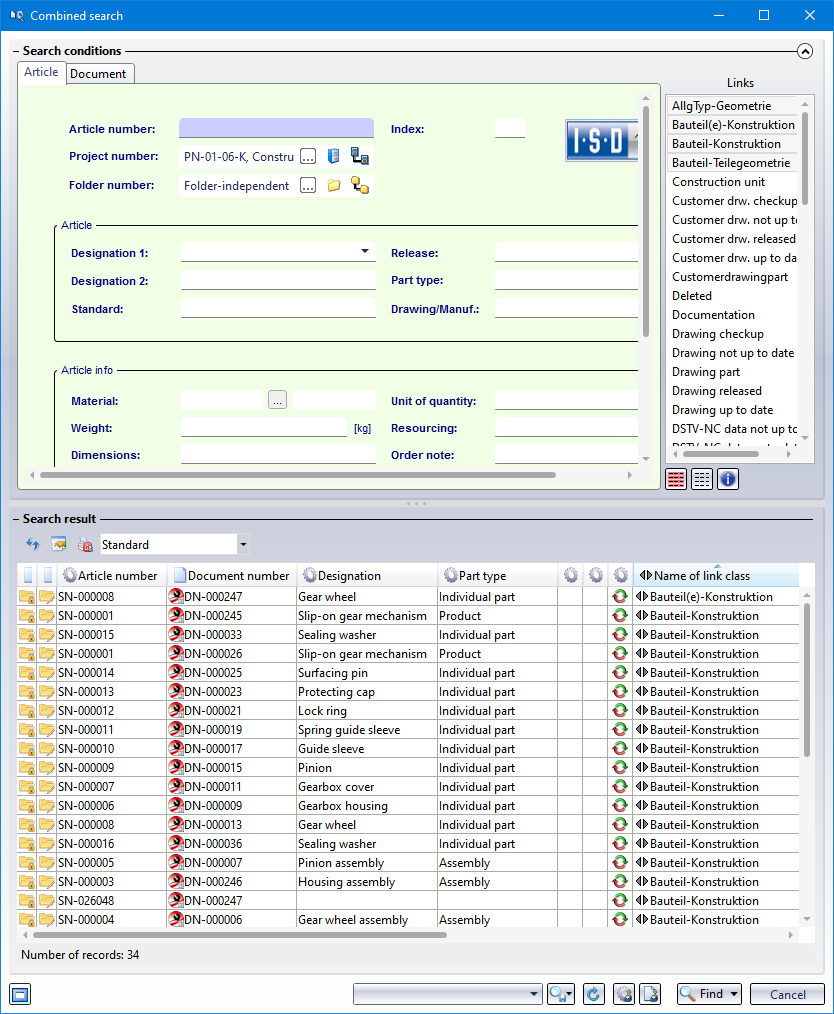
In the tabs of the search masks you can enter different criteria for Document or Article search.

Links
First, one (or several) of the Links must be selected to start the search.
In the right-hand area of the screen, under Links, there is a list of existing link conditions:
-
A simple click on one of the links will cause only one link to be selected. With CTRL + left-click you can select further links or, with CTRL+A, selects all links. In addition, a multiple selection can be made by holding down the shift key.
-
Click
 to mark all links, and click
  to unmark all links.
 -
Click
 Show information on all links to display an overview of all links, containing information such as Source class, Target class, Description and Link type will be displayed.

-
If you do not select a link, all objects with the entered search conditions that are not linked to any other object are displayed. For example, documents of items that have been deleted in the meantime can be listed in combination with other attribute-related search criteria. For example, to link, move or delete such items.
You can also search for items without drawings, for example, in order to determine whether drawings have been created for all parts in an assembly or whether parts have been overlooked.
-
If you are working with HELiOS Desktop in conjunction with HiCAD and the Steel Engineering Drawing Management, there are specific link types that can be filtered in search queries.
Search
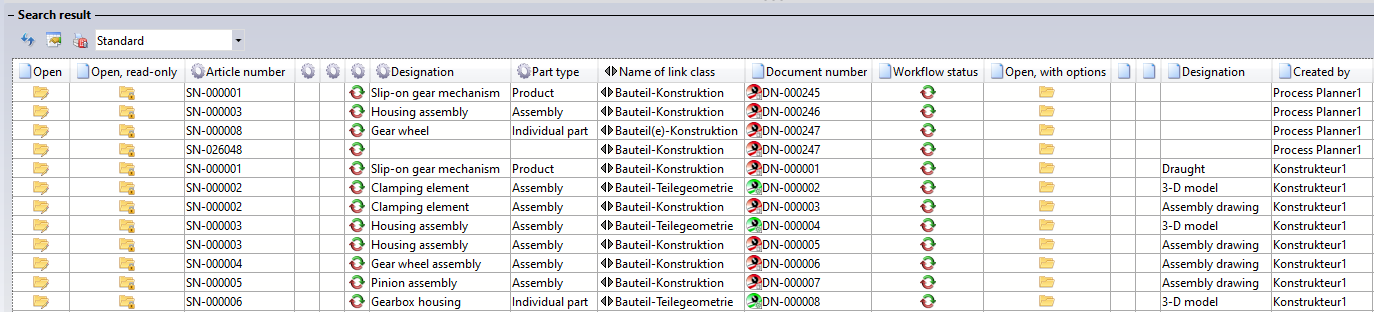
The  Find button at the bottom right of the window starts a combined article/document search. In the result list, linked articles and documents are listed with Article number, Document number, respective Designation and Name of link class.
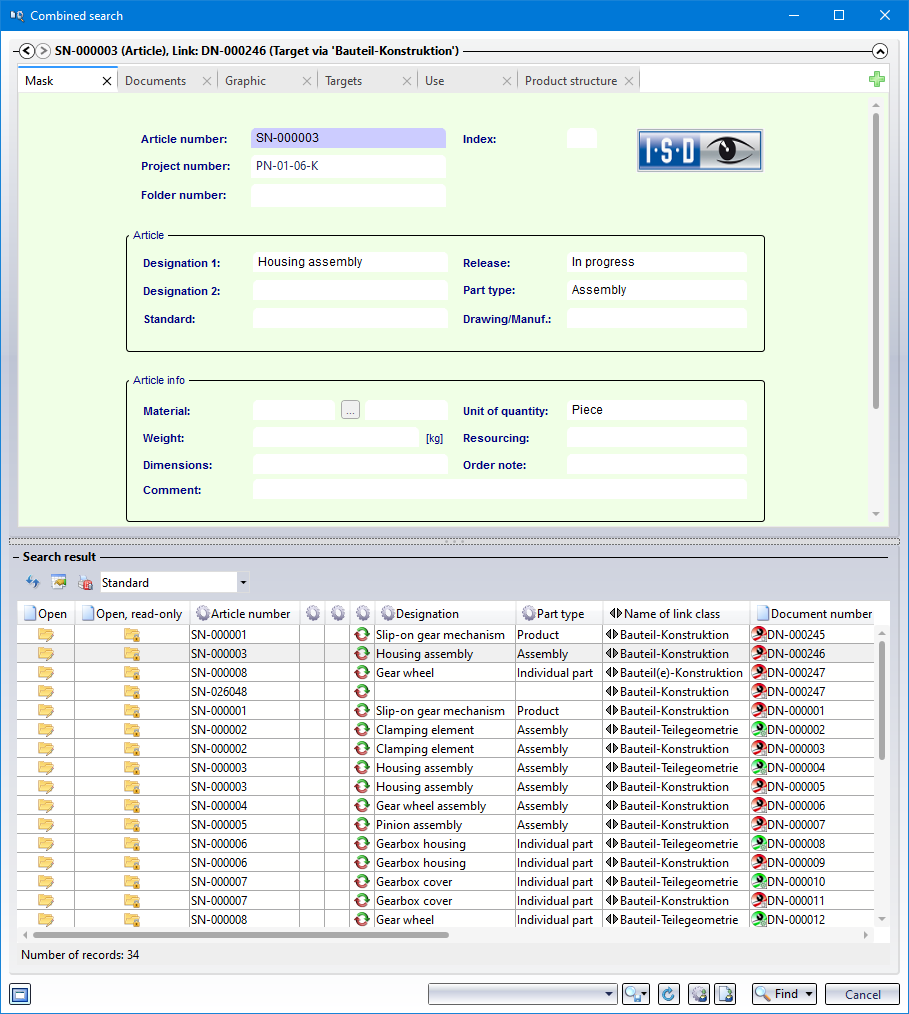
If you click on an article or document in the result list, the master data is displayed; if you right-click, the corresponding file or article context menu appears. If an item or document is marked in the result list (by clicking on it), you can use the arrow keys at the top of the window to switch between the search conditions and the detail window of the marked object.

By default, the master data defined in the standard result list configuration is displayed in result lists. Of course, you can also change the current display by clicking on the  Adjust result list icon, or use other result list templates if you have previously created any.
If the sub-project setting in the search mask is deactivated (set  to
to  Show content related to selected project) and the Project number (e.g. in the Project Explorer) is set to
  Project-independent only files that are not assigned to a project are searched for. If Project-independent and Show content related to selected project and its sub-projects are set, all objects are displayed regardless of the current project assignment.
If a search is made in a specific project (via the Project number) while the sub-project setting is inactive, only files located in this project are displayed, and none from its sub-projects.
The behaviour with regard to folders is identical.
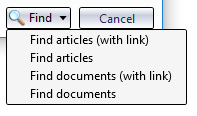
If you click on the arrow symbol on the Find button, a pull-down menu with further filter options opens:
|
Find articles (with link) |
The search result is restricted to items that match the specified search conditions and the selected link(s).. |
|
Find articles |
The search result is restricted to items that match the specified search conditions. Links are not taken into account. |
|
Find documents (with link) |
The search result is restricted to documents that match the specified search conditions and the selected link(s). |
|
Find documents |
The search result is restricted to documents that match the specified search conditions. Links are not taken into account. |
At the bottom of the window you can find the following options:
-
 Display new contents in this window.... This window has a content focus. /
  Do not display new contents in this window. If no window with content focus is open, a new window will be opened.
 - Use the
 Save search template option to save the current search settings. If the current template already exists, it will be saved immediately, otherwise, the input field for the template name will be displayed. If you select Save search template as... the current search settings will always be saved as new templates, i.e. requiring the input of a new name. If you select Save global search template as... (Administrator rights required!) , you can create a search template which will also be available to other users. All available search templates can be chosen from the pull-down menu next to the symbol.
 - When working with search templates please also note the following: Search templates saved in the window of the Combined search window refer to the complete Combined Search, which means that besides specific options of the Combined Search (e.g. the Links), the current search options on the other tabs will be saved to the search template as well, and not just those of the currently visible tab (e.g. when saving the search template in the Document tab, the current options in the Article tab will also be saved). These templates will then be exclusively available to the Combined Search. General search templates of articles or objects can also be used in the Combined search.
- Select
 Reset to clear all input fields of the search mask.
![]() Please note:
Please note:
-
The default tab opened when calling up is Article. If another tab is desired, this can be set in the Registry (HKEY_CURRENT_USER/Software/ISD Software und Systeme/HELiOS Desktop > CombiSearchDefaultTab).
- Deleting an object (by selecting it and pressing the Del key) in a result list area of the Combined Search behaves like deleting a multiple selection. Deleting an object (e.g. the item in the component search tab) causes the entire combination to be deleted, i.e. the document linked to the item is also deleted.
- You can also execute the search while making entries in the mask with the keyboard by pressing the F3 key.
- The additional Classification tabs (for Articles and Documents respectively) can be activated on the General tab of the HELiOS Options dialogue window: Under Find, activate the Show classification tab... checkbox (by default the tabs are hidden). This allows you to search specifically for Articles and Documents of a certain class (sub-classes are not taken into account). If you want to search in a class with its sub-classes, go to the Classification window by clicking on
 Article classification or
  Document classification at the bottom of the search dialogue. Select a class there and click OK to close the window and start the search.
