
Project: HiCAD Element installation
Civil Engineering functions > Element installation > Element installation
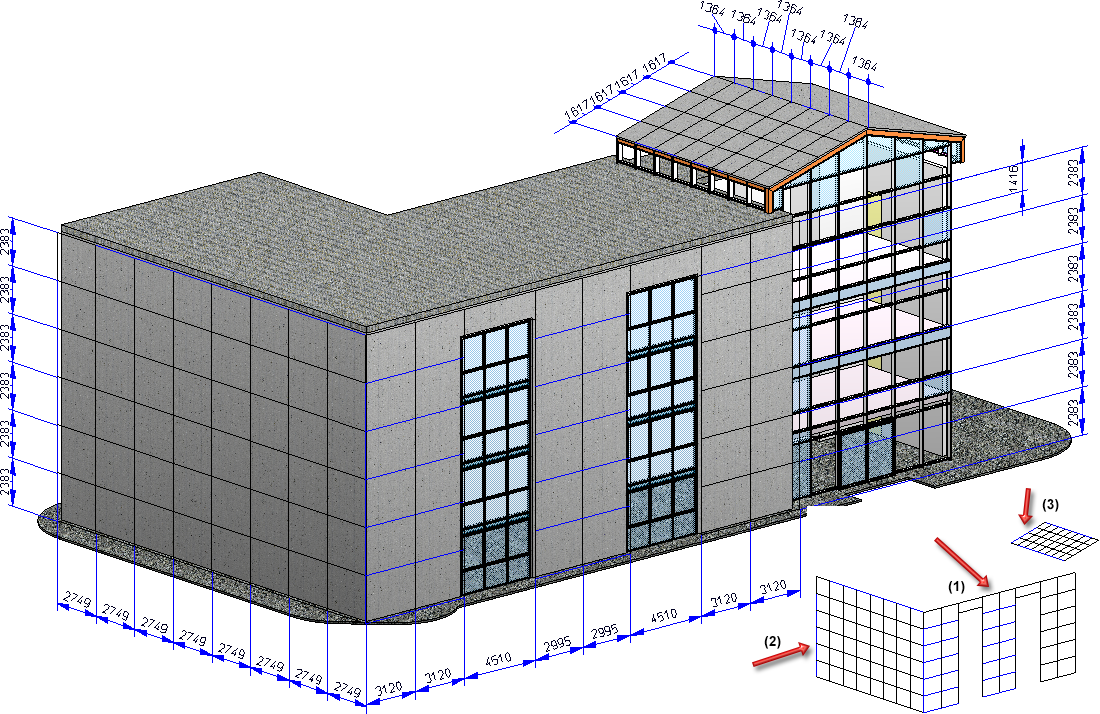
In the present example, elements are to be placed onto a facade as follows:
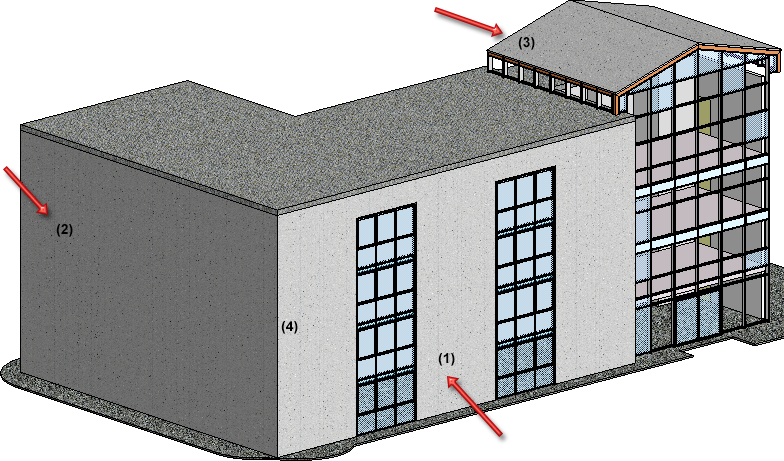
For this purpose, appropriate sketches have been created for
The sketches (1) and (2) converge at the corner edge (4).
Step 1: Installing the corner elements
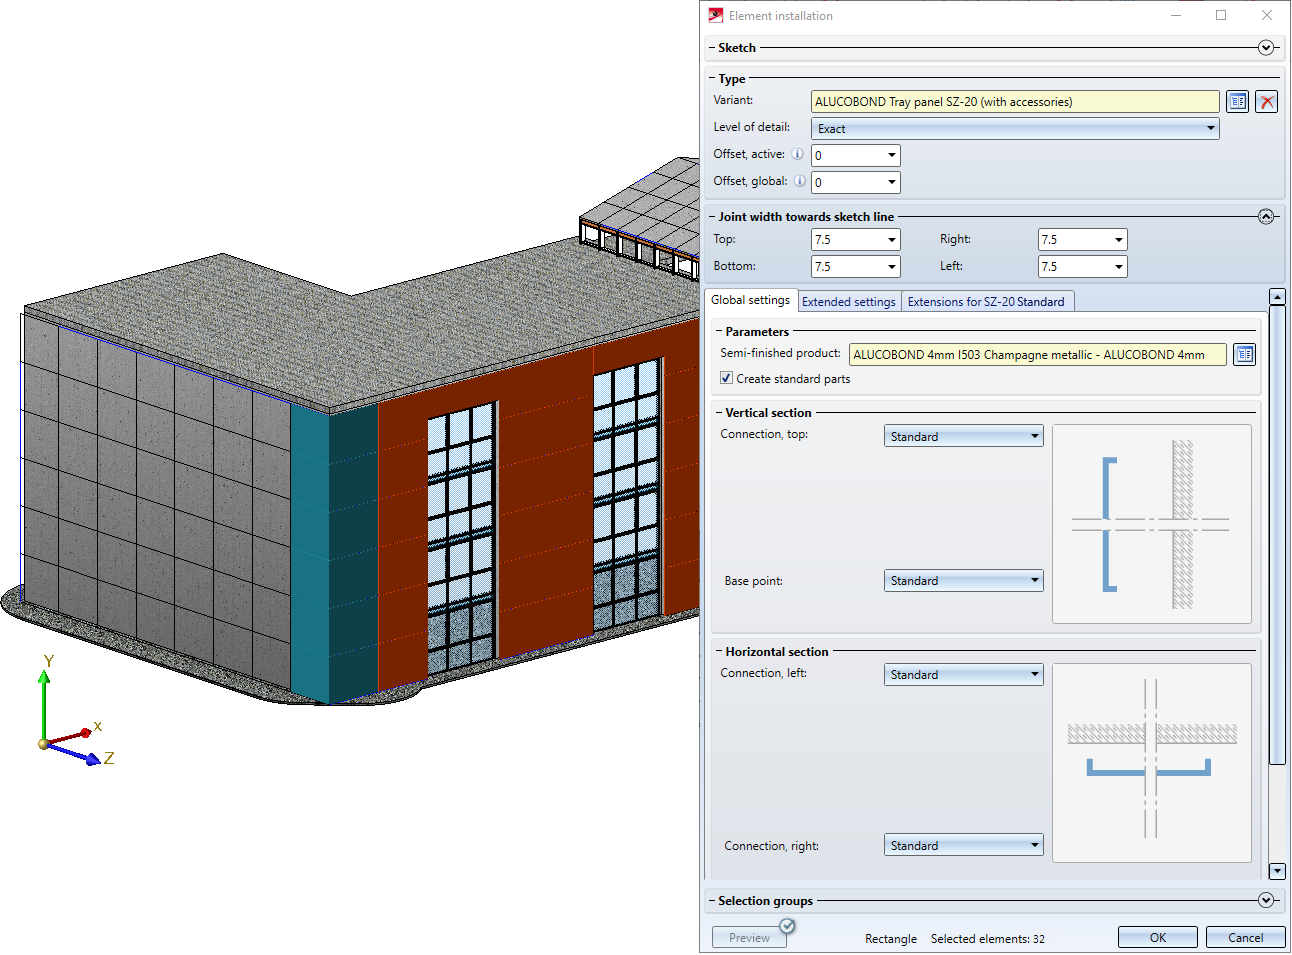
We start the element installation by selecting Sketch (1). All areas of the sketch are permissible areas and are therefore highlighted. In the first step, elements are to be placed only along the left edge, with the left outer corner being cladded with folded sheet metal. The length is to be the length of the right surface area of Sketch (2).
Select the desired surface areas of Sketch (1): Mark the first area and, while holding down the CTRL key, the other 5 areas as shown in the image below.
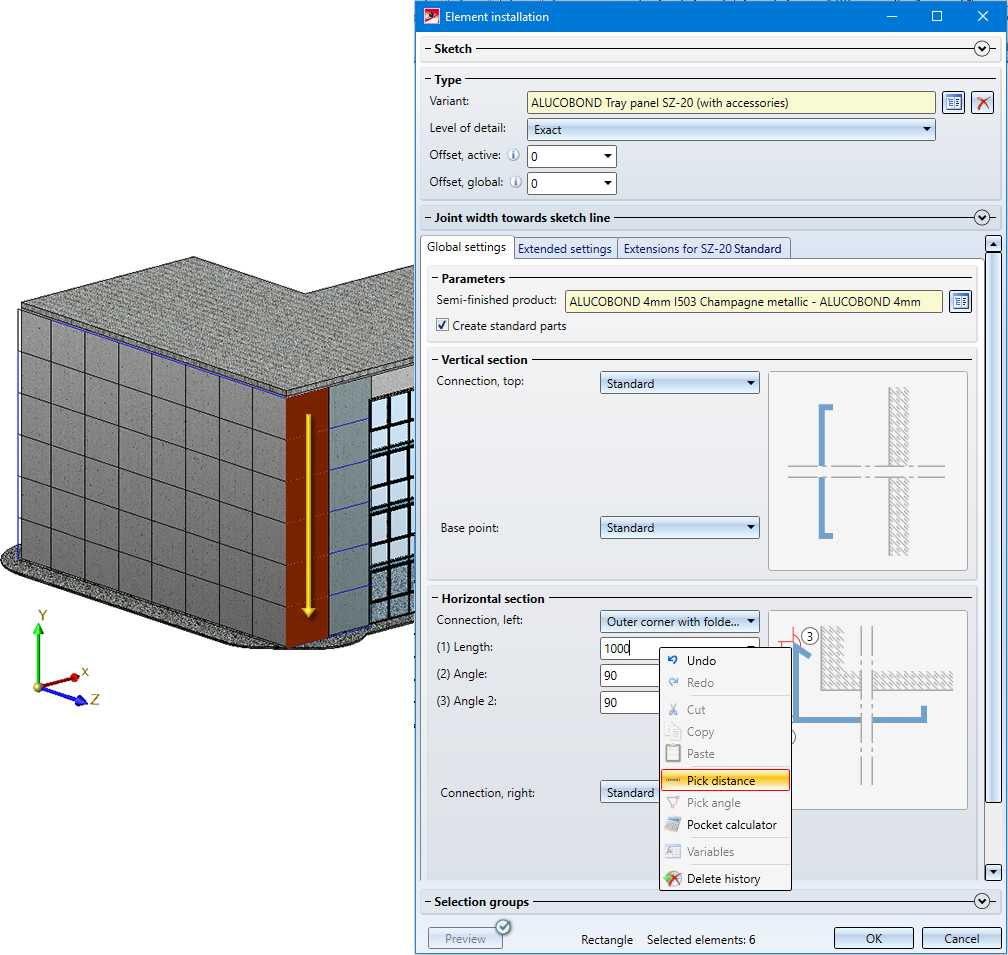
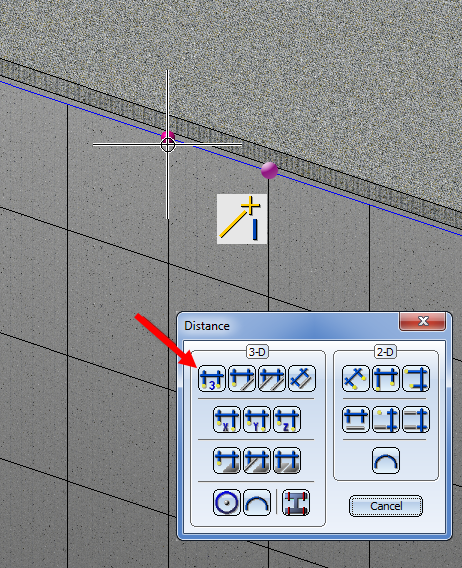
Since we want to place corner elements along the edge, select the option Outer corner with folded sheet for the left connection. The length of the sheet flange can be picked from the drawing: Right-click in the Length/Angle (1) fields and select Pick distance. In the dialogue window, choose Distance, 2 points. Then, specify 2 neighbouring grid points on Sketch (2) (via Autopilot, Point option "I").
Step 2: Installing the remaining elements of the front side
Now, elements are to be placed on the other areas of Sketch (1). Without closing the dialogue window, select the required areas. For all of these areas use the option Standard.
Confirm with OK. The dialogue window will be closed and the calculation will be started. After completion of the calculation process, an assembly called Element installation will be created.
Step 3: Element installation for the side wall
Open the Element installation dialogue window again and choose Sketch (2).
The 6 areas on the right are already occupied by the folded sheets on the outer corner from Sketch (1). Therefore, remove these areas from the selection.
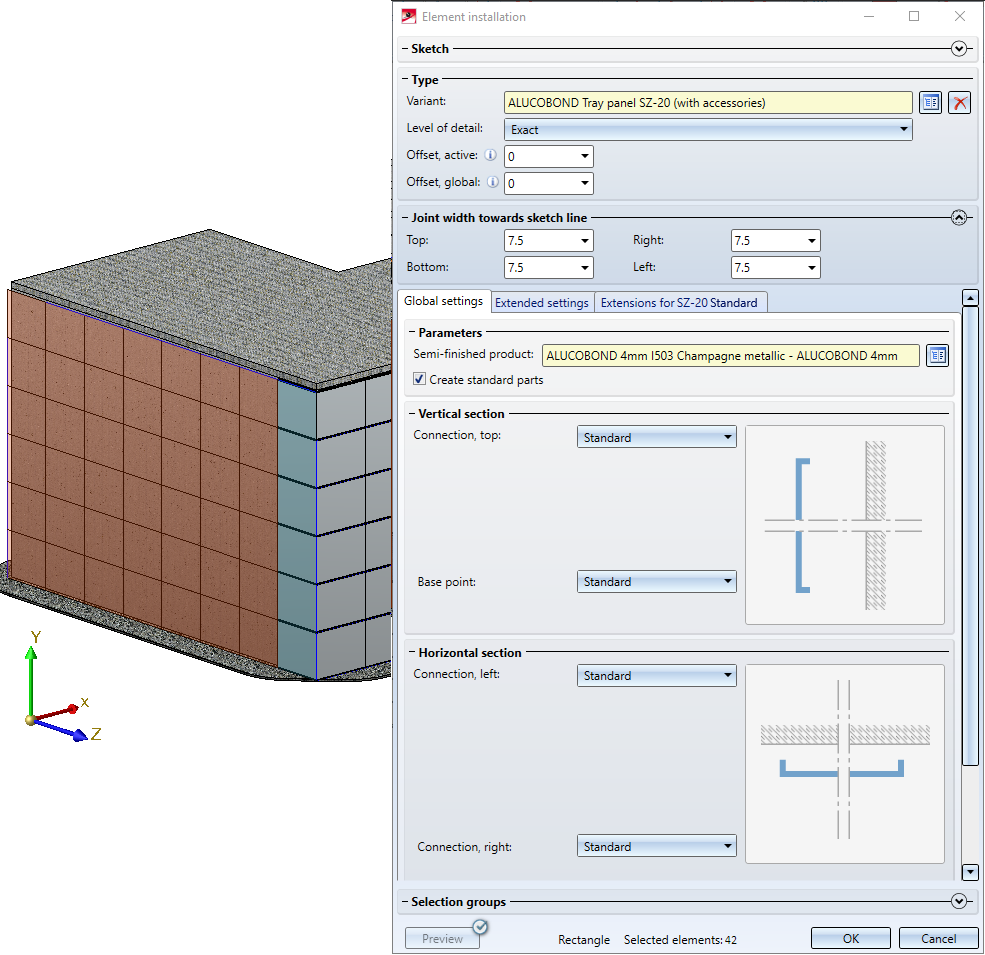
Here, too, choose an ALUCOBOND Tray panel SZ-20 and confirm the default settings with OK. A second assembly called Element installation will be created.
Problem:
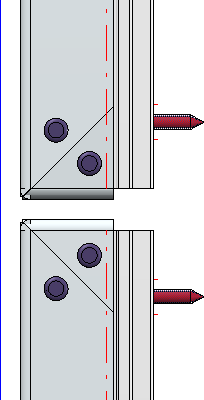
When you now take a look at the installation in the top view, you will see that there is an offset between the two element installations:
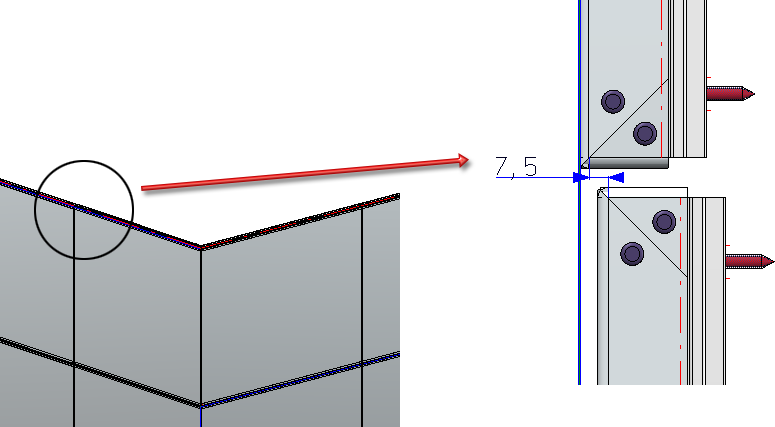
The reason for this offset is that the default clearance of 7.5 has been used for both element installations, with the sketches converging in the corner edge.
Therefore, please note:
Always pay attention at the clearance at the outer side while placing corner elements!
How do you solve this problem?
You have the following two options to solve the problem:
A disadvantage of the "Clearance =0" solution is that in case of an evenly distributed sketch the corner trays would be broadened by the value of the clearance. The disadvantage of the other solutions is that they are less intuitive and convenient and that the value of the clearance must be kept consistent at two points in the model.
In our example we choose the "Offset" solution: In the ICN, activate the second element installation and double-click the corresponding feature entry Element installation. In the dialogue window, change the value for Offset, global to -7.5. Confirm with OK.
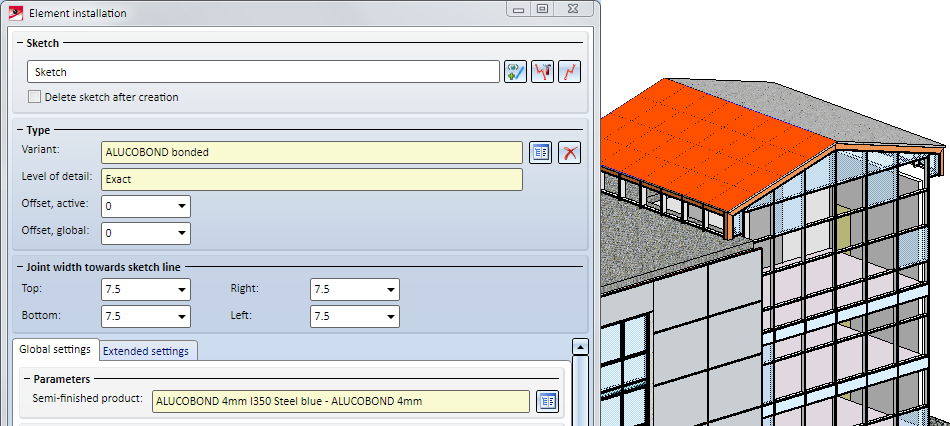
Step 4: Element installation on the roof surface
Finally, the elements for the roof will be installed. Open the Element installation dialogue window again and select Sketch (3). Since we want to place elements on all areas of this sketch, it will suffice to choose the installation element - here: ALUCOBOND bonded - and to reset the Offset to 0 again. Confirm and close the dialogue window with OK.
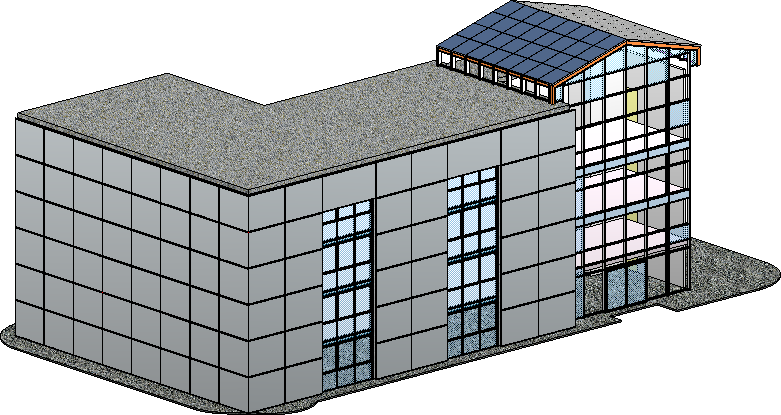
The third Element installation assembly will then be created.
Result


Element Installation: Basic Procedures • Edit Installed Elements • Customer-Specific Installation Elements
|
© Copyright 1994-2020, ISD Software und Systeme GmbH |
Data protection • Terms and Conditions • Cookies • Contact • Legal notes and Disclaimer