Modifications, itemisation and drawing derivation in the detail drawings
Here, the original model drawing is split into suitable structure assemblies and saved in a non-itemized state. The structure assemblies of the model drawing are saved individually as externally referenced detail drawings. These referenced detail drawings can then be edited and itemized on different workstations. Customer drawings, production drawings and mounting drawings are created, released and changed in the detail drawings. Changes in the detail drawings will, due to the referencing, also be transferred to the original model drawing which will serve as an overview in the process.
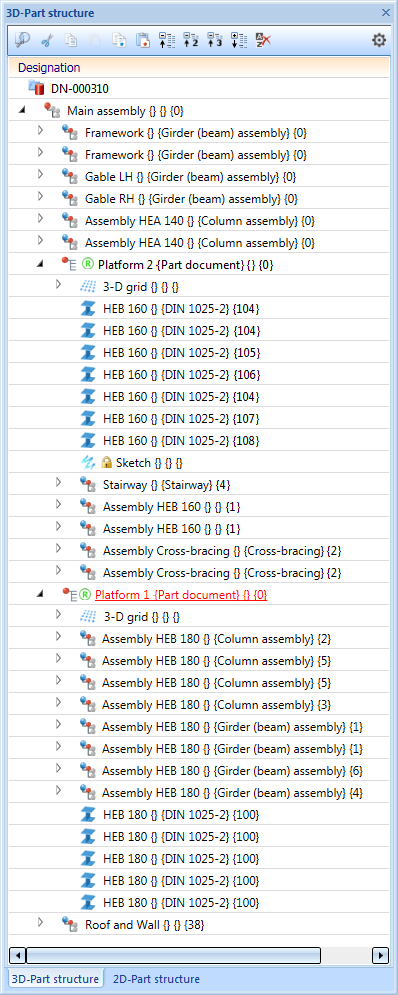
The procedure will be explained by way of the model drawing shown below. The model drawing is not managed in the database yet, no structure assemblies have been defined yet and the assemblies are still non-itemized:
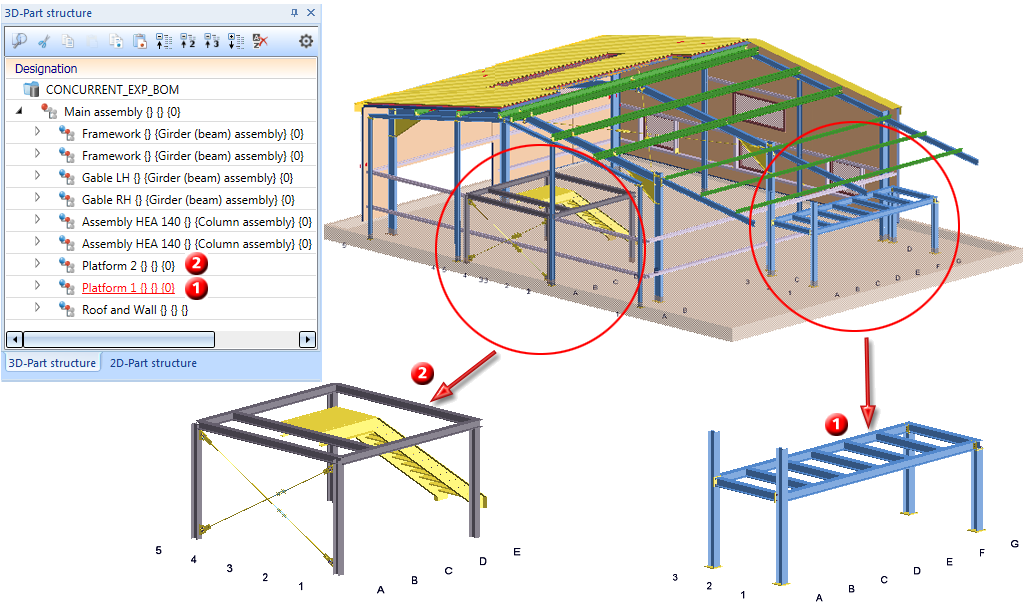
By way of the assemblies Platform 1 and Platform 2 it will be demonstrated how Concurrent Engineering works (the procedure can also be applied to the other assemblies).
In this example the default settings for Management+BIM will be used.
Step 1: Assign the model drawing to a BIM project
- Create a project, e.g. z.B. CONCURRENT_EXP1, with the function Management+BIM > Project > New

- Load the model drawing with the function Management+BIM > Drawing > Article...
 > Explorer
- Save the model drawing with the function Management+BIM > Drawing > Save > New article master
 , while in the document data mask the Itemisation checkbox is deactivated. As a result, the original model drawing will not be the itemized source model.
(ignore the messages concerning itemization etc.) - Assign the article master to the main assembly of the model drawing:
- Right-click the main assembly in the ICN.
- Choose HELiOS > Article master - Assign, of drawing.
- Save the model drawing with the function Management+BIM > Drawing > Save
 .
.
(ignore the messages concerning itemization etc.)
Step 2: Define structure assemblies
- Convert the assemblies Platform 1 and Platform 2 into structure assemblies:
- Right-click the assembly and choose Part attributes.
- Select the part type Structure assembly.
The structure assemblies will be marked as such in the ICN with the  symbol.
- Save the model drawing with the function Management+BIM > Drawing > Save .
(ignore the messages concerning itemisation etc.)
The example model drawing has now been assigned to the BIM project and the structure assemblies have been defined.
Step 3: Create the referenced detail drawing for platform 1
- In the ICN, activate the assembly Platform 1. Right-click and select Management + BIM > Drawing > Reference
 in the context menu (RMB).
 - In the Reference, Save dialogue window, choose the following options: External referencing, Create + Save detail drawing, Database, with new article master and Enter document master for part. Confirm with OK.

- Enter article and document attributes for the part document, and the document attributes for the detail drawing.
Tip:
Assign a number for the construction section to the detail drawing. 
When you itemise and save the detail drawings with the functions on the Management + BIM tab, all articles contained in this drawing will then also automatically obtain this construction section number. Via the link "Construction unit" you can then perform a targeted search in HELiOS for all articles that belong to a particular drawing, which facilitates searching in large and complex model drawings.
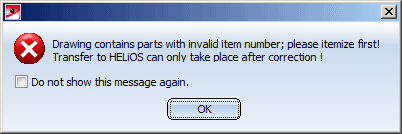
- Close all windows with OK. As no complete itemisation has taken place yet (this will happen later in the detail drawing), the following message appears. Confirm with OK (if you do not want to receive this message again, activate the checkbox at the bottom).
- Proceed likewise with Platform 2 (Construction section 2).
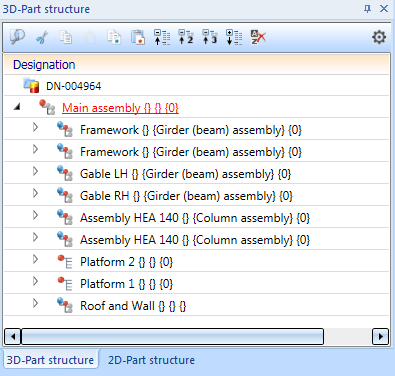
In the original model drawing, the assembly will be marked as "referenced"  .
. 
Step 4: Change, itemize and derive drawings in the detail drawing
The changing, itemisation, drawing derivation release etc. in the detail drawing is done in the same way as shown in Example 1, Steps 3 - 8. Therefore, the focus here will be on the itemization, rather.
- Load the detail drawing for Platform 1:
- Click Switch drawing in the ICN.
- Choose the function Management+BIM > Drawing > Article and then select the detail drawing.


- Now you can modify the detail drawing.
- Itemize the detail drawing by choosing Management+BIM > Parts > Item.
 .
.

- Save the detail drawing with the function Management+BIM > Drawing > Save . The Save referenced parts dialogue window will be displayed. Click OK to apply the changes to the assembly.
- Proceed likewise for Platform 2.

- Derive the drawings, grant the releases etc.
The original model drawing:
When you then load the original model drawing, the Load referenced parts dialogue window will be shown.
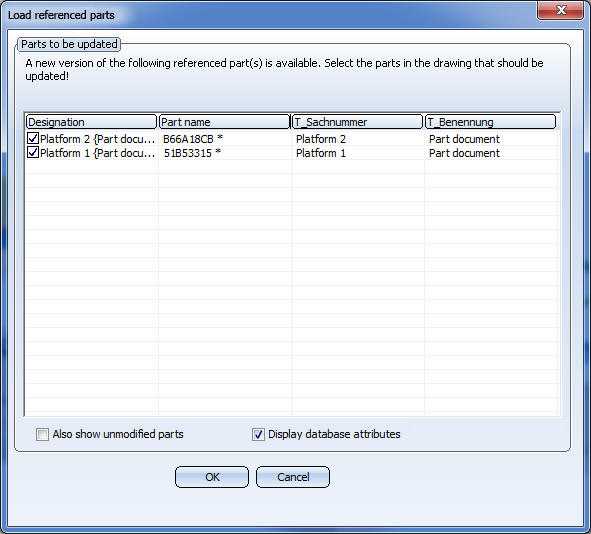
Click OK to apply the changes to the assemblies in the detail drawing to the original model drawing, too.
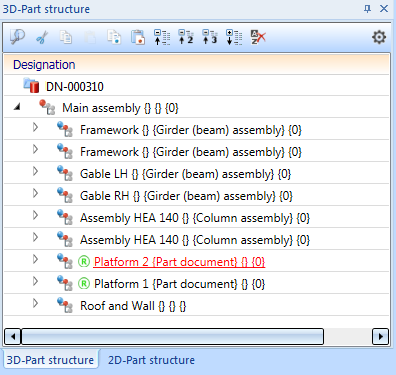
The original model drawing now contains parts that belong to different assemblies and - although they are not identical parts - have the same item number. But, since the itemisation is carried out in the detail drawings, this is not relevant here. Furthermore, the item numbers of these assemblies are locked in the original model drawing, i.e. if you perform an itemization in the original model drawing, the item numbers assigned in the detail drawings will remain unchanged.
Tip:
When you choose this procedure, the detail drawings will be itemized independent from each other. Therefore, the responsible engineers should inform each other about the start values they intend to use in the itemisation settings. Otherwise it might happen that non-identical parts will obtain identical item numbers in the original model drawing.


Requirements for a Smooth Operation (ManBIM) • Pre-planning of the Construction Process (ManBIM) • Overview of Functions (ManBIM)