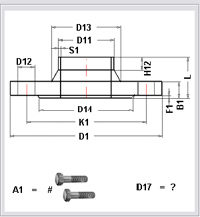
The preview box displays an image of the loaded simple variant. This is only possible if the image exists in an EMF file (Windows Enhanced Metafile). By default, these files are located in the HiCAD subdirectory ega. They have the ame name as the variant file and the extension EMF.

Example: ASME_FLANGE600
Click the  icon to subsequently assign a preview image to a variant. Select the desired folder and the EMF file.
 When creating a feature variant via Drawing > Save/Reference > Part
  > Create feature variant
  , a graphical preview image will be automatically created for the Variant Editor, provided that the shaded representation has not been activated.
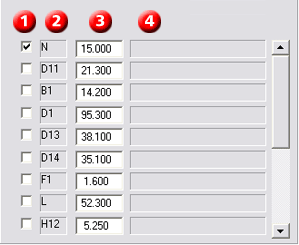
The entry field at the top of the table box contains the type designation of the record to which the table entries belong. The table is comprised of four columns:

The following option buttons are available:
|
|
(Re)set selection ... Selects all table lines or cancels the selection. Selected lines are taken into account when recalculating or transferring records. |
|
|
Delete... This command deletes the contents of entry fields in the Value column. |
|
|
Restore... This command replaces the current value by the value that was contained in the Value column when the record was loaded. Only unblocked lines are affected.
|
|
|
Recalculate... This command recognises all lines selected in the first column, but only influences the current record. The dialogue box enables you to specify quotients by which the numerical values in selected lines are multiplied. Select OK to execute calculation. Calculation is logical if, e.g. we assume that value 32 was specified for variable N in a record, and a new record should be created with N = 50, whereby the record with value N = 32 is initially taken over. To change the value of the variables H51 and D51 proportionally to N, proceed as follows::
|
|
|
Transfer selected values to all records For each marked variable, the given value will be copied to all other records. |
|
|
Transfer selected values to selected records The value of the marked variables will only be copied to those records which you selected as you would do for Find. Enter the required search conditions and select from the result list (with Ctrl+ right mouse button or Shift) the records in which the values should be replaced. |
|
|
This button converts the nominal diameter into inches. A typical example: First click the Variables+Attributes button, choose the Insert variable option, select String for the data type of the variable, and give the variable a name (maximum length: 4 characters). Confirm with OK. Double-click the field of the database attribute for the new variable, enter the attribute name NPS_INCH and confirm with OK. If you now click the button, the values for the new variable will be converted for all data records. After clicking the List button, all values will be displayed in the list. In the first row, the value has been converted into 3/8“ (from nominal diameter 10). |

The User Interface • Settings • Change/Generate Type Designation • Edit Structured Variants
|
© Copyright 1994-2018, ISD Software und Systeme GmbH |