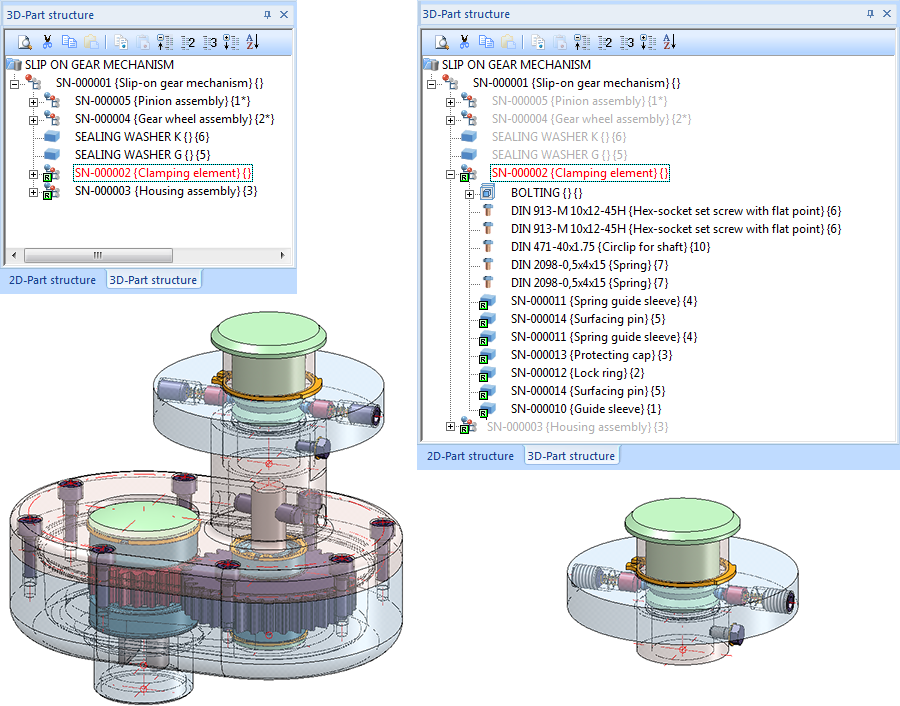
The image below shows a Slip-on gear mechanism. In this example an exploded view of the Clamping element assembly shown on the right hand side is to be created.

Proceed as follows:
Step 1: Define a view for the exploded representation:
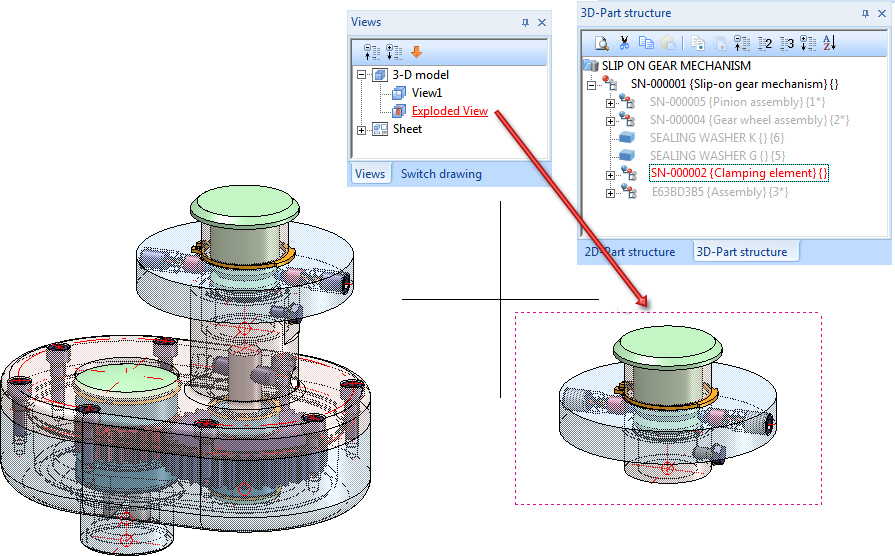
Step 2: Start exploded view creation
 function. HiCAD switched into the Exploded view mode.
  Apply the function to the Clamping element. Since you want to move the individual parts of this element, right-click this entry in the dialogue window and choose Remove element(s) from list.
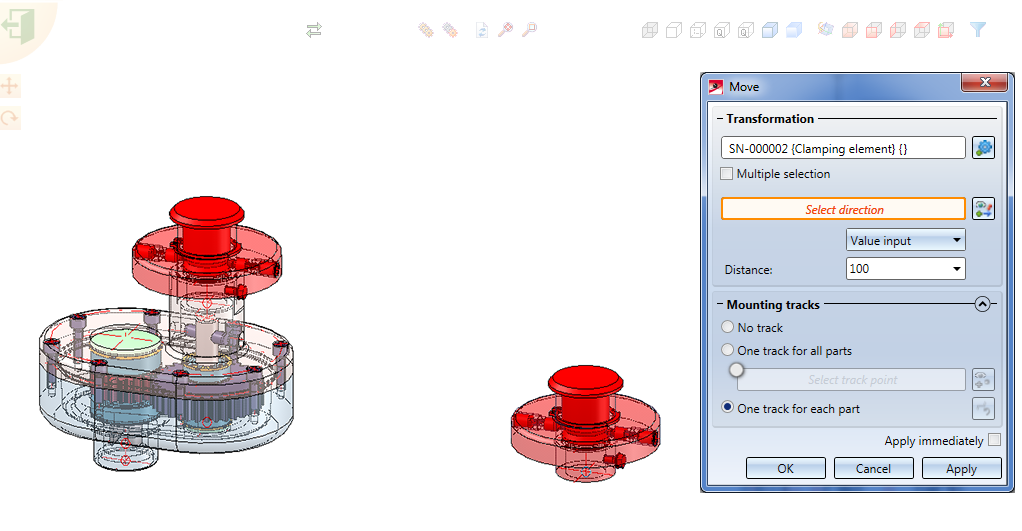
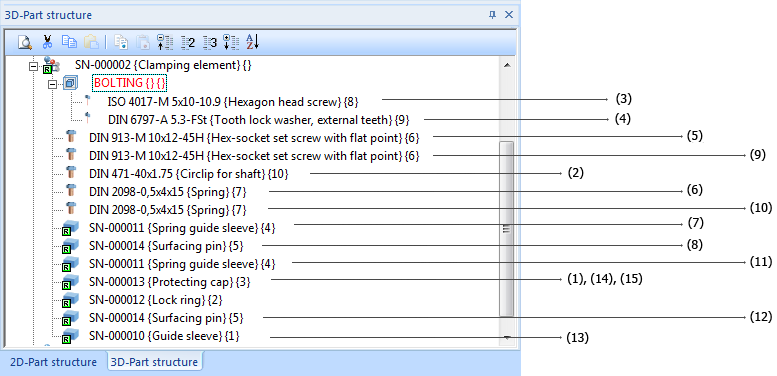
Step 3: Definition of the displacements (1) - (14)
 symbol, select in the ICN the Protecting cap (1) and, The displacement is to take place via Value input with a Distance of 140. As direction, choose the Z-axis (right-click). When you click Apply the displacement will be carried out.
 Proceed likewise for the other parts, carrying out each displacement with a click on Apply.
Step 4: Definition of a rotation for the protecting cap (15)
Now, rotate the protecting cap in the exploded view.
 symbol to open the Rotate dialogue window. Choose the Clamping element as the part to be rotated. As you want to rotate only the Protecting cap (15), right-click the entry and choose Remove element from list.
 symbol, choose the Protecting cap (15) in the ICN. Carry out the rotation by means of a value input, namely, -90°. To determine the rotation axis, use the quad points shown in the image below.
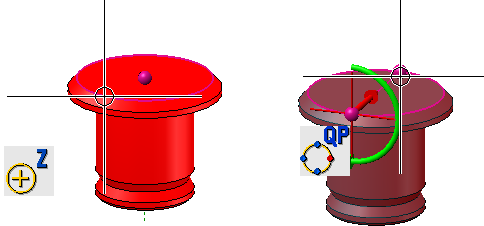
Click Apply to perform the rotation.
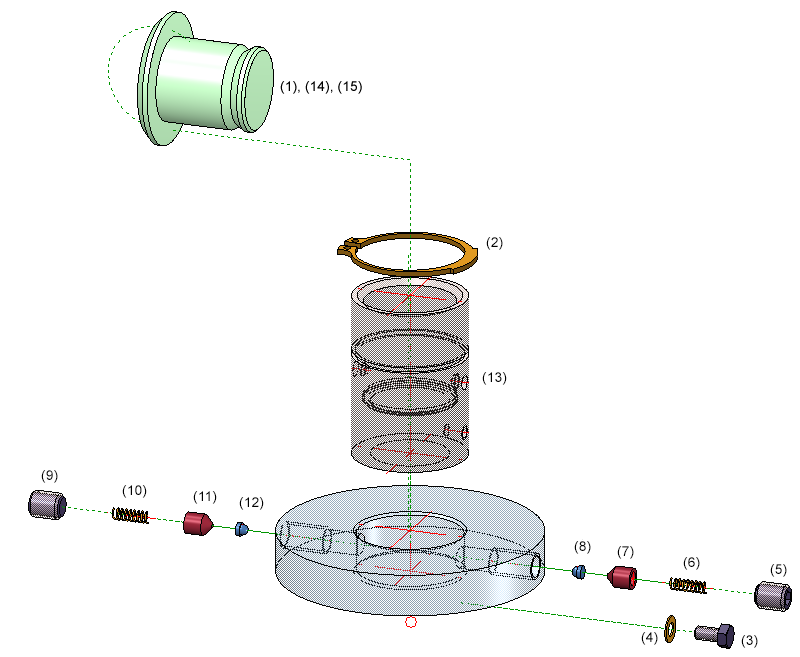
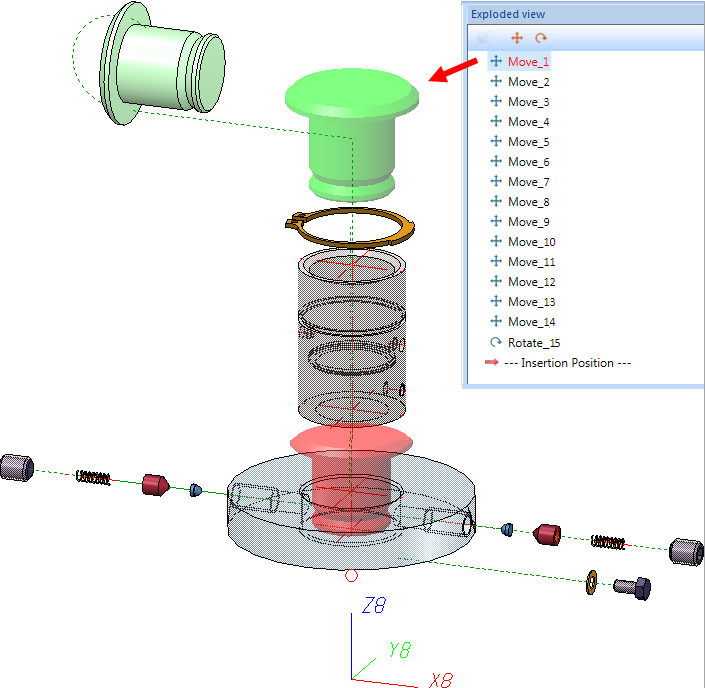
Accordingly, the Exploded view docking window will contain 14 displacements and 1 rotation. When you click on a transformation in the exploded view log, the transformed part and also the previous position of the part will be highlighted.
The exploded view creation as film:

Exploded View • Representation Functions
|
© Copyright 1994-2018, ISD Software und Systeme GmbH |