Hatching in Sectional View and Cut-Out
3-D Standard > Tools > Attr.  > Hatch section + cut-out
This function allows you to define an individual hatching for each part and view for those section surfaces that result from sections, cut-outs or detail areas. A distinction is made between "normal" hatchings and insulation hatchings.
The views selected when calling the function will be considered. Selecting views within the dialogue is not possible.
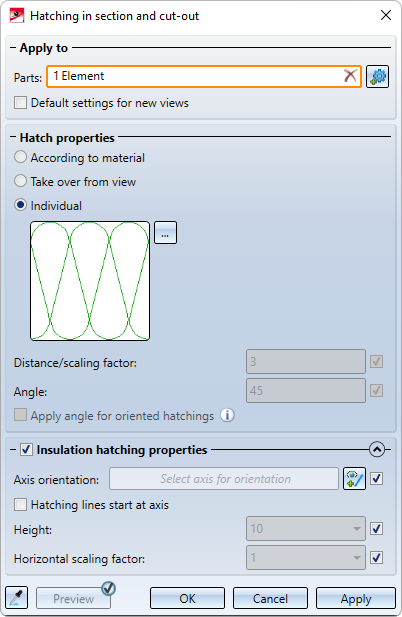
After calling the function, the dialogue window shown will be displayed.
The input areas:
The buttons:
|
Pick hatching and attributes from part |
By clicking on the |
|
Preview |
If the check mark is set on the button, the preview will be displayed automatically. Otherwise, you need to activate the preview by clicking on the button.
|
|
OK |
The hatching is changed. The dialogue window is closed. |
|
Cancel |
The dialogue window is closed without changing the hatching. |
|
Apply |
The hatching in the selected views is changed. The dialogue window will remain open. You can then change the hatching of other parts in the selected views. |
 button, the settings of an existing part, i.e. the settings that you have assigned to this part with the Hatching in section and cut-out function, can be adopted as the settings in the dialogue window. You can then continue in the dialogue.
![]() Please note:
Please note:
- An exact representation of hatchings is only provided in the representation modes Hidden Line dashed and Glass model. In all other cases a simplified representation of hatchings will be shown, i.e. lines are always continuous and have the same spacing.
- If the selected parts have already been assigned a hatching for sectional views and cut-outs and the hatchings differ in the views selected before calling the function, the dialogue will indicate that the hatching data are different, e.g.

- The function is also available in the context menu for 3-D parts under Properties.
Please note:
When hatching adjacent parts, the Hatching settings set for the current drawing may have an effect. This means that if adjacent parts cannot be clearly distinguished from each other visually by the hatching settings selected with the Hatching in
section + cut-out function, then the hatching settings will be taken into account. This means that the hatching angle of adjacent parts will be rotated or mirrored vertically and the hatching distance will be reduced if necessary.

Apply to
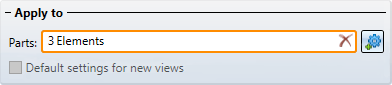
Here you select the Parts to be processed. The active part or the parts of the active part list will be selected automatically. You can delete the selection by clicking on the  symbol. To select other/additional parts, click on the
  symbol and then select the desired parts. The number of selected parts is displayed in the Parts field.
If the selected hatching settings are to be used as default settings for subsequently generated sectional/detail views and cut-outs, activate the Default settings for new views checkbox.
Hatch properties
Here you select the hatch pattern and specify the spacing of the hatching lines and the angle to the horizontal.
Hatch pattern
-
According to material
If a material for which HiCAD knows the corresponding hatch pattern has been assigned to the part, this pattern will be used; otherwise, the hatch pattern of the view will be used. - Take over from view
The hatch pattern of the view is used. - Individual
You explicitly select the hatch pattern. To do this, click on the symbol, select the desired pattern and confirm the selection with OK.
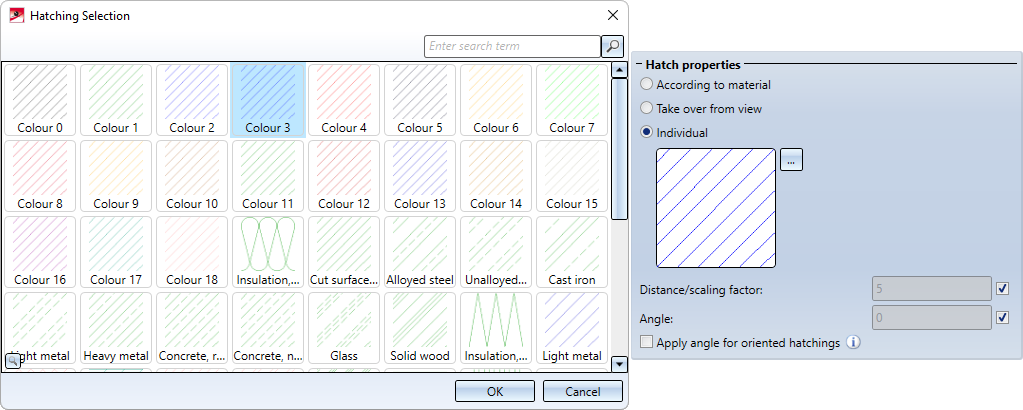
Please note that for certain hatchings no or only a schematic preview can be displayed.
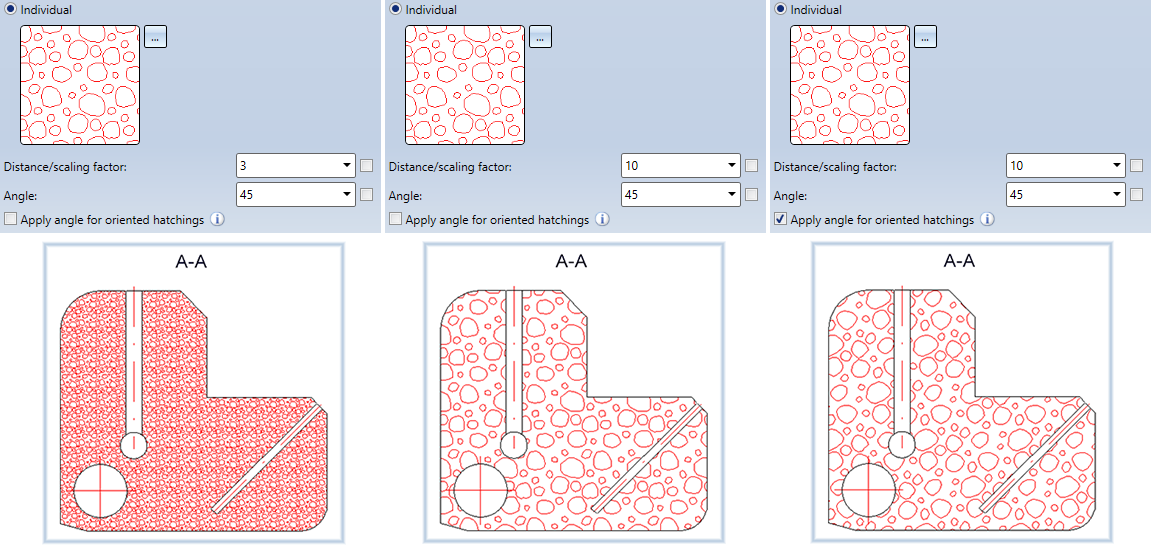
Distance/Scaling factor and angle
The distance of the hatching lines or the scaling factor for hatch pattern as well as the angle can either be taken from the view or specified individually. To specify the values individually, deactivate the checkbox and then enter the desired values.
For the angle, a distinction is made between non-oriented and oriented hatching. Oriented hatchings normally have a fixed angle to the horizontal. By activating the Apply angle for oriented hatchings checkbox, oriented hatchings can be rotated by the specified angle.
Insulation hatching properties
Unlike "normal" hatching, insulation hatching is subject to special rules and requirements. The properties for insulation hatchings can therefore be defined - after activating the corresponding checkbox - in a separate area of the dialogue window, which can be closed/expanded by clicking on  or
or  .
.
Here you select the axis for the orientation of the hatching and determine the height and the horizontal scaling factor. If you want this information to be determined automatically, activate the respective checkbox next to the input field.
In addition, by activating the Hatching lines start at axis checkbox, you can specify that the insulation hatching should start exactly at the selected axis.

(1) Automatic determination, (2) Freely selected height and scaling factor, (3) Selection of the axis orientation, (4) Hatching lines start at the selected axis

Sectional Views • Cut-Outs • Linked Views (3-D) • Model and Process Parts (3-D)