Find Articles
Find > Articles 
This function enables you to search the database for articles. You can
restrict the search to certain criteria through input of data. Find > Articles .
On the HELiOS Ribbon, choose Find > Articles . After calling the function, the Find article dialogue window will be displayed. Enter your search
criteria here.
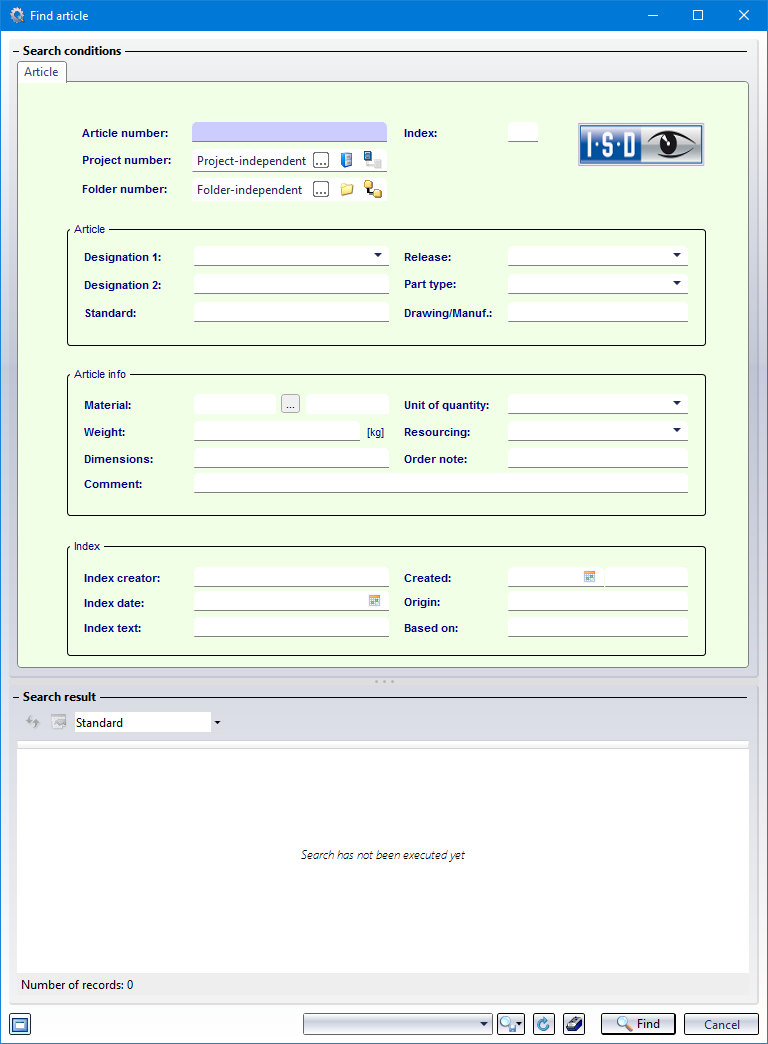
If one or several windows are not filled in, all values will be valid. If only an asterisk * is entered as search criterion in a field, only those objects will be taken over into the result list which have an entry in this field. The database will then be searched and a result list will be shown. You can end the search process at any time with ESC.
As the search window will remain open you can change the search criteria and start a new search.
A message will be displayed if no article for the specified search criteria has been found. The mask remains active so that so can enter new criteria. If you double-click an article in the result list, the corresponding master data will be displayed. Multiple selections are also possible (click while holding down the CTRL or SHIFT key). Right-clicking the article or article selection opens a context menu with editing functions. If only one article has been marked, more editing functions will be available in the context menu.
 Please note:
If the sub-project setting is deactivated (  switched to
  Do not search in sub-projects) and the Project number has been set to
  Project-independent, HELiOS will only search for files which are not assigned to any project.
If you are searching in a particular project (via the Project number) with deactivated sub-project setting, only files located in this project will be displayed, and none from its sub-projects.
An extended selection dialogue is available for searching according to creation dates or index date. To open this dialogue, click the  symbol next to the Created or Index date input field.
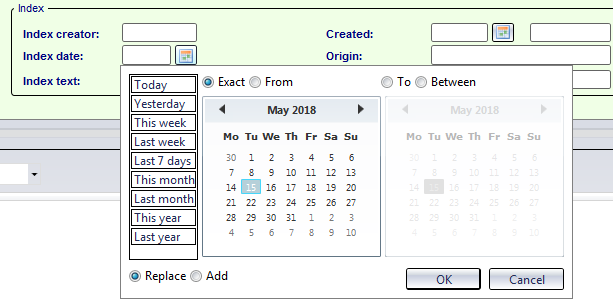
On the left hand side in the pop-up window you can choose a time or a period such as Today, Yesterday, This week etc., or select a concrete date in the calendar. Multiple selections are also possible.
If the Exact checkbox is active, the search will only refer to this particular date or, if multiple dates have been selected, only to these dates. If the From option is active, the search will refer to the period spanning the specified date until today. For this to happen, the Add option at the bottom of the window must be active. If the Replace option is active, a previous date selection will be replaced by the new one.
Activate the Between option to choose one date on the left hand side and one on the right hand side of the calendar, which represent the start date and end date of a period for article creation or index creation. The article search will then refer to this period.
Furthermore, you can enter a user name in the input field next to the Created or Index creator input field. The search will then consider articles which have been created or indexed by the specified user.
When you click on the  Adjust result list icon, a dialogue window opens, enabling you to add further attributes (or remove existing ones) to be displayed in the list view (the procedure is the same as the one for the configuration of the Properties window).
The  Print result list function calls the Report Manager for printouts. Besides, the
  Adjust report settings option opens a window, allowing you to specify, by activating or deactivating the corresponding checkboxes, which attributes of the result list are to be included in the report
At the bottom of the window you can find the following options:
-
 Display new contents in this window.... This window has a content focus. /
  Do not display new contents in this window. If no window with content focus is open, a new window will be opened.
 - Use the functions in the drop-down menu of
 Save search template option to save the current search settings locally , i.e. only for the current user or globally, i.e. for all users in the system (after selecting the option, enter the desired name into the displayed input field and confirm with OK ). In the pull-down selection field to the left, all available search templates are offered for selection.
 - Select
 Reset to clear all input fields of the search mask.
 - Right-clicking an empty area of the search mask opens a context menu from which you can also set the search to Project-dependent, Folder-dependent, Project- and Folder-dependent, or save and load search templates.
![]() Please note:
Please note:
-
You can also perform the search while making entries in the mask by pressing the F3 key.
-
If you work with classifications, you can perform the search via the Classification tab. For this, the Show classification tab... checkbox under Find must have been activated in the HELiOS Options on the General tab. An additional Classification tab then allows you to search specifically for items in a class. If you want to search in a specific sub-class, you can do this by clicking on the
 symbol at the bottom of the dialogue window to go to the Classification window. Select a class there and click OK to close the window and start the search.

