Print Documents
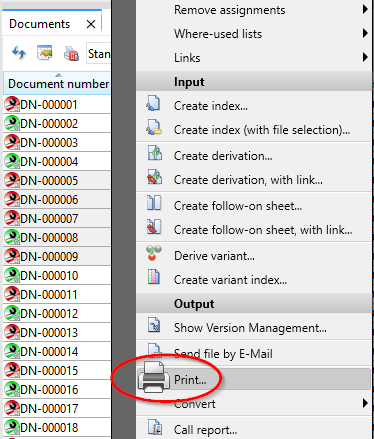
You can print documents by clicking on Print in the Ribbon of a document detail mask or by opening the document context menu with a right-click on the document and selecting  Print in the Output section, or from the context menus or detail screens of linked Artcles, Projects or Folders.
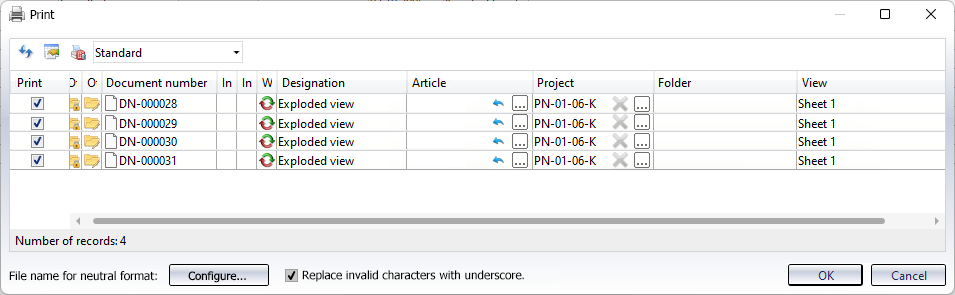
You can also send the print jobs of several documents at once by right-clicking on the multiple selection in a document result list and selecting Print.
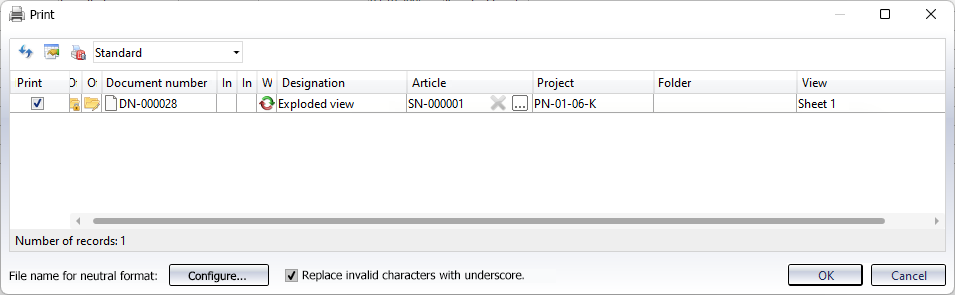
The extended dialogue window for printing opens for the corresponding document:
![]() Please note:
Please note:
The behaviour of the dialogue depends on the settings specified for HELiOS Options: Print.
If the Project or Folder assignment of the document is not unique, a selection must be made in the corresponding column (a project- or folder-independent printout is possible). Unique article, project or folder contexts are always set by default.
If you start printing from a unique context, such as a specific Project, then the corresponding column is preassigned with this project. If the project or folder affiliation is hidden, the print job is carried out independently of the project or folder. In general, the information of hidden columns is excluded from the print job.
Under Article, a linked article or, if necessary, a multiple selection of articles can be transferred to the print job.
Under View, if there are several views, you must select at least one for printing (multiple selection is possible).
If the print job is sent with OK, the HELiOS Print Client opens first. Continue there to send the print job to the HELiOS Spooler.
The Print dialogue then lists all documents for which you can make appropriate options "at a glance" for each of the documents.
With a checkbox in the Print column, individual documents can be excluded from the print job again.
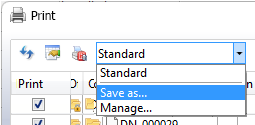
As with regular result lists, in the Print dialogue you can click on the  symbol to add or remove columns from the list and save the configuration for reuse.
If you are working with notes documents, please also note the setting options for the printing behaviour of documents with created or accepted note documents specified at HELiOS Options: Print.

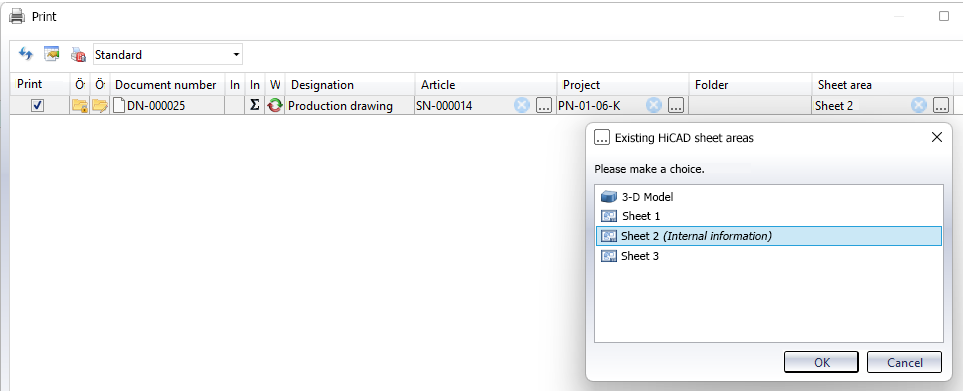
HiCAD Sheet areas
For HiCAD documents (SZA files) you may have to select one (or more) sheet area(s) before printing.
To do this, click on the ... icon at the Sheet area column header. A corresponding selection dialogue appears.
A multiple selection of the sheet areas of several documents in the Print window is possible by marking and clicking on the ... icon in the Sheet area column header.
When selecting the sheet areas, a "union" of all available sheets (ascending by sheet number) is displayed. The selection of Sheet 1 then prints e.g. Sheet 1 of each (marked) document.
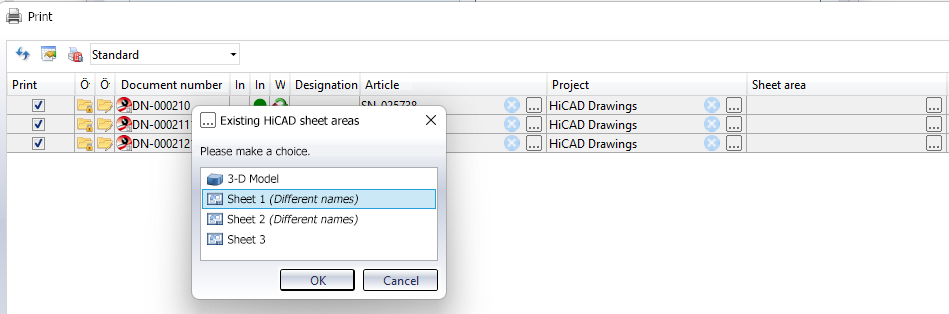
If you select sheets that are not available for all marked documents, a message appears and the corresponding sheets are deselected for printing.
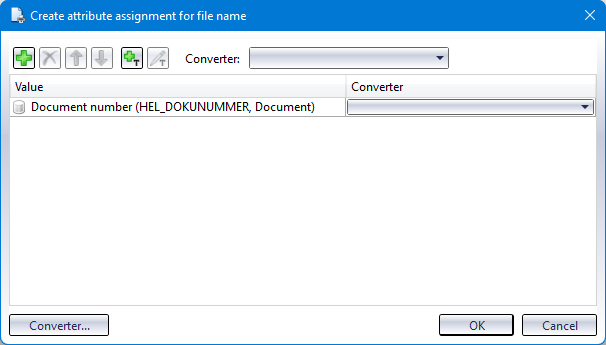
Configure file name for neutral format
Am Fuß des Fensters können Sie neben Dateiname für Neutralformat: auf die Schaltfläche Konfigurieren... klicken, um einen erweiterten Dialog zur Dateinamensgenerierung per Attributzuordnung aufzurufen.
At the bottom of the window you can click on the Configure... button next to File name for neutral format to open an extended dialogue for file name generation via attribute assignment.
![]() The content of the system file hel_fileprint .ini used for this purpose in earlier HELiOS versions is transferred to the attribute assignments when it is called up for the first time. Afterwards, the old ini file is no longer needed, but it is not automatically deleted from the system.
The content of the system file hel_fileprint .ini used for this purpose in earlier HELiOS versions is transferred to the attribute assignments when it is called up for the first time. Afterwards, the old ini file is no longer needed, but it is not automatically deleted from the system.
Default settings to be set when calling up the file can be configured in the HELiOS Options at Print > Print documents > File name for neutral format.
With a click on the  symbol at the top of the window you can add further attributes to the file name generation. A corresponding dialogue for Attribute selection opens.
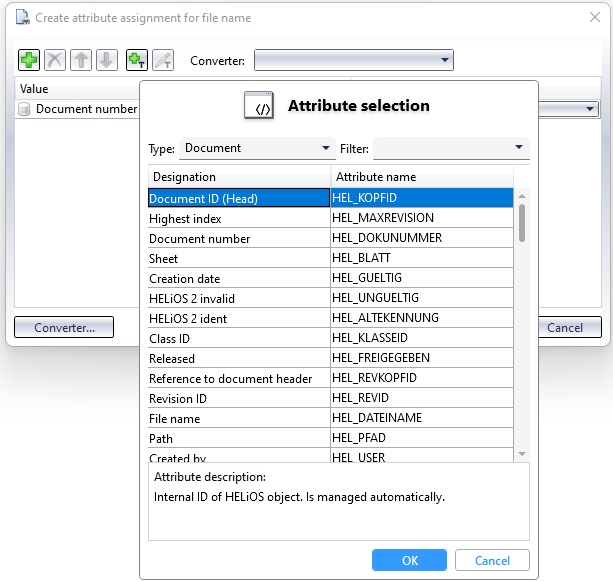
The behaviour is similar to theexport of files: Attributes selected here and entered in the attribute assignment are then lined up as file names when printing, as they appear from top to bottom in the list in the window.
With a click on  (Add fixed text) you can also add a freely selectable text as a separator.

Using the arrow buttons 
 at the top of the window, you can move the currently marked line of the list up or down step by step by clicking; by marking and clicking on the
  symbol, attributes can be removed from the file name generation again.
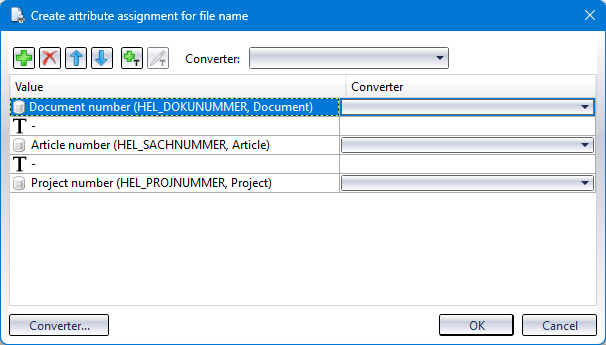
After leaving the attribute assignments window with OK, the generated file name is composed accordingly when printing.
Example: Document number, Article number and Project number, with a separator text in between that only consists of "-":
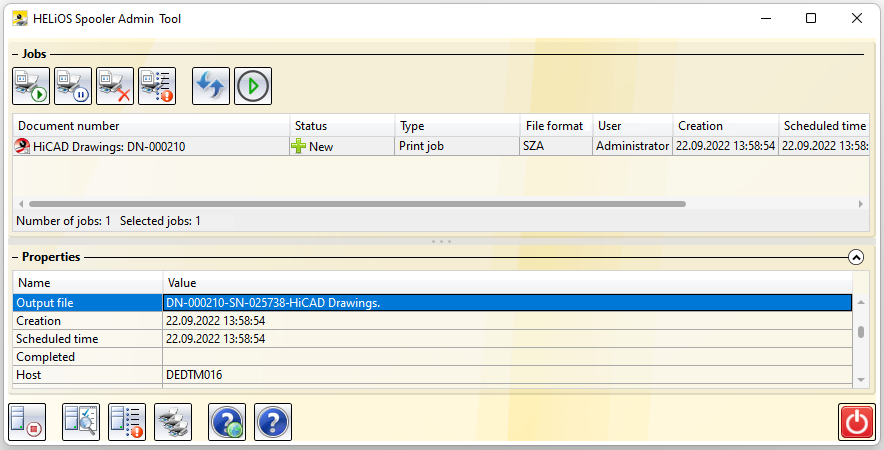
After printing or converting, you can view the generated file name in the HELiOS Spooler Admin Tool via Properties >Output file:
Errors
Errors that prevent printing and are recognised accordingly by HELiOS are output below the result list when executed with OK.
Double-clicking on an error line also marks the corresponding document in the result list above.
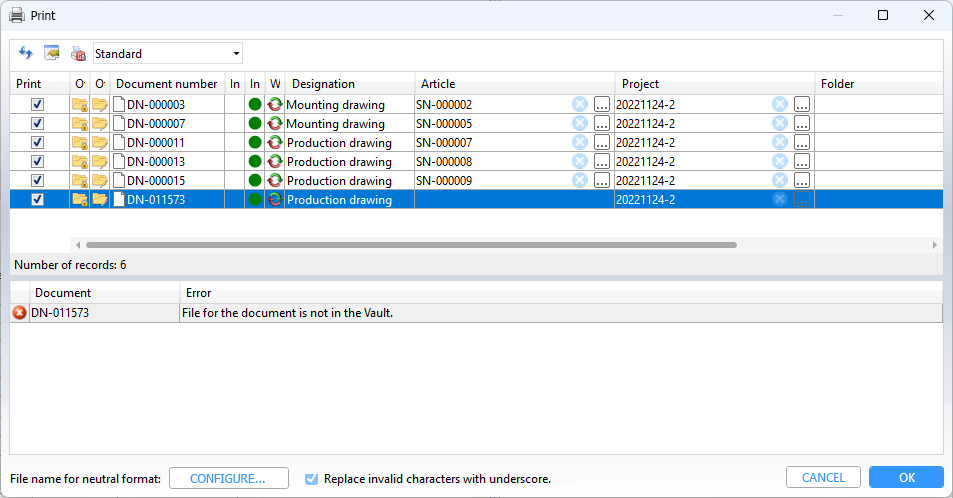
Example: If the dialogue returns the error description "File for document is not in the Vault", it is recommended to load the document once into the workspace.
