Roof Inclinations
Profile Installation > New/Change > Profile installation 
Profile Installation > New/Change > Define inclined roof sections ![]()
The Roof inclinations tab allows you to construct sloping roof surfaces within a profile installation.
Profiles that were started on one roof surface are continued on the adjacent roof surface. For example, on construction sites, corrugated sheet metal profiles can simply be bent along the edge of a roof section to form an adjacent inclined roof section.

Define inclined roof sections
If several different roof inclinations are to be used within a profile installation, you must define the edges for which the roof inclination is to be changed.
You can use individual line elements within the profile installation sketch as such edges for the next inclination on the roof surface. These line elements can be selected for this purpose with the ![]() Define inclined roof sections function . If you define more than one roof inclination edge, they must be parallel to each other. In addition, the edges must (at least) completely intersect the profile installation sketch.
Define inclined roof sections function . If you define more than one roof inclination edge, they must be parallel to each other. In addition, the edges must (at least) completely intersect the profile installation sketch.
To mark edges accordingly, choose the Define inclined roof sections function in the New/Change function group of the Profile Installation Ribbon. You can now select line elements in the sketch by clicking on them which will mark them in red in your model drawing. You can remove the marking by clicking again. Exit the function by pressing the middle mouse button.
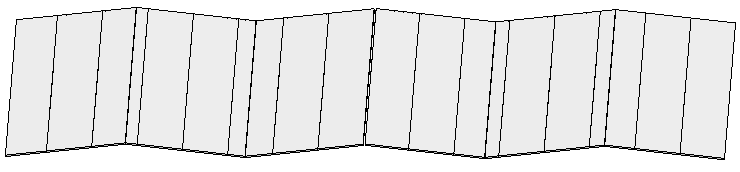
In the sketch these edges will be displayed as dashed lines.
Profile installation sketch with dashed edges for the definition of inclined roof sections
Roof sections
At the roof inclination edges the sketch is divided into individual roof sections. These are numbered along the Y-axis of the sketch. Only if the edges are exactly parallel to the Y-axis, they are numbered along the X-axis instead. Using the option Order of roof sections you can select whether the numbering should be along the Y-/X-axis of the sketch (In reference direction) or against this direction (In opposite direction).
Configure roof inclinations
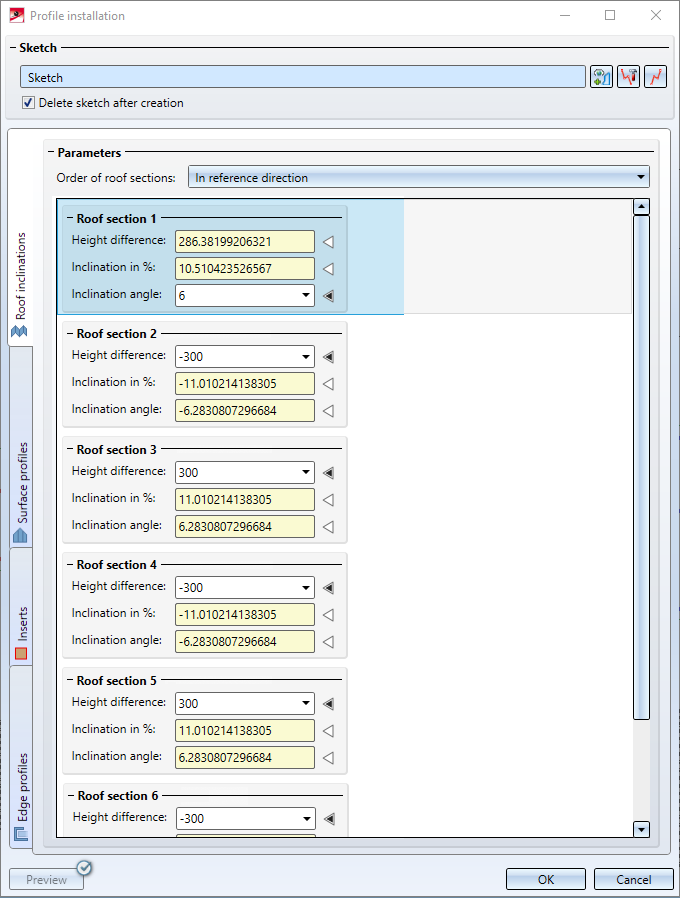
The Roof inclinations tab of the Profile installation dialogue window displays one entry per roof area. When you select an entry, the corresponding part of the sketch is highlighted in the drawing.
You now have the possibility to define the inclination of this roof section in 3 different ways:
- You specify a Height difference in mm.
- You enter an Inclination a in %.
- You enter an Inclination angle.
By clicking on the arrows next to fields, you can select which value you want to specify. The other values will then be calculated automatically.
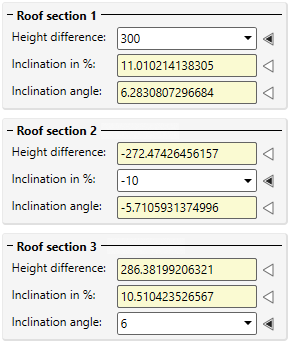
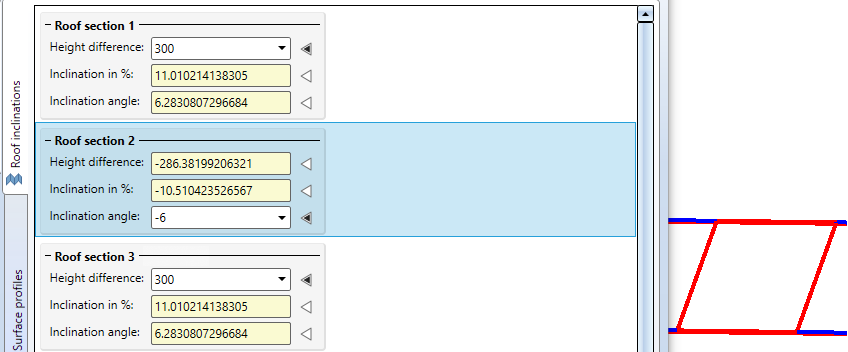
Example - . Top: Height difference specified; Middle: Inclination in % specified; Bottom: Inclination angle specified.
The outermost edge of roof section 1 remains fixed at the height of the sketch; the inclination of the roof surface then refers to the other side of this surface. The next adjoining surface then refers to this side and so on.
Positive height differences / inclinations are deducted upwards from the sketch, negative values correspondingly downwards.