Installation and Setup
The following steps need to be performed for the setup and activation of the HELiOS <-> SOLIDWORKS interface:
- Installation of the HELiOS/SOLIDWORKS interface
- Vault Server
- Session directory
- Integration of links to SOLIDWORKS in the HELiOS Desktop
- Activation in SOLIDWORKS
Installation of the HELiOS/SOLIDWORKS interface
The HELiOS/SOLIDWORKS interface is created via the HELiOS installation DVD. It can be installed together with the HELiOS Desktop, or separately at a later time.
In the Ready to install HELiOS ... dialogue of the HELiOS Installation Wizard, select Extended Settings > HELiOS Interfaces, and select the systems to which you want to create an interface.


Further information can be found in the Installation Notes guide that is supplied with your installation DVD.
 Please note:
- The creation of the interface requires a compatible version of SOLIDWORKS on your computer.
- The installation automatically executes the MultiCAD.csv file with the help of the HeliosClientConfig tool. If you are using your own .csv file, you can also execute this file subsequently. To do this, start the HeliosClientConfig.exe tool from the \exe\ directory of your HELiOS installation. Click the ... button to select the path of the file and confirm with OK.
- In the \templates\SOLIDWORKS\ directory of your HiCAD installation you will find drawing frame templates. If required, copy them to the appropriate SOLIDWORKS directory.

Vault Server
The initiation of the interface between SOLIDWORKS and HELiOS requires the installation of a Vault Server. You install the Vault Server via a separate menu item on the HELiOS DVD.
Further information can be found in the Installation Notes guide that is supplied with your installation DVD.
The Vault Server then needs to be activated. In the HELiOS Desktop, open the  HELiOS Options window and activate the Database tab.
Select General and set the Vault Server option to Yes. In the Vault Server dialogue window, tick the Activate Vault Server checkbox, specify the Address (e.g. computer name of the system on which the Vault Server is installed) and the Port (Default: 9000).

![]() Please note:
Please note:
To be sure that the Vault Server is actually active, it is recommended to restart HELiOS after changing the setting!
Session directory
In older versions, the utilisation of SOLIDWORKS with database required the selection of a session directory which had to be installed on your hard disk as a separate system working directory beforehand.
This step is now no longer necessary. When starting SOLIDWORKS for the first time, activate the HELiOS interface, and login as a HELiOS user. You will then be prompted in a dialogue window to select a session directory.
It is recommended to select the suggested default path. You can, however, use the Select directory option to choose a different directory - for instance, if different users will work with the HELiOS/SOLIDWORKS interface on the same local system. Then close the dialogue.
Via the session directory, the Vault Server interconnected between database and client computer, performs the transfer of HELiOS data for further processing in SOLIDWORKS. Further information can be found in the Session Concept chapter.
Integration of links to SOLIDWORKS in the HELiOS Desktop
In the HELiOS Desktop, select HELiOS Options > Database. On the General tab of the Configuration dialogue window, click the CAD System button. In the CAD System dialogue window, activate the SOLIDWORKS checkbox and confirm with OK.
The SOLIDWORKS tab will then be added to the Configuration dialogue window, enabling you to define the links between SOLIDWORKS and HELiOS.
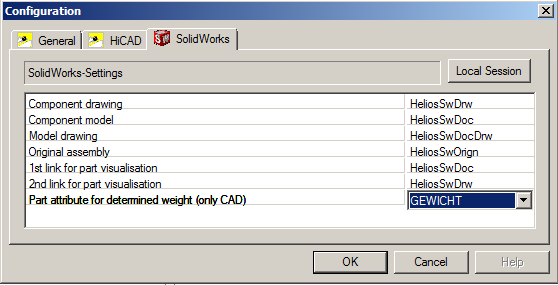
In the configuration the Part attribute for determined weight is also assigned.
Activation in SOLIDWORKS
In SOLIDWORKS,activate the HeliosSw add-in: Select Tools > Add-Ins... . In the Add-Insselection window, activate the HeliosSw checkbox in the Other Add-ins section. If you also activate the checkbox below the Start column, the additional functions will then be available on the menu bar each time the program is launched.

Activate the HeliosSW checkbox.
You can now use the functions for HELiOS in SOLIDWORKS.
Additional notes and settings
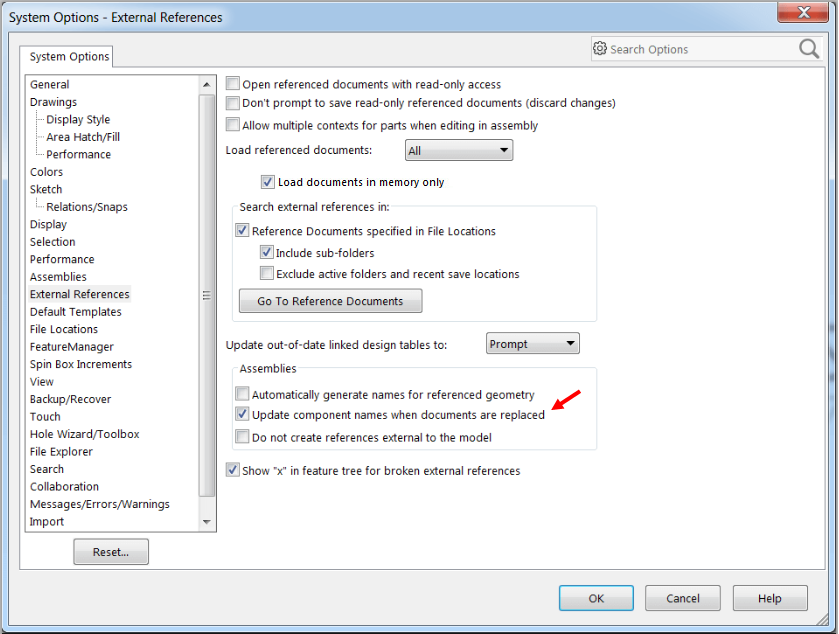
It is recommended to deactivate the SOLIDWORKS system option External References > Update component names when documents are replaced.
This will ensure that the designations used by HELIOS will be preserved and not be accidentally overwritten by the SOLIDWORKS file name due to component name updating when loading or saving.