Project: HELiOS
On the Start Ribbon of the Mask Editor you will find a number of editing functions. In many cases, these behave in the same way as the usual Windows functions::
The following functions are available:
| Function | Description | |
|---|---|---|
|
Clipboard function group |
||
|
|
Cut |
Familiar Windows standard functions to cut or copy marked mask elements to paste them elsewhere. |
|
|
Copy |
|
|
|
Paste |
|
|
|
Undo |
Known Windows standard functions for taking back (Undo) the last step in the Mask Editor or restore (Redo) the last undone step. |
|
|
Redo |
|
|
|
Insert new data field |
Allows you to insert a new data field. Data fields are linked to an attribute and are used to enter text. Select an attribute and confirm with OK. In the Properties window you can set various settings for the data field. These include, for example, field height and length, text length and text color and background color. You also specify the characters allowed for the current data field here.
The new field appears on the screen and can now be positioned freely. |
|
|
Insert new text field |
Text fields serve as a description of a data field. The new field appears on the mask and can now be positioned freely. |
|
|
Insert new button |
After a click on New button a new button is added to the mask. You can recognize it by the colored frame.
If this frame is active, you can change the dimensions or position of the new button directly by using Drag & Drop. |
|
|
Insert new special control |
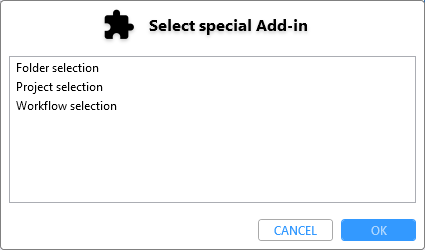
Opens a selection window in which you can choose the desired special element: Folder selection, Project selection or Workflow selection.
|
|
|
Insert new Viewer |
Use this function to add a new Viewer field to the mask (preview window). |
|
|
A predefined selection of images from the installation directory opens, which can be added to a mask. Select the appropriate one and confirm with OK. Alternatively, you can import an image file from another location in the same dialog. To do this, click on FILE SELECTION. The image will be added to the mask and set to active, so that you can drag it directly with the mouse to a desired position. With the additional checkbox option As background you can easily add a background image to the active mask. |
|
|
|
Insert new group frame |
Adds a group frame to the mask to visually frame mask elements.
You can change not only the text colour of group frame headings, but also the background colour and its transparency by selecting a different background colour in the Properties window. Under Colours you can use a colour picker and set a manual value between 1% and 90% for Transparency or use the slider:
|
|
|
Insert new group box |
Unlike group frames (see above), elements in a group box are actually grouped together. |
|
|
Convert to group box |
With this function you can convert a group frame into a group box. To do this, you must first select a group frame with a mouse click and then execute Convert to group box. After that, all elements within the previous group frame will be grouped into an actual group box. |
|
|
Removes the currently selected element (also multiple selections) from the currently edited mask. |
|
|
|
This function allows you to change the attribute stored in a data field via a selection dialogue. |
|
|
|
Align left edges |
With the alignment tools you can align multiple selections of fields to each other. For example, you can align fields that are arranged one below the other on the left edge. Always click first on the element to be aligned and then on the element whose alignment is to be applied to the element clicked first. Multiple selections are also possible: The corresponding alignment property of the last element clicked before calling an alignment function is applied to all previously (+ Ctrl) clicked elements. |
|
|
Align right edges |
|
|
|
Align top edges |
|
|
|
Align bottom edges |
|
|
|
Equal distance, horizontal |
|
|
|
Equal distance, vertical |
|
|
|
Centre, horizontally |
With the Centre functions, elements also multiple selections of fields) can be aligned centred to the horizontal or vertical axis. |
|
|
Centre, vertically |
|
|
|
Equal width |
A multiple selection of fields can be set to the same dimensions. The determining element is usually the last clicked element, which is displayed with a pink border. The other selected field(s) (with blue border) will be adjusted in width (of the determining element), e.g. by clicking on
A click on |
|
|
Equal height |
|
|
|
Equal size |
|
|
|
AutoAdjust width |
|
|
|
Select mask colour |
By calling Select mask colour you can change the background colour of the active mask in the following dialogue window. |
|
|
Copy mask colour |
With Copy mask colour and Apply mask colour you can transfer the exact background colour of a certain mask to another. If you have changed the colour in your active mask and want to assign the same colour to others, you only need to click on |
|
|
Apply mask colour |
|
|
|
Transfer mask colour to texts |
With a click on Transfer mask colour to texts the general background colour of the active mask will be applied to all static elements. This means that if there are descriptive text elements in the mask whose background colour is not the same as that of the mask, these are adjusted to the mask colour with one click. Static elements such as input fields or pop-up selection lists are not changed. |
|
|
Format text |
Click a text box and click A dialog box opens, as in Office applications, in which you can change the font and font size and apply formatting effects (bold, italic, underline). To make changes, you must deactivate the Use default formatting checkbox at the bottom of the dialogue window. |
|
|
Set background colour |
You can change the background color of data fields using this button. The color selection dialogue opens. Confirm this dialogue with OK. Here, too, a background colour can be assigned to a multiple selection of fields. |
|
|
Reset formatting |
A click on Reset formatting restores the HELiOS default display of colours and fonts on the active mask, if changes have been made. |
|
|
Transfer formatting |
You can apply the formatting of a specific element to other elements by first selecting all elements (by CTRL and left-click) that are to adopt a specific formatting and then selecting the element whose formatting is to be applied.
With a subsequent click on |
|
Tab order function group |
||
|
|
If you change fields when filling in a mask with the Tab key, this is done in the order that is displayed by clicking on Start editingat the fields of the opened mask. You can change the order manually by left-clicking on certain fields one after the other, which will be numbered in the appropriate order. With Ctrl + left click on an element you can move it back in the order, with Ctrl+ right click on an element in the row follower it will be moved forward. |
|
|
|
Generate |
When you click Generate, the fields are automatically numbered in sequence. The sequence is based on the positions of the elements in the mask. |
|
|
Displayed language |
In this pull-down menu you can change the displayed language of the mask.
Please note the further notes on translation texts and multilingual text objects. |


|
© Copyright 1994-2021, ISD Software und Systeme GmbH |
Data protection • Terms and Conditions • Cookies • Contact • Legal notes and Disclaimer