Drawing > Others > Extras  > New texture
With this function you are allowed to create and enter own textures in the HiCAD Catalogue Textures. Please note that a drawing must be opened and a 3-D part has to be active.
Furthermore, this function can be used to modify already existing textures.
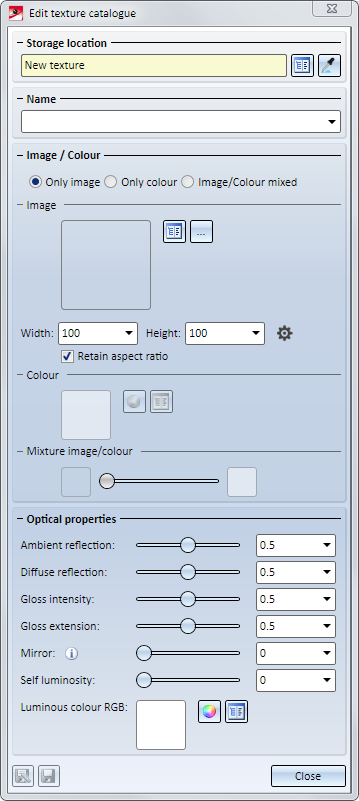
The dialogue window consists of these areas:
- Storage location and name,
- Image / Colour and
- Optical properties.
If the texture should be saved with the current modifications, the following functions are available in the dialogue window below:
|
|
Add as new texture A new texture is created with the selected setting. Choose the table where to enter the texture. A new data record is being created for this texture. User-defined textures can also be filed in Factory Standards Catalogue in the table Example textures under User-defined textures. The texture image and texture icon are automatically saved in the HiCAD folder CATALOGUE > TEXTURES > IMAGE. |
|
|
Overwrite texture in catalogue Choose the table being the storage location of the given texture. The data record for this texture is being overwritten with the changed settings. This may also applies to the texture image and icon in the HiCAD folder CATALOGUE > TEXTURES > IMAGE. |
 Please note:
Changes on catalogues and tables may affect other HiCAD/HELiOS user, e.g. if the catalogues lie on a server and different co-workers have access. Thus ensure a current backup frequently, particularly before changes/upgrades.
Please observe the notes for creating new catalogues and tables for textures in the Online Help of the Catalogue editor. You can find the information in the section Textures.

Storage location
Change existing texture
If you want to change an existing texture from the catalogue, you have two options:
- Click on the symbol Open texture from catalogue
 and choose the table and data record directly from Textures of HiCAD Catalogue.
 - Click on the symbol Pick texture from part
 and choose a part already textured.
Subsequently, catalogue and name of the chosen texture are being shown. Change the settings and save the texture with the function Overwrite texture in catalogue  .
.
Create new texture
- If you want to derive a new texture from an existing one, choose - as described above - the texture first. Enter the name of the new texture in the field Name.
- If you want to define a new texture, it is quite enough to enter a name for the new texture.
Define the required settings and save the texture with the function Add as new texture  . The picture for the texture pattern and texture icon are created automatically in the HiCAD directory CATALOGUE > TEXTURES > IMAGE.
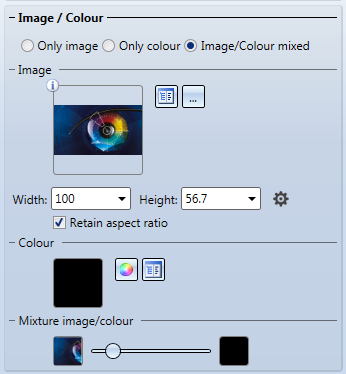
Image / Colour
Textures can be colours or images or a mixture of colour and image. Activate here the required option first.
Image
The pictures for the texture pattern must be JPG files (jpg, jpeg) sein. We recommend a size of 2000x2000 pixels as reference value. For the image selections, two options are available:
- Select an existing texture pattern from the catalogue in Textures . For this, click and select the according table and data record with the texture pattern.
- Select any desired JPG file. Click on
 and select the required image file on your computer, a server or similar.
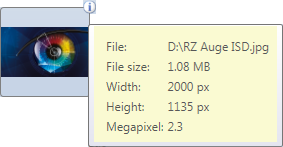
A preview of the image is displayed. By clicking on the i symbol top right in the preview you can show further information to the chosen image.
The size of the texture can be set in the fields Width und Height . If the aspect ratio should be maintained, activate the respective checkbox.
With a click on Loading images from file  it can be determined how the size is being treated of an image loaded from a file instead of a catalogue.
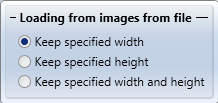
- Keep specified width
The entered width will be maintained. The loaded image will be scaled evenly. - Keep specified height
The entered height will be maintained. The loaded image will be scaled evenly. - Keep specified width and height
The fields width and height will not be changed, i.e. the loaded image will be scaled on the entered size and perhaps rammed and stretched if necessary.
Colour
The colour can be set directly by clicking on

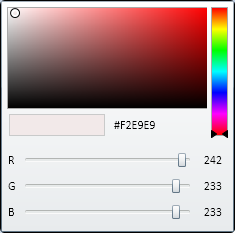
Alternatively you can choose the colour from HiCAD catalogue Colours. For this, click on and select the required colour.
After selecting the colour, a preview of the colour is shown in the dialogue window.
Mixture Image / Colour
If the option Mixture image / colour is active, you can adjust the mixture with a regulator. The result is visualised on the active 3-D part in the drawing.
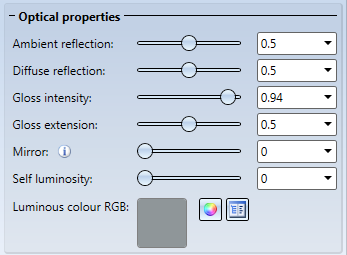
Optical properties
Different optical properties can be assigned to a texture. These can be either adjusted by a regulator or by an explicit value input.
- Ambient und diffuse reflection
determines degree of reflection for ambient and diffuse reflections. The higher the ambient proportion is, the stronger the surrounding light is being reflected. Thus, objects appear paler and less vivid. - Gloss intensity, gloss extension
determines size of highlights. For semi-gloss textures you should use small values, for high-gloss textures relevantly higher values. - Mirror
determines percentage share for mirroring reflection. If panoramas are used in simulating environments and the textures have to mirror the environment, the value of the mirror must be higher than 0! - Self luminosity
determines whether a texture is also visible if no other source of light is involved. You are allowed to choose a luminous colour if the value of self luminosity is > 0.
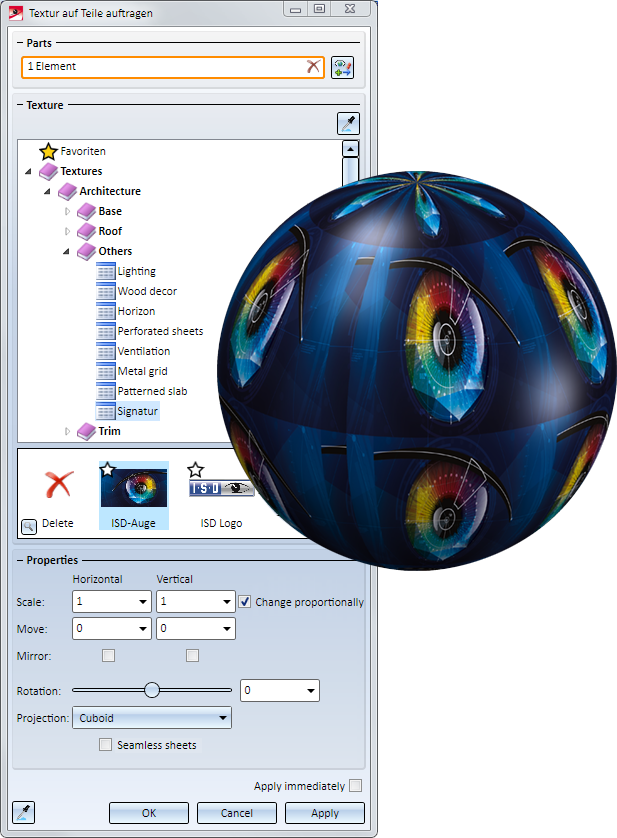
Example
In the following example, we assume that a drawing is loaded and a 3-D part is active. We select a cuboid measuring 400x400x600.
The depicted ISD logo (2000x1135 Pixels) should be used as texture and assigned to the catalogue Textures > Architecture > Others to the table Signature .

In the dialogue window of the function New texture we proceed as follows
- Storage location
- Since we want to create a new texture, we do not have to select in the catalogue yet.
- As name of the new texture, we enter ISD-Eye .
- Image / Colour
- In our example, image and colour should be mixed, thus we activate the option Mixture image / colour.
- We define the size 200 x 200 and in the settings we activate Keep specified width.
- Now we load the ISD logo. As already mentioned, its actual size is 2000x1135 Pixel. By means of the previous setting, the size is being recalculated to the texture size which is 200 x 113.5.
- We select the mixture colour, e.g. dark blue (#131147, d.h. RGB 19/17/71). Then, we mix image and colour per regulator.
- The optical properties are selected as depicted.
The preview in the drawing then looks like this:
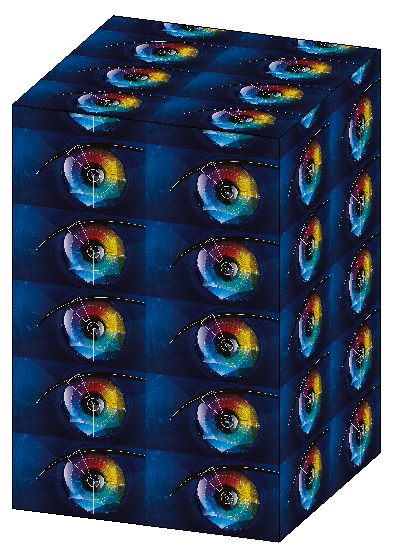
- We save the new texture using the function Add as new texture in the catalogue Textures > Architecture > Others in the table Signature .
Thus, the texture ISD-Eye is available for assigning textures with the function New Texture 

Colour Settings • Colour Editor • Drawing Colours • System Colours, Special Colours • Assign / Change Textures (3D)