Create Video of Simulation
'Simulation' docking window > Create video 
Use this function to create a video of a calculated simulation in AVI format . Proceed as follows:

- Select the directory to which you want to save the video, and enter a file name. The file extension will automatically be .AVI.
- Specify the number of frames per second.
- Specify the image size for the video.
- Define the time period for the simulation of which you want to make a video. If you want to make a video from the complete simulation, activate the Complete animation checkbox.
- At the start and at the end of the simulation a still image can be shown before (Pre-video time) and after (Post video time) the video. Specify the duration of the still images.
- Activating the Repeat checkbox makes further options available. You can then specify how many times the simulation is to be repeated in the video. The following directions are possible:
|
|
forward
|
|
|
backward |
|
|
forward/backward
|
|
|
backward/forward
|


For the directions forward / backward and backward / forward you have the option to add an additional pass of the simulation after the last repetition by activating the corresponding checkbox. The purpose of this option is to implement no complete repetition, but to perform a re-run of the created simulation and stay in the "End" position - i.e. to make a "half repetition", so to speak.
Additional still images can be inserted between the individual repetitions.
- Enter the desired data and click OK.
- The Videocodec dialogue window will be displayed. Select a codec for video compression.
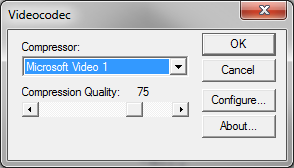
Available for selection are all codecs that have been installed on your computer. If you require different codecs, you need to install them as well. Please note that the codecs are not supplied with HiCAD!
Make the required settings (depending on codec) and close the window with OK.
- As soon as you close the window with OK, the video will be generated.
 Please note:
- If a simulation has been defined, but has not been calculated yet, the function will be greyed out.
- For the standard codecs, the frames per second have been preset by the ISD in such a away that an optimal video quality is achieved.


The 'Simulation' Docking Window (3-D) • Simulations: Examples (3-D)