Project: Steel Engineering Drawing Management (BIM-PDM)
In contrast to the previous examples, assembly drawings and workshop drawings (instead of detail drawings) are to be created here.
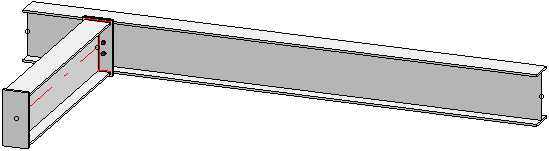
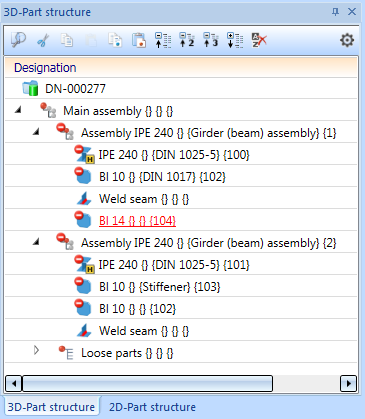
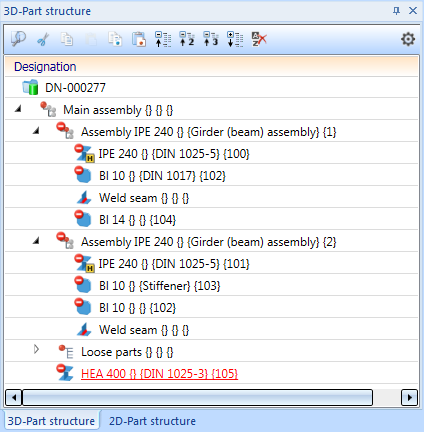
Let's take a look at the following construction:
With the help of this example, the functions
 Expand, Selection via HELiOS und
 Revision index of a production drawing
will be explained in this chapter.
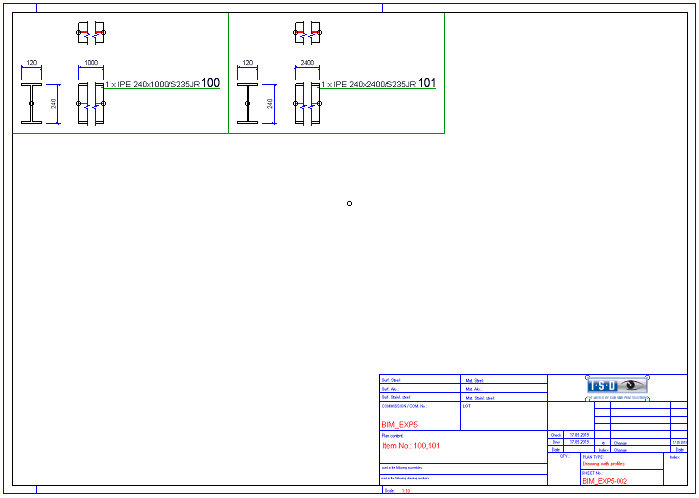
Step1: Create project / model drawing


 (we use the ISD default settings for Steel Engineering here)
  .
.
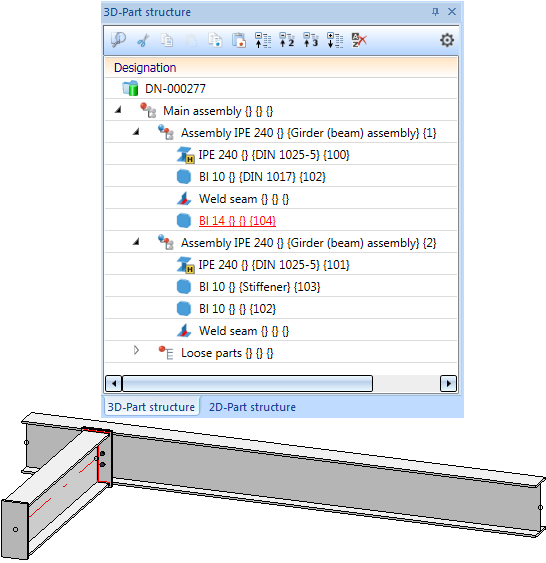
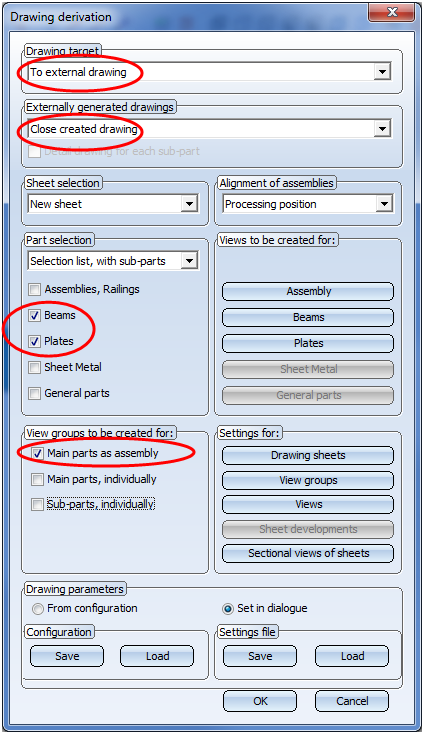
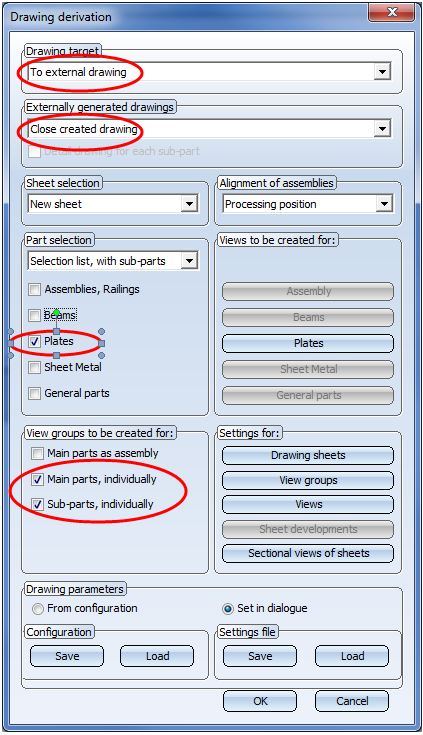
Step 2: Create the assembly and Workshop drawings
Now, the assembly drawings and one workshop drawing for each beam and plate are to be created.
Note:
Since we want to create workshop drawings (instead of detail drawings) which contain only beams or plates, respectively, we use this function instead of automatic drawing derivation.
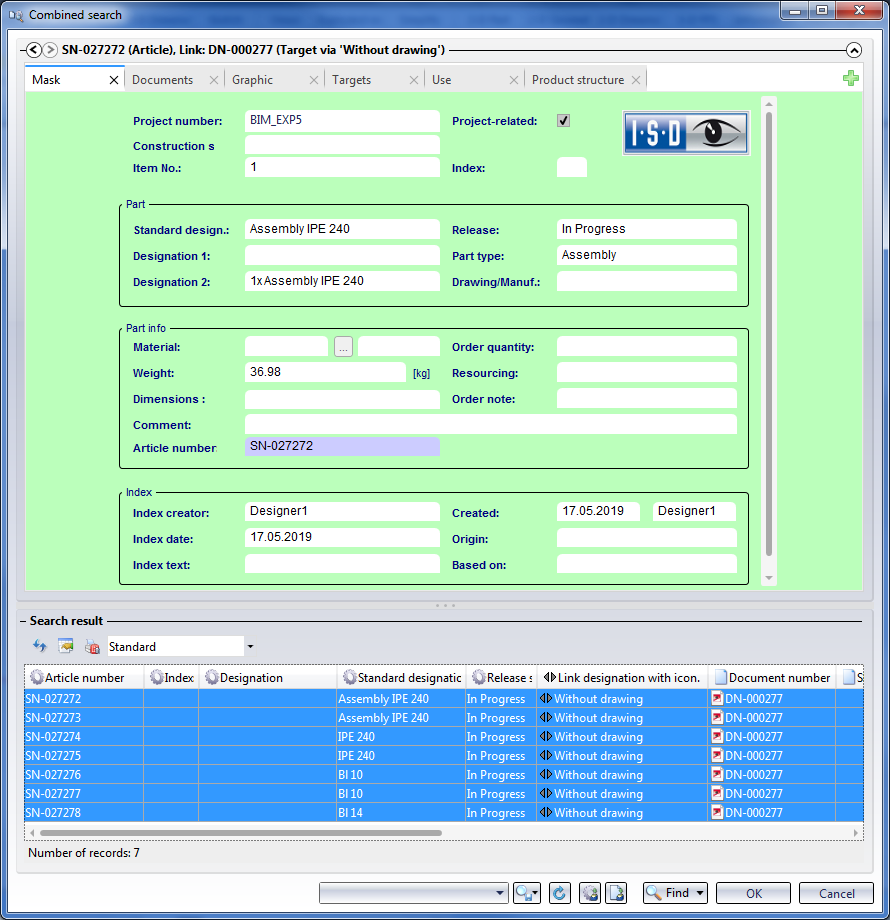
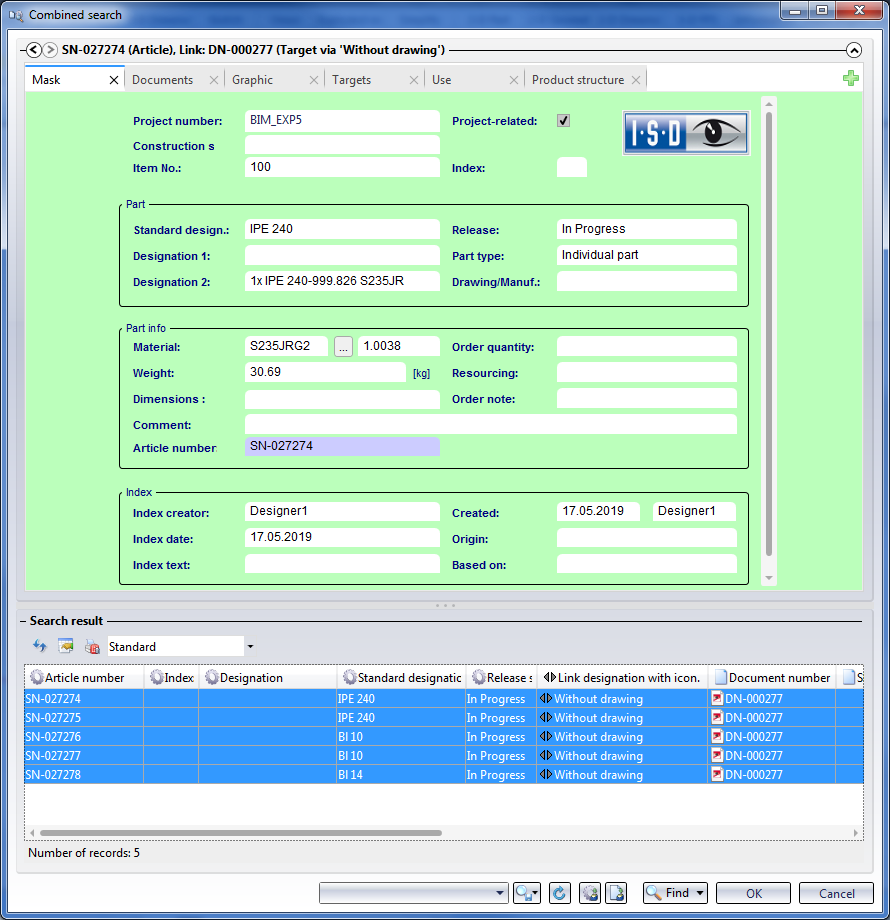
 . Mark all entries and click OK.
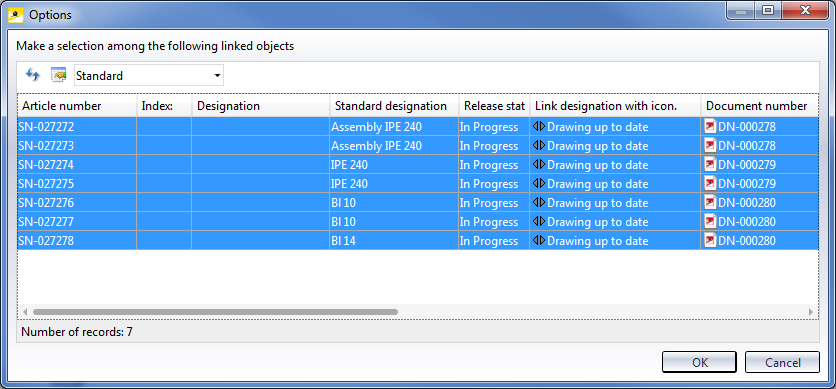
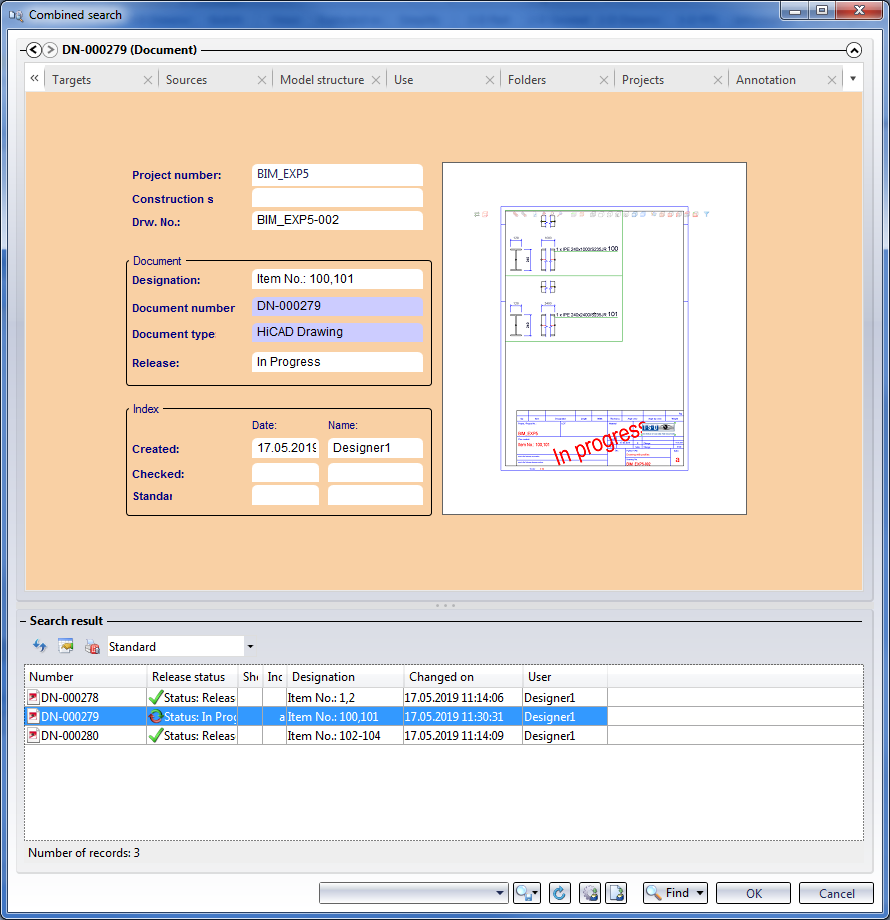
Now, add another beam to the model drawing, - e.g. for a later connection. This new beam is to appear only in the workshop drawing for beams. In this case it will suffice to create a new revision index for the workshop drawing for beams with the Revision index of a production drawings function. You can then add the new beam to the workshop drawing with the new index and re-release the drawing.
Step 3: Add another beam to the model drawing
(we use the ISD default settings for Steel Engineering here) .
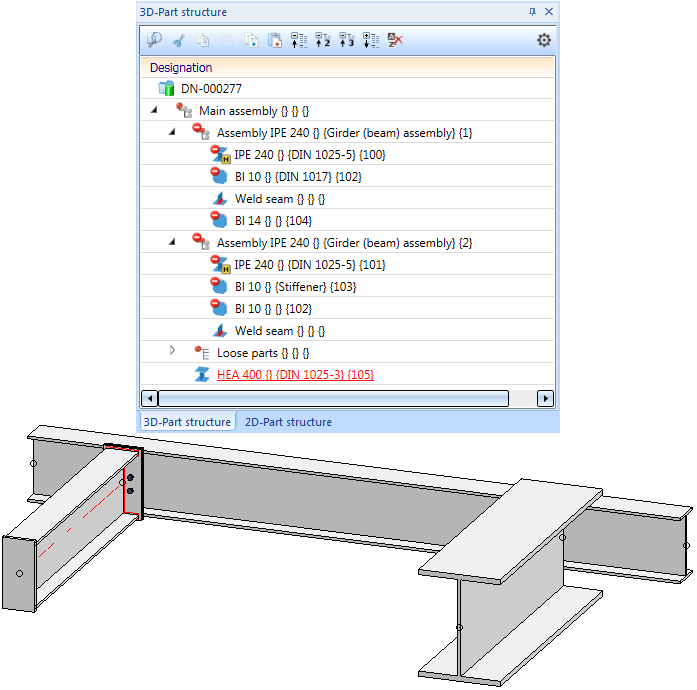
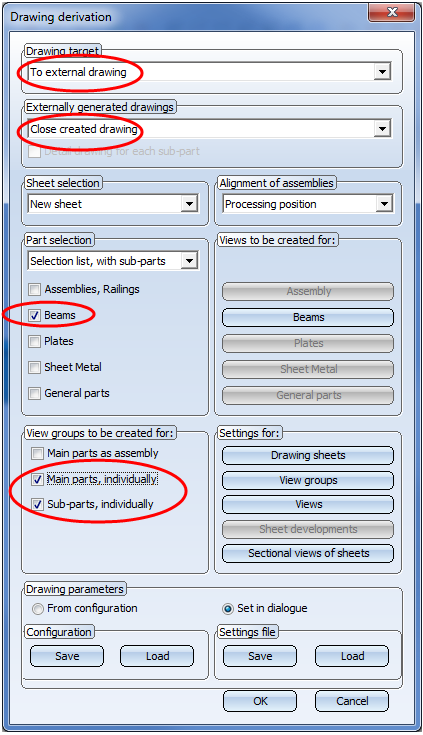
Step 4: Expand workshop drawing for beams
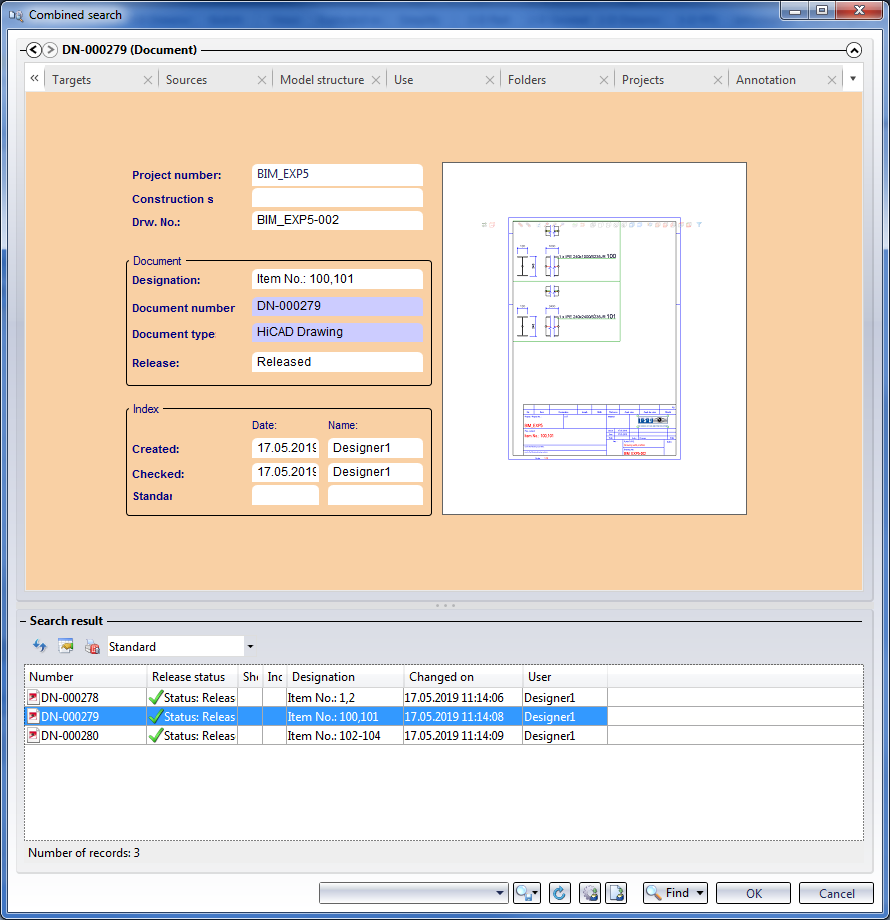
The new beam is to appear only in the workshop drawing for beams. In this case it will suffice to create a new revision index with the Revision index of a production drawings function:
 > Revision index of a workshop drawing . In the selection window, choose the workshop drawing for the beams and click OK.
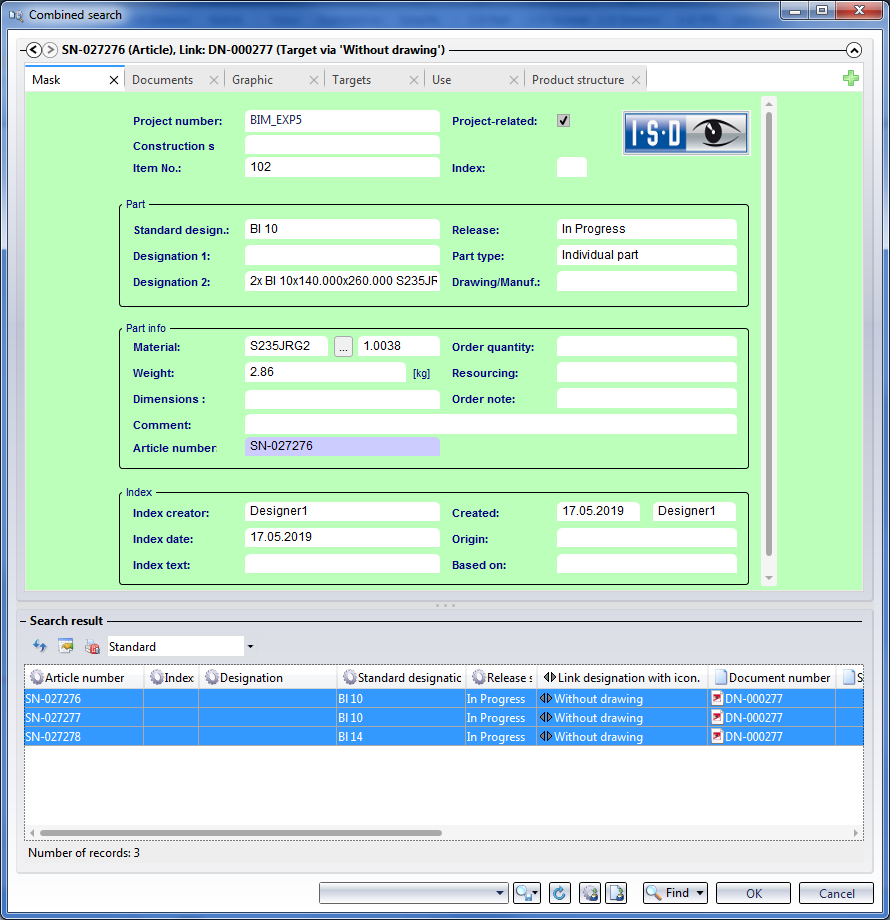
>Selection via HELiOS . 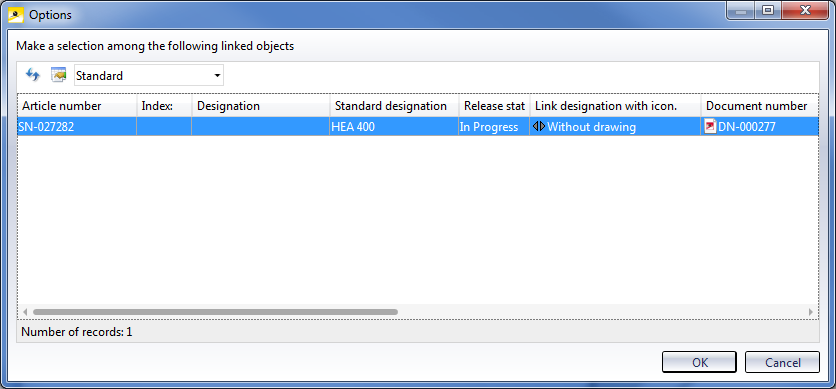
, marking the workshop drawing and clicking OK. 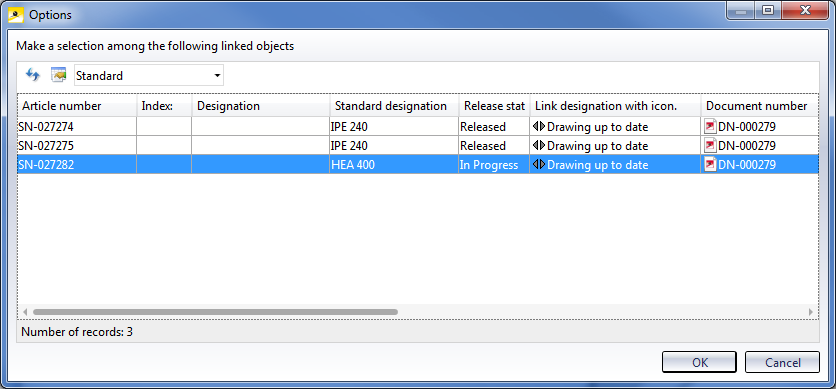


Requirements for a Smooth Operation (ManBIM) • Pre-planning of the Construction Process (ManBIM) • Overview of Functions (ManBIM)
|
© Copyright 1994-2019, ISD Software und Systeme GmbH |
 .
.