Project: HiCAD Basics
Part Libraries
Frequently required parts can be grouped in libraries that can
be integrated into the screen menu. You can then use a pop-up menu to
conveniently insert or execute parts belonging to the library.
Create
part library
Drawing > Insert Part > User Library > New part library 
To create a new part library:
- Select
Drawing > Insert Part >User library
 .
.
- In the User library menu,
choose the New part library
 function.
- Enter the name
of the part library including the file
group, e.g. C:component1. The library
is stored in the directory defined by the file group. Each library has
three files, NAME.DAT, NAME.MNU and NAME.MAC, with NAME being the specified
library name. In addition, the following files are stored in the specified
file group:
- the part
files (in 3-D: .KRA, in 2-D: .FGA)
- in subdirectory
\usrimg the preview images of the parts
in EMF format.
- Next, define
the designation of the library, e.g. USER1.
This designation is used to select libraries in the User library pop-up menu.
- The Part
library pop-up menu is displayed.
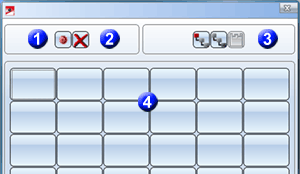
You can now:
The bottom section of the
menu (4) displays the parts that exist in the library as preview
symbols.
 Remember the part files
and the preview images when saving your libraries!

Enter
part
Drawing > Insert Part > User Library ... > 
To enter parts into a part library, proceed as follows:
- Open
the part library, and click the
 .
.
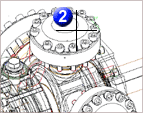
- Identify the
part in the drawing.
- Specify the position
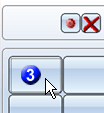
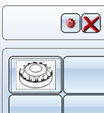
of the part in the library by clicking the desired field in the pop-up
menu. Enter a help text, e.g. the part name, for the selected menu field.
If icon help texts are activated, this text is then displayed as a short
description for the menu field settings, e.g. cast part.
- In the drawing,
select a graphic as a menu field annotation. The graphic must not be shaded!
- Repeat steps
2 to 4 for more parts or choose END to end the part selection.

Delete
part
Drawing > Insert Part > User Library ... > 
To remove a part from a library:
- Open
the part library.
- Click the
 icon.
icon.
- In the pop-up-menu, click the part you want to delete.

Insert
part, from library
Drawing > Insert Part > User Library ...> 


To insert a part from a library into the current drawing:
- Open
the part library.
- Choose whether
you want the part to be inserted as a main part
 ,
a sub-part
  or a 3-D steel engineering series beams
  .
.
- Click the icon
with the part. An enlarged preview of the part is displayed.
- Use the point
options to specify a fitting point on the part and its position
in the current drawing.


User Libraries
• Insert Existing Parts
|
© Copyright 1994-2019, ISD Software und Systeme GmbH
Version 2402 - HiCAD Basics
Date: 06/11/2019
|
> Feedback on this topic
|
![]()
 .
.
![]() Remember the part files
and the preview images when saving your libraries!
Remember the part files
and the preview images when saving your libraries!![]()


![]()
![]()
![]()
![]()
