Drawing > Reference > Reference Part, Save, Detail drawing 
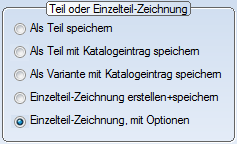
If this option is active when saving 3-D parts, the part is not only saved as a KRA file, but also as a detail drawing with the file name extension .SZA.

In contrast to the Save as detail drawing option field, however, you can also provide additional settings here, e.g. number and type of saved views, desired coordinate system etc.
You can use the Default parameters button to restore the default settings at any time.
 Please also note the information given in the Errors While Saving Parts and Drawings topic!
|
|
Insert drawing frame
|
|
|
Show parametric dimensions
|
|
|
Create workshop drawing for Steel Engineering parts
|
|
|
Create sheet development for sheets
|
|
|
Leave detail drawing open after creation
|
|
|
Coordinate system
|
|
|
Set main scale...
|
|
|
Set drawing frame...
|
Up to 6 different views can be saved in the detail drawing. First, select the number of desired views.
You can then define the projection, view name and visualisation in the view for each view number.
You can also define for each view whether HiCAD executes the Automatically align dimensions function when generating the view . This function automatically corrects the arrangement of 3-D dimensions in the view, if required, with the aim of avoiding collisions of dimensions as far as possible.

3-D View Functions • Coordinate Systems • Drawing Frame and Title Block • Errors While Saving Parts and Drawings
|
© Copyright 1994-2018, ISD Software und Systeme GmbH |