> Pipe Class Editor
Plant Engineering > Part Data Tools > EditCL > Pipe Class Editor
This tool enables you to create new pipe classes and process existing pipe classes.
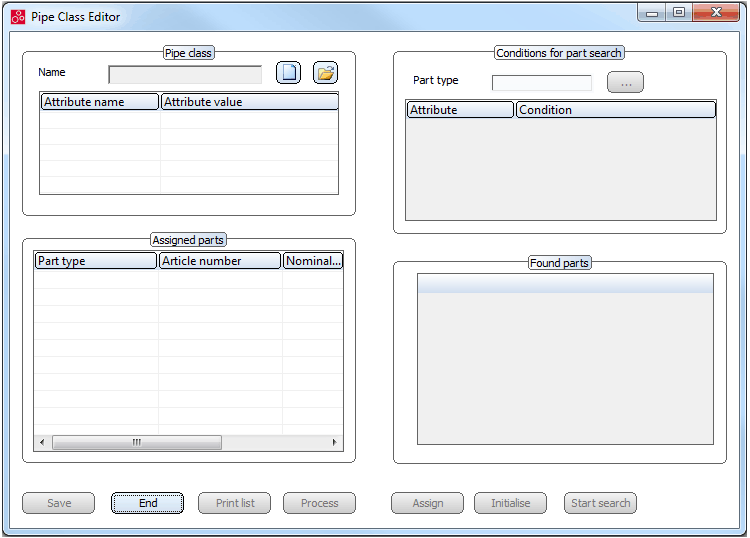
After calling the function, the Pipe Class Editor dialogue window is displayed:
 The Pipe Class Editor is only available if the HiCAD Catalogue has been set as part data source (see Plant Engineering Settings, Part selection).
Plant Engineering > Part Data Tools > EditCL > Pipe Class Editor
To create a new pipe class, proceed as follows:
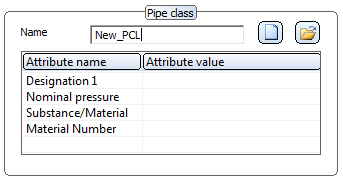
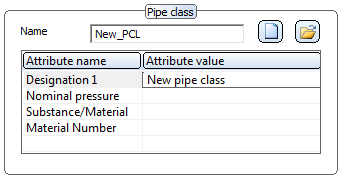
 icon and enter the name of the new pipe class into the Name field.
 icon at the top right of the dialogue window and select a part type. HiCAD displays a list of the corresponding part attributes.
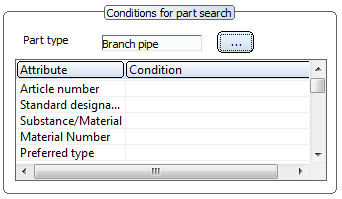
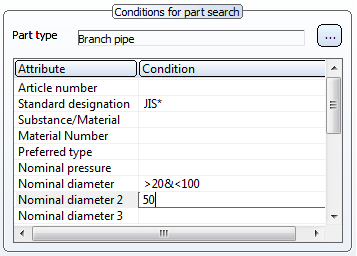
You have the option to set filters for part search by specifying particular search criteria. To assign a search criterion to an attribute, double-click the corresponding row in the Conditions column and enter the search criteria, which may contain the common wildcard characters ? (for an arbitrary character) and * (for an arbitrary sequence of characters). Valid search criteria for numerical values are the operators <, >, <=, >=, != . Furthermore, conditions can be linked by & (logical AND).
You start part search by clicking the Start search button. All parts fulfilling the specified conditions will be listed as Found parts.
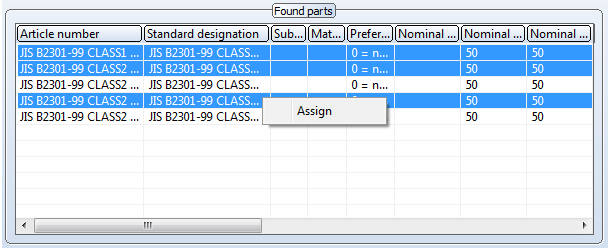
To remove parts from the list, select the corresponding row, (multiple selection with CTRL key). Right-click one of the selected and highlighted items and select Remove in the context menu.
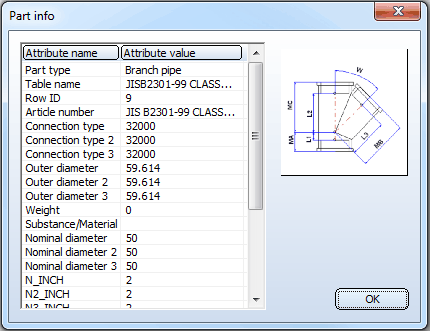
To display part information, right-click the corresponding row and select Display.
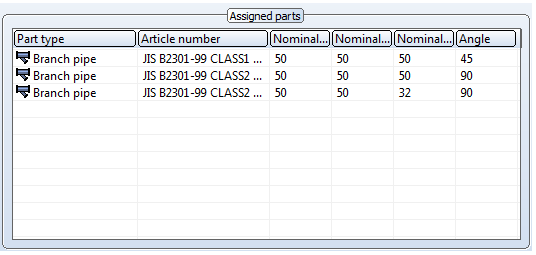
If you want to assign more parts via a new search, click the Initialise button to empty the result list. Then proceed as described in steps 4 ff.
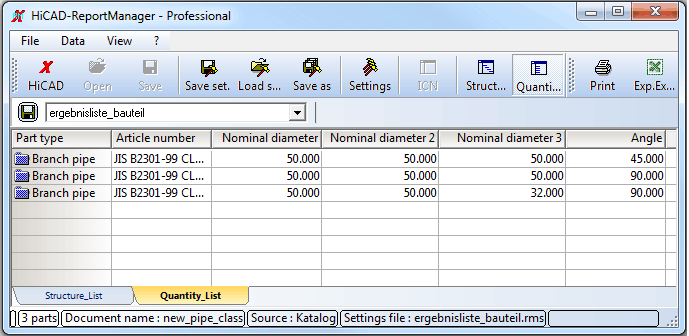
The Print list button offers the option to output a list of all assigned parts. The list is displayed in the HiCAD Report Manager. Use the functions of the Report Manager to save the list. Extensive information on the operation of the Report Manager is provided in the Online Help.
Plant Engineering > Part Data Tools > EditCL > Pipe Class Editor
To process a pipe class, click the Load pipe class  icon in the Pipe Class Editor and select the corresponding XML file. Preset is the HiCAD subfolder \PlantParts\Pipeclasses. Click Open.
If you want to change the file, click the Process button. You have now the following options:
In this context please note that the file can only be changed/edited by one process. Messages such as
Process cannot access file D:\HiCAD\PlantParts\PipeClasses\t2.xml, as it is currently being used by another process.
means that the file is currently used by another process and is therefore locked.
The locking of the pipe class file is only removed if


Part Data Tools (PE) • Plant Engineering Functions
|
© Copyright 1994-2018, ISD Software und Systeme GmbH |