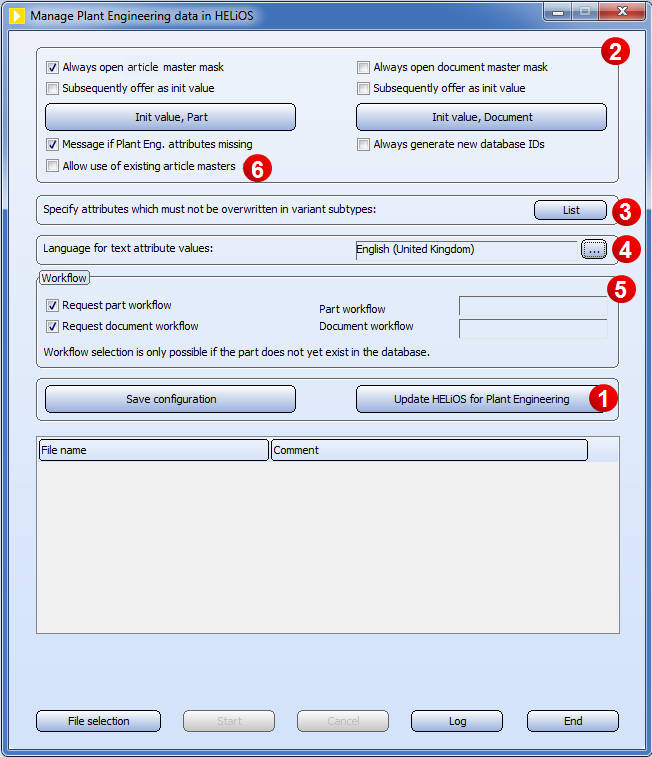
If no update is necessary, or if an update was successfully performed, the program DbPlantDataImport displays the Manage Plant Engineering data in HELiOS dialogue window. The following tasks can then be performed:

Click the File selection button to select the files to be imported.
Further buttons are:
|
Save configuration |
When you click this button, the current settings of the dialogue window will be saved to the file DbPlantDataImportConfig.xml in the SYS directory of your HiCAD installation. These will be the default settings when you re-start the program. |
|
Start |
Starts the import. Document and article master data are created or updated, and, if required, copied to the Vault Server. In the process, the program will attempt to enter the master data without any interactions with the user. If this is not possible, you will be prompted to enter the required data. Examples of this are the document mask, the part mask and the Workflow selection. Activate the Always open article master mask or the Always open document master mask checkbox if you want the mask to be displayed for each imported element. |
|
Log |
The actions performed with the DbPlantDataImport.exe program will be recorded in the log file DbPlantDataImport_Protocol.txt saved to the TEMP directory of your HiCAD installation. Click the Log button to view the contents of the file.
|
| End | Closes the program. |
The updating of the database is the first step of the HELiOS database configuration. To do this, click the Update HELiOS for Plant Engineering button in the dialogue window.
The following adjustments will be performed:
To automate the import, i.e. to avoid manual data input by the user, Workflow and attribute values can be initialised (i.e. assigned preset values).

 The Allow use of existing article masters checkbox is important if you want to use already existing article masters for the synchronization of part variants (VAA files) or fixed parts (PAA files) with the HELiOS database. Further information on this option can be found in the Utilisation of Existing Part Masters topic.
Always open article master mask / document master mask
If you activate these checkboxes, these masks will be displayed for each imported element. In the masks you can then also change the assignment to folders or projects.

Init value, Part / Document
If you click the Init value... buttons, the dialogue for attribute value initialisation will be displayed. These will be applied to every element during import.
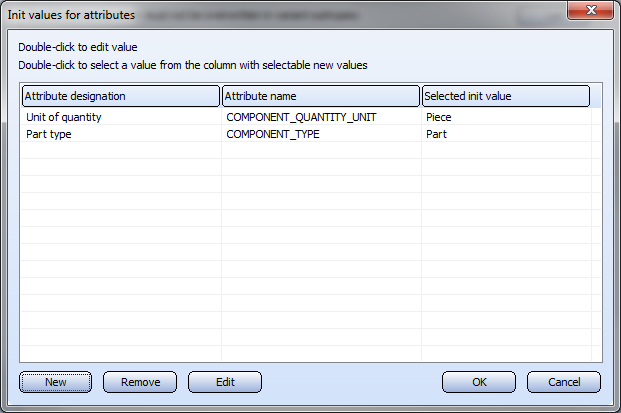
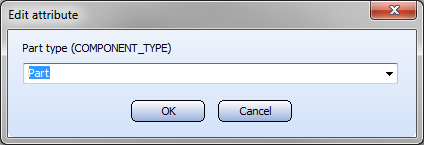
In the dialogue window the attributes and their texts are shown as entered into the mask (apart from a few exceptions). For attributes of the type REFERENCE, the references must always be specified.
Use the New and Remove buttons to add or remove attribute values. Click Edit to change the values.
Subsequently offer as init values
Activating this checkbox makes editing safer and more convenient, by taking over the values from an example. If the checkbox is active a dialogue will appear after input or editing of master data, allowing you to use the data you have just entered/edited as an init value for future data inputs. The dialogue corresponds to that for attribute value initialisation, but contains the additional Selectable new value column.
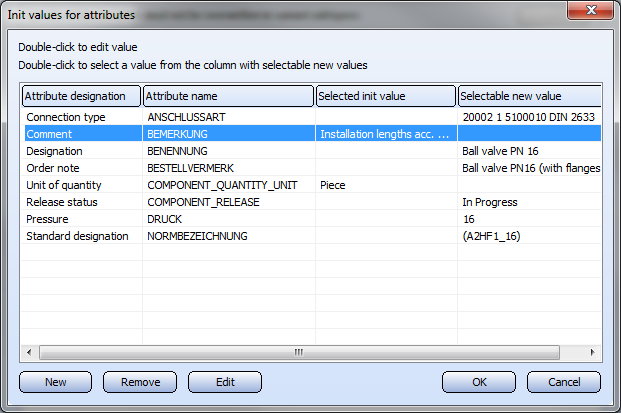
In the above example the part attributes assigned during the last input are listed. No predefined values have been selected for the other rows - the Selected init value column is empty. You can use the New, Remove and Edit buttons to specify predefined values. Or you can apply a value from the Selectable new value column by double-clicking it.
Always generate new database IDs
If this checkbox has been activated, the database IDs saved in the archive files (VAA or PAA files) will not be used for part data import. Instead, newly generated database IDs will be used, which will then automatically be transferred to the corresponding archive files. This means: The database IDs that previously existed in the archive files will be overwritten with the new ones!
This option will be deactivated again when you restart the DbPlantDataImport tool.
 This option should only be activated if a previous attempt of the part data import failed, and a database error message was issued, saying that one or several document or article masters could not be created.

This option enables you to exclude attributes from processing. To do this, click the List button.
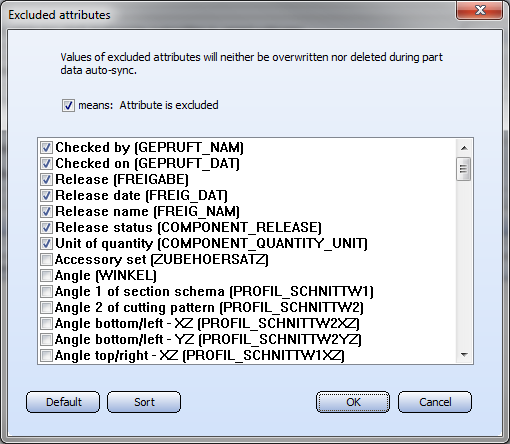
All attributes that you mark in the list will be excluded from the processing through the part data auto-synchronisation, i.e. for each of these attribute the following applies:
If you open the dialogue, the list will always be sorted in such a way that the marked attributes will be placed at the top in alphabetical order. All remaining attributes can be found below, also in alphabetical order. This sorting can be restored at any time by clicking the Sort button, e.g. after a marking of additional attributes.

As of Version 2014, the part files (.vaa and .paa) supplied with HiCAD will contain text attributes in several languages.
Click the  button in the Language for text attribute values field to select the language in which you want the attributes to be read out.
Before importing the data of the corresponding part file to the database, HiCAD checks which languages the file can actually supply. If the chosen language is not included, the language selection dialogue window is displayed, enabling you to choose a language that exists in the file.
The chosen language applies to the current file. It can, however, also be used as a default, by activating the corresponding option in the dialogue.

If the selection of a Workflow is required – because HELiOS offers several Workflows – this selection will be automatically applied to the Configuration and used for further data input. If you want the program to ask for the Workflow each time, activate the Request part workflow or Request document workflow checkbox.
Click the File selection button to select the files to be imported. Choose the folder and the desired files. A multiple selection of archive file lists (*.lst) is also possible. All VAA and PAA files contained in the list files will then be shown and are ready for import into the database.
The file list can be edited by right-clicking an item of the list and selecting the desired function from the context menu:
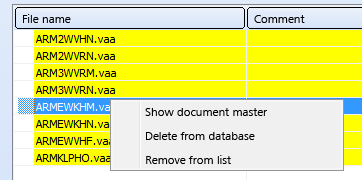
The functions Delete from database and Remove from list can also be applied to multiple selections.

Important Notes on Updates (PE) • Variant Update (DbPlantDataImport)
|
© Copyright 1994-2018, ISD Software und Systeme GmbH |