3-D Standard > New > C-edge sweep 
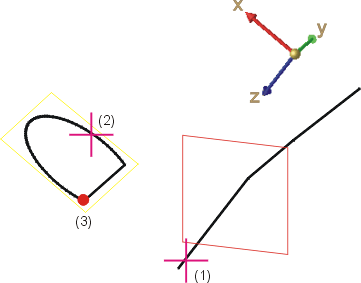
The intention is to place a cross-section (2) on the guideline (1). You want the cross-section to be rotated before it is placed.

(1) guideline, (2) sketch for cross-section, (3) point for rotation
Proceed as follows:
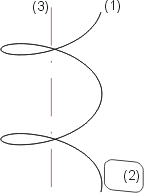
The image below shows a spiral with (1) guideline, (2) cross-section, and (3) edge for direction

The image shows a spiral with guideline (1), cross-section (2), and (3) edge for direction
 When placing a free cross-section, the (first) guideline must always intersect with the cross-section plane; this applies in particular in cases where the guideline is exchanged via the feature log. If the new guideline does do longer intersect with the cross-section plane (e.g. because it has been shortened), the sweep body creation will not be possible.

Place Circular Cross-Sections (3-D) • C-Edge Sweep (3-D) • C-Edge Sweep Creation Hints (3-D)
|
© Copyright 1994-2018, ISD Software und Systeme GmbH |