2-D Part > Standard Parts > Bolting
You use this function to bolt two or more main parts or sub-parts to one another.
If you do not want all parts between the point for the fitting direction and the bolting end to be bored, you can select specific parts. Otherwise, you can right-click to access the selection menu for bolt connections.

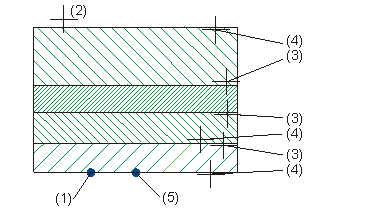
(1) Point for insertion direction, (2) bolting end, (3) Processing start, (4) Processing end, (5) Fitting point
The Bolting menu has three tabs:
Parts: Here, you select the bolting components.
Options: Here, you can specify a bolt projection length (for a bolt with nut) and a minimum bolt depth.
Settings: On the third tab, you can predefine frequently required bolt connections and save them as templates.
The standard part is displayed at the cursor.
After inserting a bolting, you can insert other boltings without exiting the menu. The selected bolting is displayed again at the cursor, and you can specify a new fitting point. You can repeat this an unlimited number of times. Right-click to end the process.

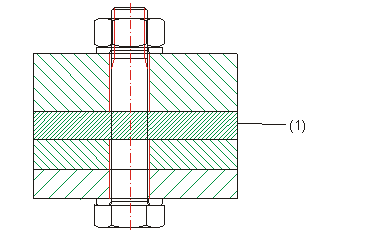
(1) Part is not bolted
2-D Part > Standard Parts > Bolting > Edit
 ![]()
You use this function to change the components of a bolting in the selection menu. To do this, identify the bolting, change the components and then click OK to exit the selection. The changes are executed immediately.
2-D Part > Standard Parts > Bolting > Move
 ![]()
Activate this function to move a bolting. Then identify the bolting and specify a new fitting point.
You are then offered a copy of the bolting for fitting. By right-clicking, you can change the components in the selection menu for bolt connections.
2-D Part > Standard Parts > Bolting > Delete
 ![]()
This function deletes the identified bolting.

|
© Copyright 1994-2018, ISD Software und Systeme GmbH |