The HELiOS/ AutoCAD interface is created via the HELiOS installation DVD. It can be installed together with the HELiOS Desktop, or separately at a later time.
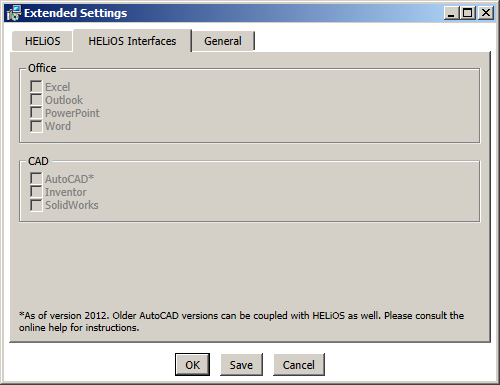
In the Ready to install HELiOS ... dialogue of the HELiOS Installation Wizard, select Extended Settings > HELiOS Interfaces, and select the systems to which you want to create an interface.
Further information can be found in the Installation Notes guide that is supplied with your installation DVD.
 Please note:
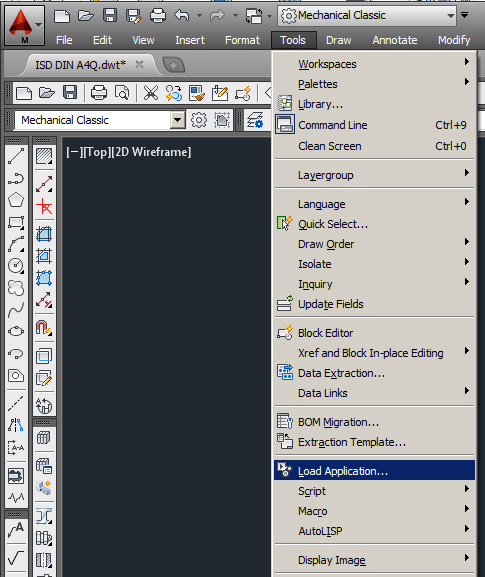
After installing the AutoCAD interface from the HELiOS DVD, an explicit activation of the Add-In in AutoCAD may be required.
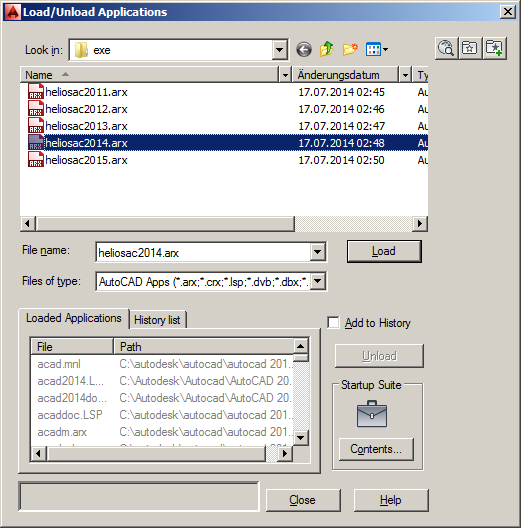
For AutoCAD 2013 (and following versions) select Tools > Load Application.... In the displayed dialogue window, select and add the HELiOS Add-In heliosac2014.arx.
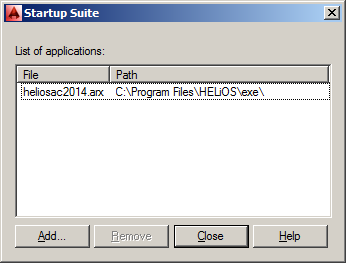
To have the Add-In automatically loaded upon each AutoCAD start, click the Contents… button to include it in the start group.
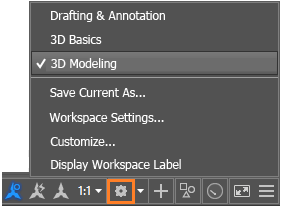
In later versions, e.g. AutoCAD 2018, it can happen that the HELiOS menu will not be displayed immediately after the start if no "matching" workspace has been activated in AutoCAD. In this case you need to use the cogwheel symbol at the bottom right of the AutoCAD screen and activate a workspace, e.g. 3D Modeling.
After the loading of the Add-In in AutoCAD and the successful login in HELiOS, the window for the configuration of the local session will be displayed.
 Please note:

|
© Copyright 1994-2018, ISD Software und Systeme GmbH |