"Civil Engineering functions" docking window > Steel Engineering > Connections > Front side to front side > Front plate > Purlin joint, 2 plates with mitre cut acc. to DAST IH (1201)
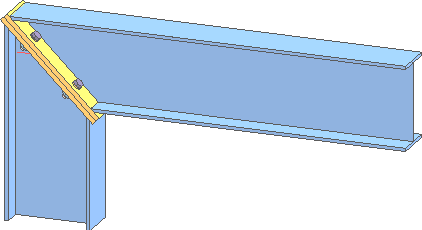
The function connects two beams by means of two rigid, bolted front plates. These can either be fitted flush or with top, bottom or lateral projection. The bolting can be aligned symmetrical or unsymmetrical. If required, the beams are automatically be shortened, lengthened or mitred in the process.
 Two assemblies will be created, each of them containing the beam and the corresponding plate. The bolting will be assigned to the first identified beam.

Configurations for purlin joints can be saved, which enables you to access your individual configurations at any time afterwards.
The configuration takes place via the tabs of the dialogue window.
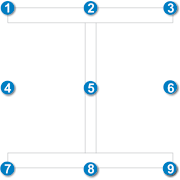
Selected parts
This tab provides information about the previously identified beams, e.g. designation, material, dimensions etc. Value inputs or modifications are not possible here.
Front plate
In this tab you specify the settings for the plate.
|
Clearance Here you enter the value fore the clearance, i.e. the distance of the plate from the second identified beam. |
|
Semi-finished product The plate can consist of sheet metal or flat steel. Click the |
|
Geometry You can choose between three methods for the definition of the geometry (size) of the plate. Select the desired method from the Definition listbox.
Furthermore, you have the following options for the positioning of the plate: Front plate x / y
Beam x / y
If you have specified an offset, the plate will be moved accordingly.
|
|
Boltings Here you can define the bolting set, e.g. type of the bolt, bore diameter etc. Click the |
|
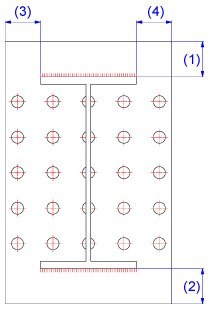
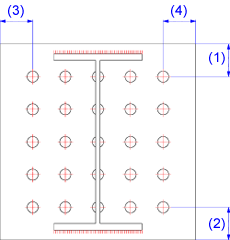
Grid The bore grid determines the position and arrangement of the bores on the end plate.
|
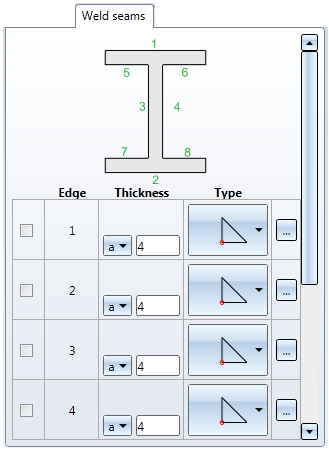
Weld seams
Activate the corresponding checkboxes to select the edges on which you want to place the weld seams. You can select a weld seam type for each edge and specify the thickness of the seam. Furthermore, you can define weld seam annotations for all edges to be welded together. Click the  , symbol to open the Weld seam dialogue. It is operated largely in the same way as the dialogue of the 3-D function Insert weld seam symbol.
After entering all required data, you can fit the purlin joint. If you select Apply, the purlin joint will be fitted, but the dialogue window will remain open. If you select OK, the purlin joint will be fitted, and the dialogue window ill be closed. If you select Close, the changes will be discarded and the window will be closed without fitting the purlin joint.
![]()
Related Topics
Connections + Variants (3- SE) • Dialogue Window for Connections - Type I (3-D SE) • The Catalogue System for Connections + Variants (3- SE)
Version 1702 - HiCAD Steel Engineering | Date: 9/2012 | © Copyright 2012, ISD Software und Systeme GmbH
 Example 1:
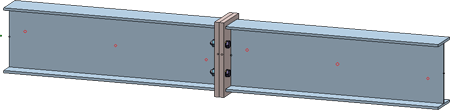
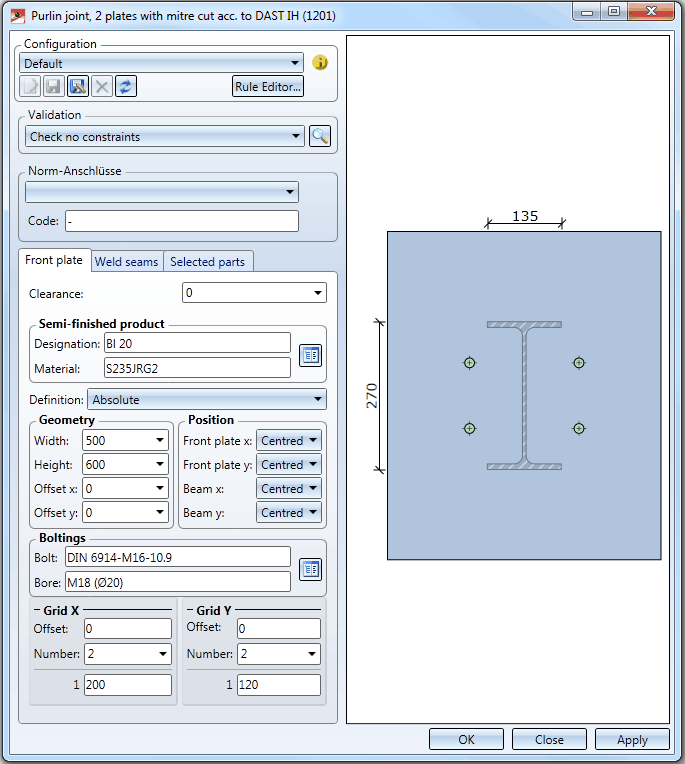

 icon to select plate type and material directly from the corresponding standard part catalogues.