"Civil Engineering functions" docking window > Steel Engineering > Connections > Front side to web/flange side > Front plate > Front plate connection 1 to web/flange (1320)
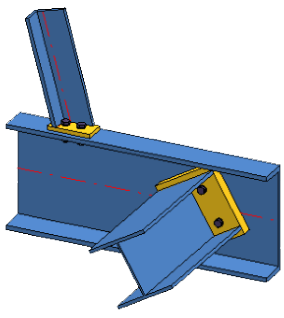
Use this function to connect beams with a bolted front plate connection - with or without stiffeners. The connection can be made to the web or to the flange of a beam. Depending on the fitting situation, the connected beam will be notched automatically. Furthermore, weld seams can directly be inserted and annotated if desired.
The connection can either be fitted as a user-defined configuration, or as a configuration on the basis of predefined DAST tables integrated in HiCAD.
The configuration of the front plate connection takes place via the different tabs of the dialogue window.
After entering all required data, you can fit the plate. If you select Apply, the plate will be fitted, but the dialogue window will remain open. If you select OK, the plate will be fitted, and the dialogue window ill be closed. If you select Close, the changes will be discarded and the window will be closed without fitting the plate.
![]() Please note:
Please note:

Configurations can be saved, enabling you to access your individual, customised configurations at any time. The configurations for this type of connection are saved to the file DV_STE_1320_00_ENDPLATE_default.xml in the HiCAD SYS directory.
The following functions for configuration management are available:
|
|
Rename the current configuration |
|
|
Save the configuration |
|
|
Save the configuration, with a different name |
|
|
Delete the configuration |
|
|
Reset input fields to the last saved state of the configuration |
|
|
Indicates that the current configuration has been changed, but not saved yet. |
The front plate connection is configured via the different tabs of the dialogue window:
This tab provides information about the previously identified beams, e.g. designation, material, dimensions etc. Value inputs are not possible here.
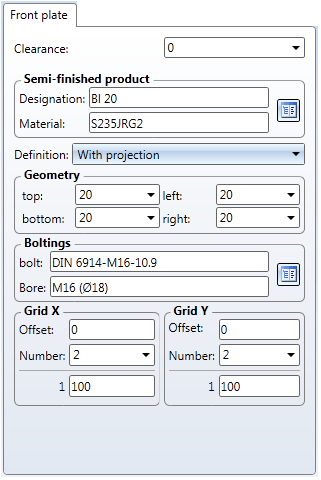
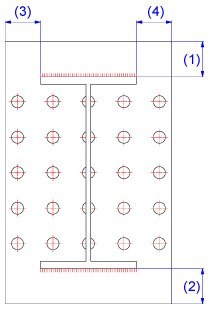
In this tab you specify type and size of the plate, the position of the plate in relation to the beam, the bore type and the and the bore grid.
|
Clearance |
Here you enter the value fore the clearance, i.e. the distance between of plate from the second identified beam. |
|
|
Semi-finished product |
The plate can consist of sheet metal or flat steel. Click the |
|
|
Geometry |
You can choose between three methods for the definition of the geometry (size) of the plate. Select the desired method from the Definition listbox. Definition - Absolute
Furthermore, you have the following options for the positioning of the plate:
If you have entered an offset, the plate will be moved accordingly. Definition - With projection
Definition - With projection beyond grid
|
|
|
Boltings |
Here you can define the bolting set, e.g. type of the bolt, bore diameter etc. Click the |
|
|
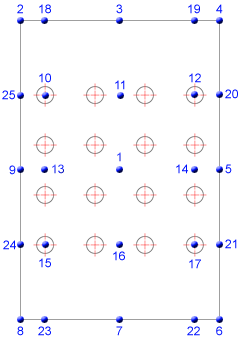
Grid |
The bore grid determines the position and arrangement of the bores on the end plate.
|
|
You can create the connection with or without stiffeners. The settings can be made separately for the upper and the lower stiffener.
If you want to fit the stiffener, activate the Insert checkbox and click the  icon to select the stiffener type from the catalogue.
Further parameters are as follows:
|
Fitting type |
Here you define how you want the stiffener to be fitted: Either perpendicular to the reference point or aligned. |
|
Type |
Activate the corresponding radio button to specify whether you want to insert a full stiffener or a partial stiffener. |
|
Dimensions |
Specify the width of the stiffener, or activate the |
|
Others |
Enter a value for the clearance, if desired. |
|
Int. corner |
Here you specify the data of the internal corner. Depending on the selected corner option, these refer to the chamfer length or the fillet radius. If you want HiCAD to automatically determine the value, activate the |
|
Ext. chamfer |
Here you specify the data of the external chamfer for partial stiffeners. Enter, depending on the selected option, the values for chamfer lengths and chamfer angles. |
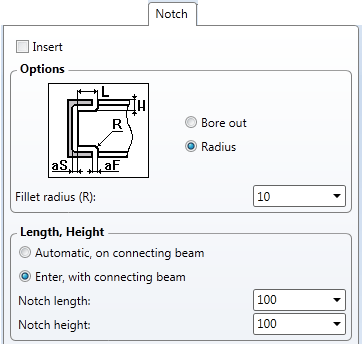
Depending on the fitting situation, the beam to be connected will be notched automatically. On this tab you can specify the options for the notching.
|
Type |
Bore out and Radius are available as notch types. Select the desired option and enter the fillet radius. |
|
Length x Height |
You can chose between automatic and manual input of length and height of the notch. Automatic determination selects the standardised minimum values for height and length according to DASt guidelines while taking the entered minimum flange distance into account. The following options are available:
|
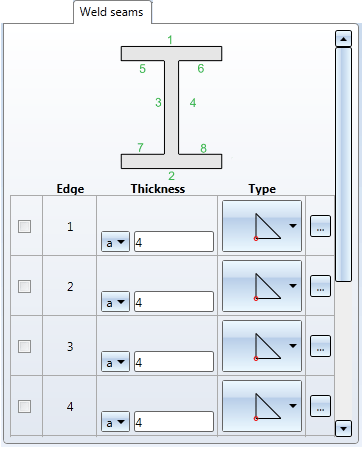
You use the Weld seams tab to place weld seams onto the edges of connected beams.
Activate the corresponding checkboxes to select the edges on which you want to place the weld seams. You can select a weld seam type for each edge and specify the thickness of the seam. Furthermore, you can define weld seam annotations for all edges to be welded together. Click the  , symbol to open the Weld seam dialogue. It is operated largely in the same way as the dialogue of the 3-D function Insert weld seam symbol.
![]()
Related Topics
Steel Engineering Connections + Variants (3-D SE) • Dialogue Window for Connections - Type I (3-D SE) • The Catalogue System for Connections + Variants (3-D SE)
Version 1702 - HiCAD Steel Engineering | Date: 9/2012 | © Copyright 2012, ISD Software und Systeme GmbH
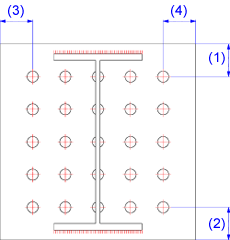
 The Front plate connection 1 to web/flange (1320) dialogue window
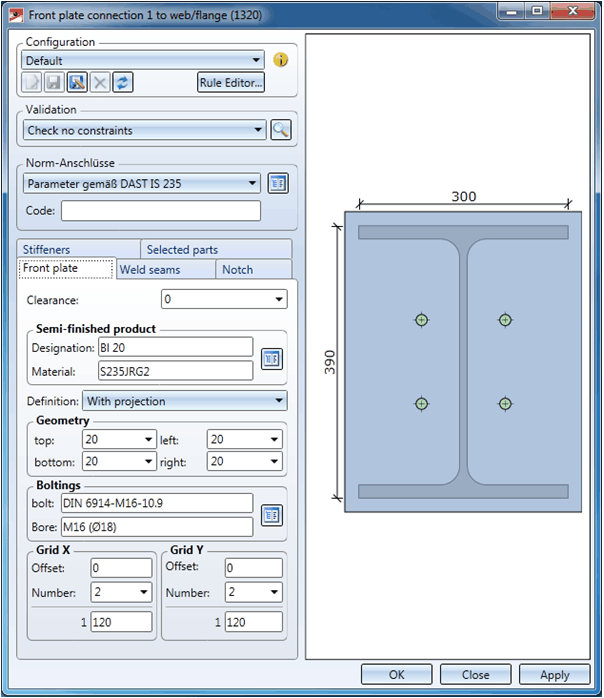


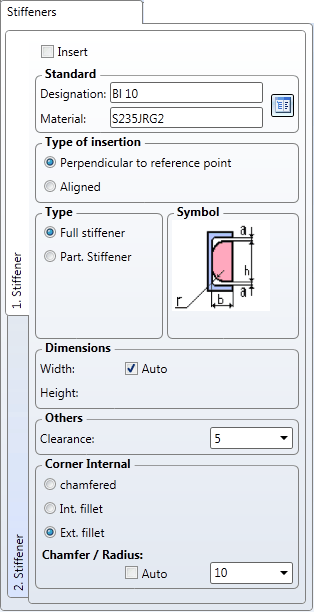
 Auto checkbox if you want HiCAD to automatically determine the width.