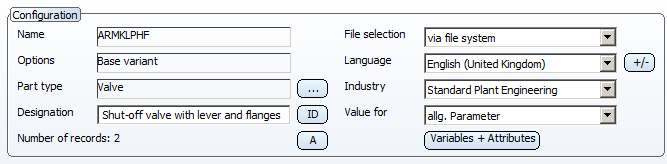
Configuration
|
File selection |
Here you select the source of the variant file. Default setting is via file system. If HELiOS is active, you have two additional selection options, with DB, via document master, and with DB, via part master. |
|
Language |
This field displays the current working language. Click the
The assigned language will only be saved together with the variant if the Designation field is not empty. For each further language, the pre-setting <text_input_n> will be entered (n is an internal ID referring to the index of the text). You can simply overwrite this entry, so that a corresponding can be entered. An example: You load a variant. In the Languagefield, a language ID is displayed, but the Designation field is empty. If you want to add further languages and save this assignment together with the variant, you need to fill in the Language field for at least one language. If required, the designation <text_input> will then be assigned to the other languages. |
|
Industry |
Here you can switch between the two fields of industry, Standard Plant Engineering and Air ducts. The third, option is meant for non-Plant Engineering variants and do not contain any part type- and industry-relevant information. For these variants, the buttons for part type, article number and constant attributes will be inactive, as these data will be industry-dependent.
|
|
Value for |
Here you select, for structured variants, the variables group that you want to load into the table for editing. The selection options depend on the structure description of the base variant belonging to the current variant. These definitions are contained in the base variant description file. |
|
Name |
This field displays the name of the currently loaded variant (this field is locked against entries for base variants!). When you derive a new variant, the name is initially "Unnamed". You can simply overwrite this entry with the desired name. |
|
Options |
This field indicates the type of the current variant:
|
|
Part type* |
The part type within the selected industry can be selected with a click on the Constant attributes that are preset for the part type and are to apply to all data records can be edited. Click the
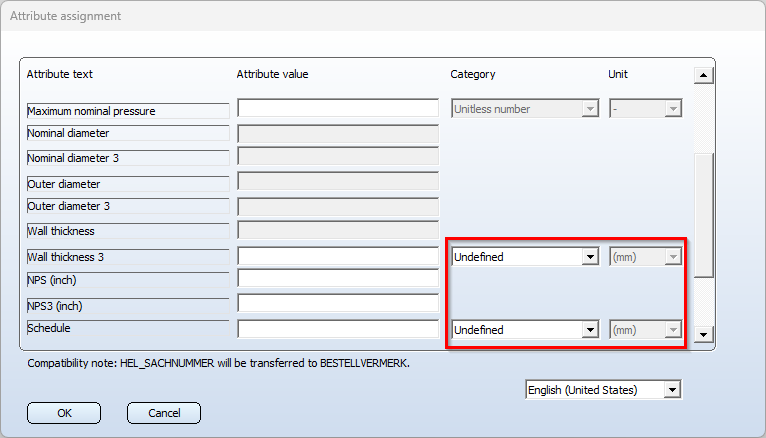
If any lists of suggested values, or selection lists exist for the displayed attributes, the corresponding values can be chosen from a selection box. Please note however that this is only possible if the Variant Editor can access HELiOS. In addition, setting or changing categories and units is enabled for corresponding attributes. The attributes that expect a unitless number are all Nominal diameter attributes and the attribute Pressure. These attributes are already assigned the category Unitless number, a change is not possible here. To change the category and unit assignment of an attribute, select the desired entry in the selection box of the corresponding row. Since the category specifies the available units, the category should therefore be selected first. Some attributes are automatically preassigned when the attribute assignment is called up, e.g.:
This means that when you exit the window with OK, the variant has been changed, even if you do not make any changes.
The fields for article number and variables are locked here. These will be edited separately via the
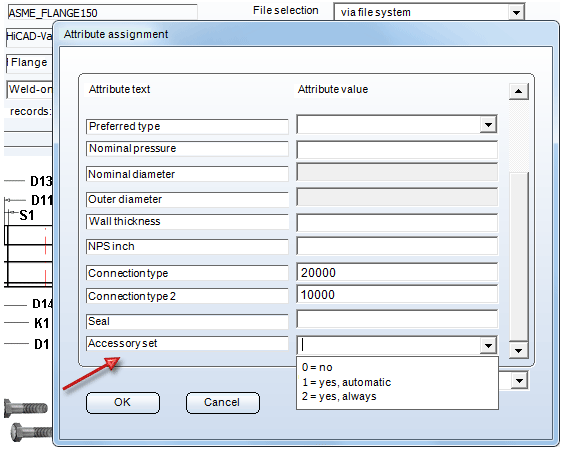
If you want further attributes to be displayed in the Attribute assignment dialogue window, you can achieve this by expanding the corresponding file nnnnnnn.CatSearchAtt.txt in the PlantParts\CatSearch of your HiCAD installation. nnnnnnn stands for the Part type ID. For example, if you want the attribute ZUBEHOERSATZ (=Accessory set) for flanges (Part type ID 5100010) to be also displayed in the Attribute assignment dialogue window, you need to expand the file 5100010.CatSearchAtt.txt accordingly, i.e. add the entry D:ZUBEHOERSATZ The result will look as follows:
An overview of the Part type IDs can be found in the anbtlken*.DAT files in the HiCAD Sys directory.
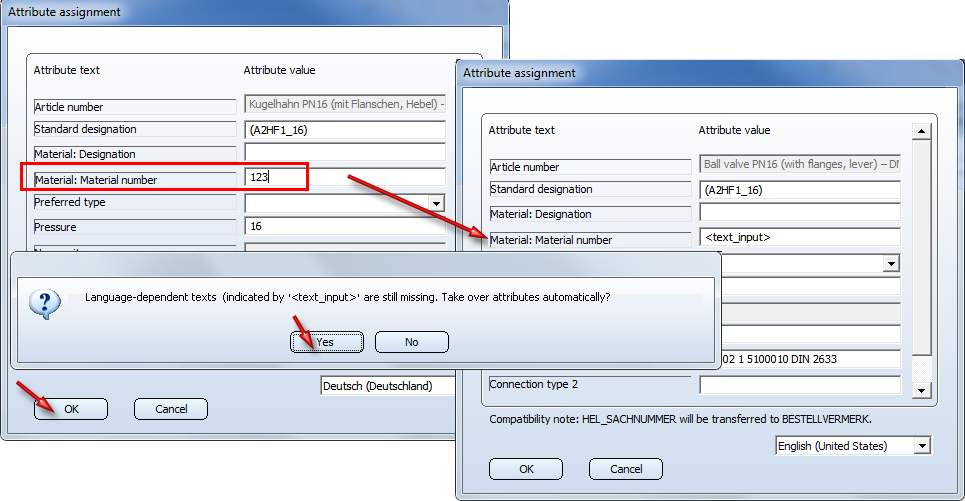
Taking over attributes for all languages When you change attribute assignments via the A button and then click OK without having adjusted the attribute in all languages, the following message will be displayed:
If you choose Yes, the attribute from the first language, in which it has a value, will be transferred to the corresponding fields of the other language; otherwise, the current content of the field will remain unchanged. If you choose No, the text <text_input> will be entered in the corresponding fields of the other languages.
|
|
Designation |
This field is used for the definition of the constant attribute BENENNUNG (=DESIGNATION). |
|
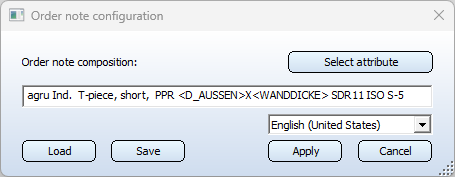
Order note configuration* |
The configuration of the order note is done using the
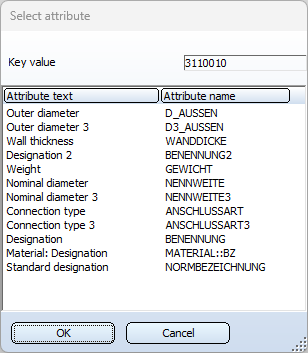
When you click the Select attribute button in the Order note configuration dialogue window (appears after clicking the
If you double-click a row or mark the row with a left-click and select OK, the corresponding attribute name will be inserted in <> brackets at the current cursor position in the input field of the Article number configuration dialogue. The name is the placeholder for the actual attribute value. If you click Save (or press CTRL+S), the content of the input field will be saved as an article number configuration to a file, provided that this sequence of characters does not exist yet. For each part type, a corresponding file exists in the subdirectory PlantParts\CatSearch, e.g. 1010011.DesignationConfig.txt. You can select yet another of the article number configurations that are saved for the current article number configurations. Click Load (or press CTRL+L) ,then double-click a row or mark the row with a left-click and select OK. The corresponding configuration is then entered in the input field. When you then click Apply, you will be asked whether you want to save the article number configuration entered in the input field, if it has not been saved yet. If you now click the button |
|
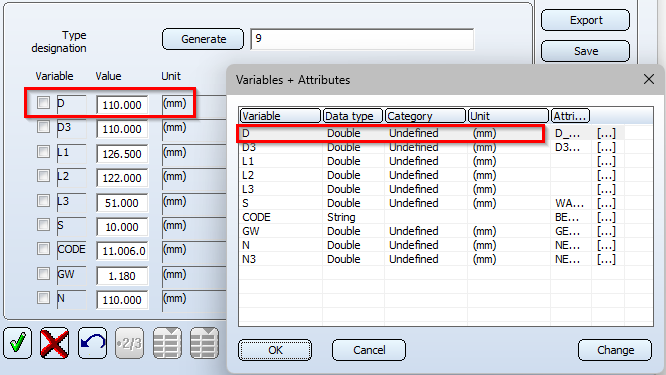
Variables+Attributes |
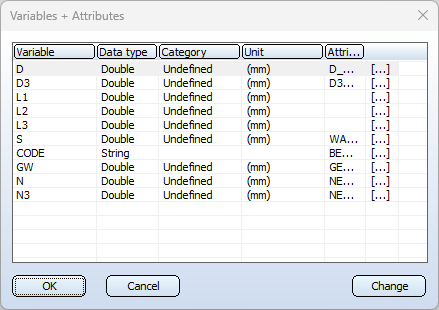
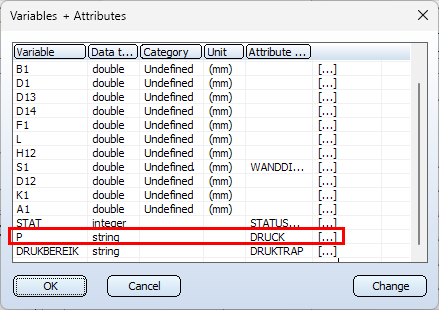
Clicking the Variables+Attributes button lists all variables defined in the variant with their associated data type (Integer, Floating point or String) and HELiOS attribute.
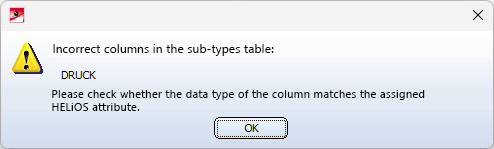
Rename, delete, insert variables You can change the name of variables, delete variables, insert new variables, and assign a database attribute to variables. You can access the editing functions for variables by right-clicking in the line of the variable you want to edit. Alternatively, you can activate the context menu by clicking the Change button. The previously selected line is then edited. Please note that the editing may only refer to variables that have no influence on the geometry of the part. Such a variable can represent, for example, the weight. The only task of this variable is to provide the associated values to the assigned database attribute. If you change the name of a variable that is required for the geometry of the part, then the variant becomes unusable. Changing a variable name can also be invoked by double-clicking on the corresponding list cell. If you want to insert a variable, you can also adjust the data type (DBL for Floating point, INT for Integer, STR for String). The length of a new variable name must not be greater than 4.
Assigning of Category and Unit The Category and Unit can be assigned to each variable. To do this, simply click in the Category and Unit column in the corresponding row. Since the category specifies the available units, the category should be selected first and then the unit.
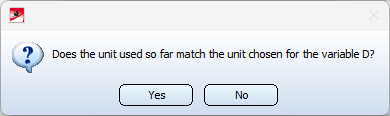
There are some attributes that are nominal values without a unit and are defined as a Unitless number. Here the assignment is done automatically. If you are editing variants and assign a unit to a previously unitless variable, then when you exit the Variables+Attributes window you will be asked whether the previously used unit matches the newly assigned one.
If you choose Yes, the category and unit will be assigned to the variable, but without conversion. If you choose No, you must select the original unit. Only then will the variable be assigned the category and unit and and the value of the variable be converted to the new unit.
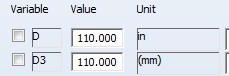
Example: The variable D in the figure has neither a category nor a unit assigned to it, therefore Undefined and (mm).
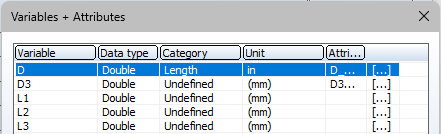
Now change the assignment as shown below:
When you exit the dialogue window with OK, the query shown above appears:
If you choose Yes, the category and unit are assigned to variable D, but no conversion takes place.
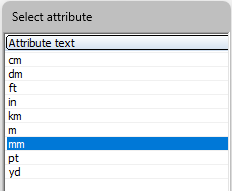
If you choose No, you will be prompted to select the original unit, e.g. mm.
If you confirm the unit with OK, the Category and Unit are assigned to variable D here as well, but the previous values are now converted from mm to inch.
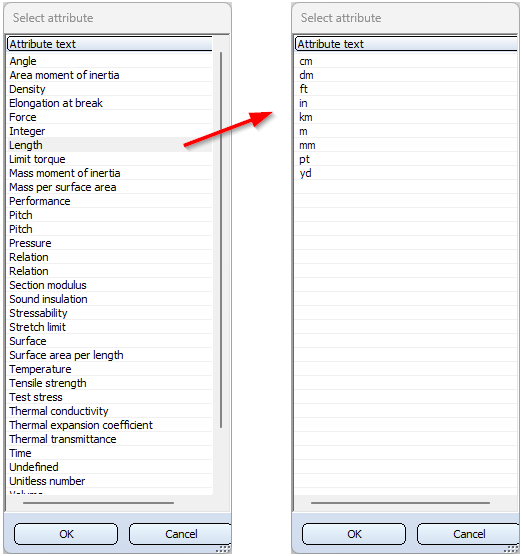
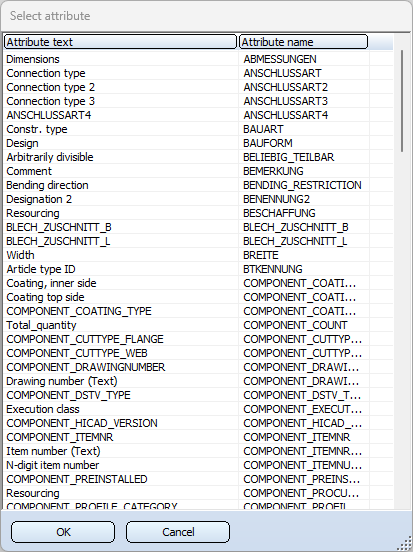
Assigning of database attributes To assign a database attribute to a variable or to change the assignment, click [...]in the corresponding row. Then a list of attributes is displayed. By double-clicking a row or by selecting a row and then clicking OK, the corresponding attribute will be assigned to the variable.
When you exit the Variables+Attributes dialogue window with OK, the changes will be applied. A deleted variable is given the name "—" (it can be restored by renaming it). Only when the variant is saved will the variable marked in this way be deleted. This only becomes visible when the file will be opened again afterwards.
Please note:
|
 icon to open the

 button.
  button to display a list of these constant attributes.
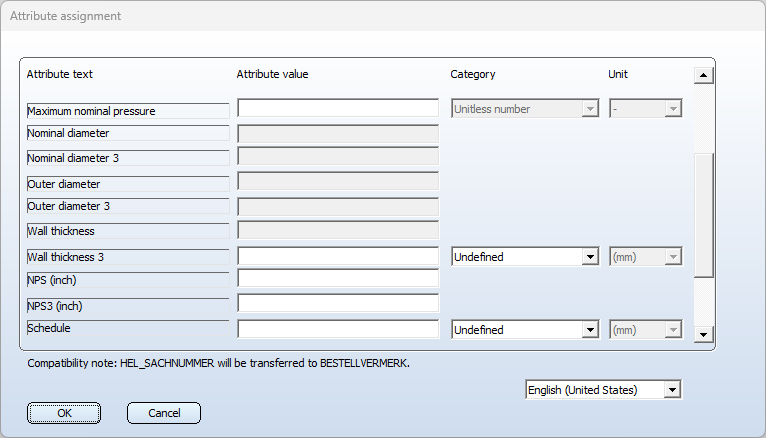
 button or the Variables +Attribute button, respectively.


* These options are currently only available for Plant Engineering variants.

