
Align views horizontally/vertically, via points
To align individual views horizontally or vertically to a specific point, the following functions are available in the context menu of views.

|
Align views horizontally, via points |
|
|
Align views vertically, via points |
-
After calling up the function, first select a point for the alignment. Depending on the function selected, a horizontal or vertical alignment guideline is then shown through this point.
- Then select a point in a view. This view is then moved orthogonally to the alignment guideline so that the point selected in the view lies on the alignment guideline.
Please note that the selected point must belong to a view, otherwise a corresponding error message will be displayed.
The function does not end automatically after it has been executed, i.e. you can align further views to the displayed line by selecting further viewpoints. You end the function with the middle mouse button or with ESC.
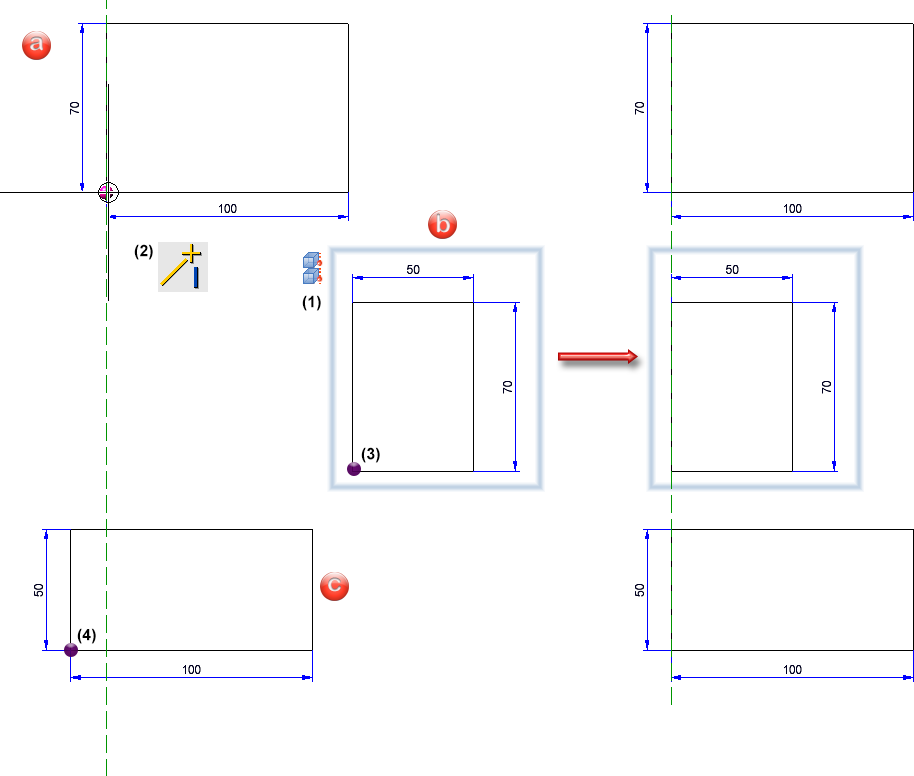
Example
The illustration shows three views. View b and c are to be aligned vertically to view a. After calling the function Align views vertically, via points  , the target point (2) is determined first and then the points (3) in view (b) and (4) in view c.
![]() Please note:
Please note:
- The undo function cannot be used here. However, the Undo last view transformation
 function can be used to undo the move of the individual views.
 - When a master view is aligned, the views linked to this view are also moved. If the transformation of the master view is undone using the Undo last view transformation function, this also applies to the linked views.
Align and distribute views flush/centred
HiCAD also offers the option of aligning several views flush (right, left, top, bottom) or centred (horizontal, vertical). In addition, views can be evenly distributed horizontally or vertically. The corresponding functions are available in the context menu for views if a view list (multiple selection) is active.
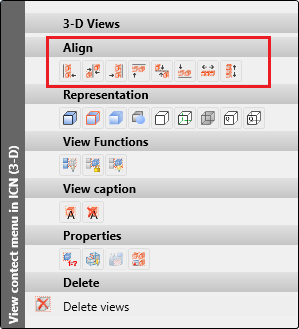
|
Align |
|
|---|---|
|
|
Align views left |
|
|
Centre views horizontally |
|
|
Align views right |
|
|
Align views at top |
|
|
Centre views vertically |
|
|
Align views at bottom |
|
Distribute |
|
|
|
Distribute views horizontally |
|
|
Distribute views vertically |


Align
With the flush alignment functions, only the displayed geometry is aligned; dimensioning, annotations etc. are not taken into account. This means that the smallest enveloping rectangle is used, which only completely encloses the geometry. The alignment line is determined by the "extremum" of the views. For example, in the right-aligned alignment, the view whose geometry extends furthest to the right remains in place. With the top alignment, the view with the highest geometry point remains in place.
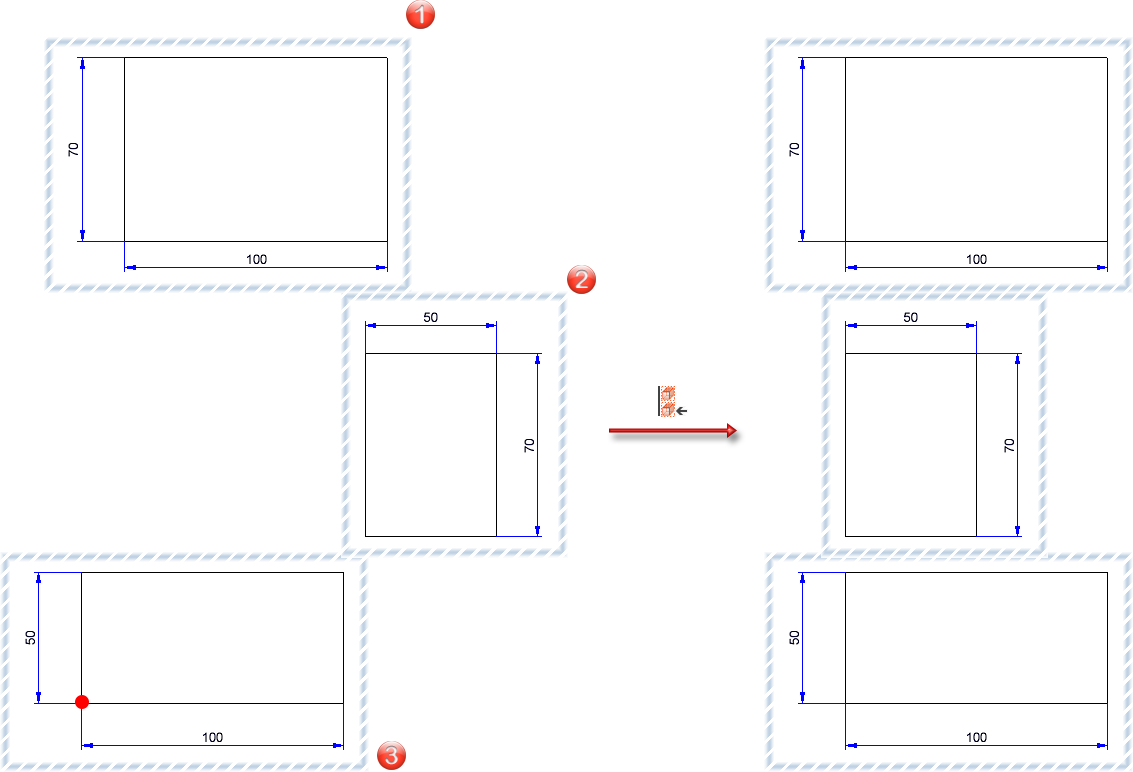
The illustration shows three views, with view 3 projecting furthest to the left. On the right of the image you can see the result with left-aligned alignment. The position of view 3 is retained.
If you want to centre vertically, the alignment line is halfway between the top and bottom geometry points of the selected views. The views are then moved so that their centre lines lie on the alignment line.

The illustration shows three views, with view 3 projecting furthest to the left and view 2 furthest to the right. A is then the alignment guideline. On the right of the image you can see the result with horizontally centred alignment.
Distribute
In contrast to alignment, dimensioning, annotations etc. are also taken into account when distributing in addition to the geometry. This means that the smallest enveloping rectangle that completely encloses all objects in a view is processed here.
Horizontal distribution moves the views to the right or left so that they are distributed laterally with the same lateral distance to the next view. The two views that protrude furthest to the left and right determine the overall width for the distribution and are not moved themselves.
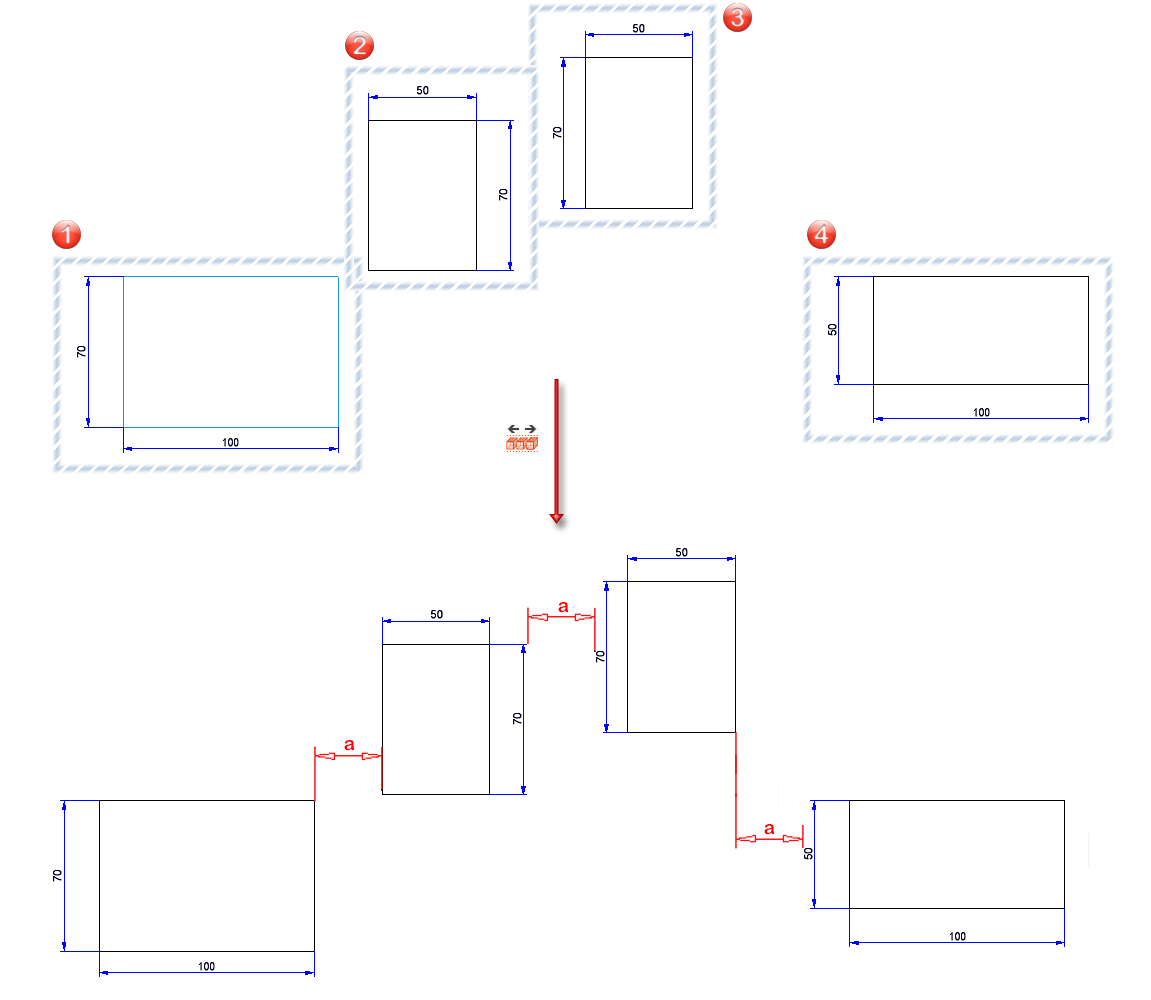
The illustration shows four views that are to be distributed horizontally. Views (1) and (4) remain in place as they project furthest to the left and right respectively. Views (2) and (3) are moved horizontally so that the distance a between all views is the same.
![]() Please note:
Please note:
- The undo function cannot be used here. However, the Undo last view transformation function can be used to undo the move of the individual views.
- When a master view is aligned, the views linked to this view are also moved. If the transformation of the master view is undone using the Undo last view transformation function, this also applies to the linked views.

Projections (3-D) • Linked Views (3-D) • View Functions (3-D)