Export and Import of UI Settings and HELiOS Options
 > HELiOS Options
Individual settings (not only) of the HELiOS interface can be easily distributed from one system to other users or workstations.
To do this, you will find the Manage... button at the bottom of the HELiOS Options window with the pull-down menu items for  Import settings... and
  Export settings... .
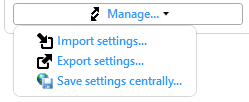
Via the  Save settings centrally... menu item, you can also save the current settings directly to the central directory for distributing settings.

Export
> HELiOS Options > Manage...> Export settings..
To export your current workstation configuration, select MANAGE...> Export settings... .
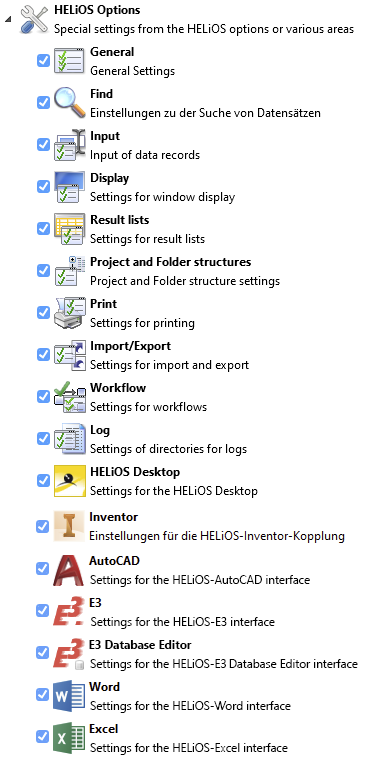
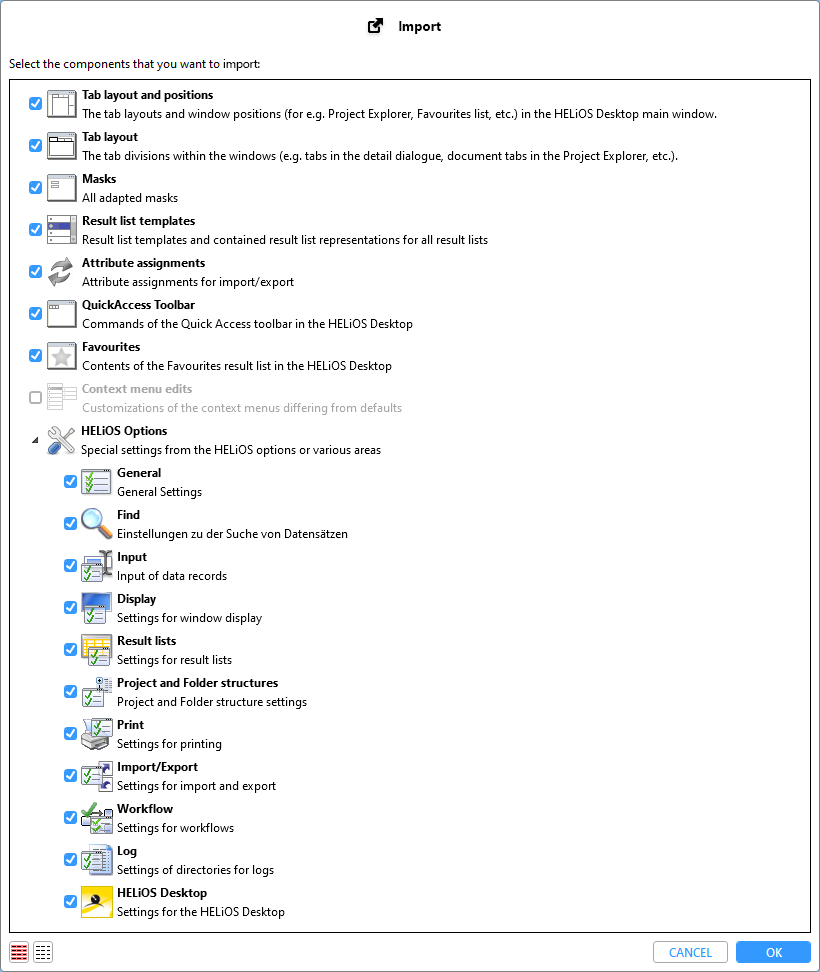
A dialogue window appears in which you can select individual components of the interface for export or exclude them by deactivating the checkbox:

- Tab layout and Positions: Layout of the windows of the HELiOS Desktop and their position (arrangement of the Explorers, lists, active/inactive windows etc.)
- Tab layout: Arrangement of tabs in the individual window areas.
- Masks: All masks that have been adjusted with the Mask Editor.
- Result list templates All created templates and settings for the result lists.
- Attibute assignments: Attribute assignments for import/export, including for MultiCAD interfaces. In the system these are located at %APPDATA%\Roaming\ISD Software und Systeme\[HELiOS Version number]\Transfer\
- QuickAccess Toolbar: The elements that have been assigned to the symbol list for the QuickAccess Toolbar.
- Favourites: The Favourites window and is saved content.
- Context menu edits: Customizations of the context menus that are called via right-click.
- HELiOS Options : Below this menu node you can export individual areas of the HELiOS Options, not only for the HELiOS Desktop, but also for any other application that is linked to your HELiOS Desktop (e.g. Office or MultiCAD applications), if there are any.
![]() Please note:
Please note:
The export of some areas is only offered for selection in the menu window if there are changes or settings in the system that deviate from the HELiOS delivery standard.
This means: If, for example, no changes have been made to context menus or if the Favourites window is empty, the corresponding areas will not be offered for selection in the export window.
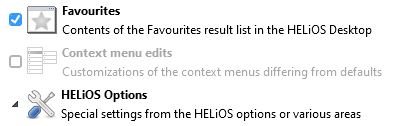
The areas above the HELiOS Options may be greyed out and displayed with an inactive checkbox, as can be seen by the Context menu edits entry shown below:
The HELiOS Options E-Mail, Preview, Database and Document type are excluded from the centralised export/import procedure.
If you confirm with OK, you can change the automatically generated, self-explanatory file name (with date marking) in the following export dialogue window if necessary and select a storage path.
The settings are then saved in the corresponding file path as a ZIP archive containing the various individual system files for the components.
Import
> HELiOS Options > Manage...> Import settings..
To load a previously exported interface configuration at another workstation, you only have to select MANAGE... > Import settings... select the zip file in the following Windows selection dialogue (which may have to be copied to the local system beforehand) and confirm with Open.
Afterwards, as with the export, a selection dialogue for the individual components to be taken into account also appears for the import.
If desired, you can exclude individual areas from the selection at this point if you do not want to import all of them.
The areas above the HELiOS options may be greyed out and displayed with an inactive checkbox, as can be seen by the Context menu edits entry.
When you confirm with OK, the HELiOS Desktop interface is adapted accordingly.
![]() Please note:
Please note:
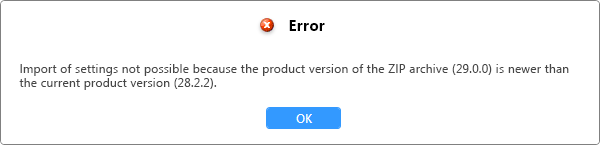
The import of HELiOS Desktop configurations is not backwards compatible. This means that files exported from an older HELiOS product version can be imported into a newer version, but not vice versa from a higher version number into an older version of HELiOS Desktop.
You will receive a corresponding message when you try to do this:
Save settings centrally...
> HELiOS Options > Manage...> Save settings centrally...
Via the menu item HELiOS Options > Manage... > Save settings centrally... you can save the current settings of your HELiOS Desktop directly to the central directory set for the distribution of settings.
After the call, the selection dialogue for the individual components appears in the same way as Export settings....
If you confirm this with OK, the settings are automatically saved in the central directory.
![]() Please note:
Please note:
-
HELiOS Administrator rights are required to call up the function.
-
The central directory for the configuration data can be set as part of the HELiOS installation and, if necessary, changed using the HELiOS.ConfigImport.exe tool. You can view the exact path at any time at HELiOS Options > General > Distribution of settings.
-
A backup is automatically created before overwriting the settings in the directory.
HELiOS.ConfigImport.exe
The import can not only be performed directly via the HELiOS Desktop, but also via the HELiOS.ConfigImport.exe tool (in the \exe\ directory of your HELiOS Desktop or HiCAD/HELiOS installation.
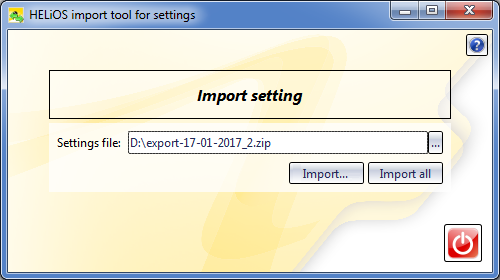
After calling up the tool, select a corresponding zip file and then click on Import....
After this, the dialogue for selecting the individual components also appears (see above).
To make interface settings available to several workstations, you have the option of specifying a central (cross-computer) directory for configuration data during the installation of HELiOS. On the HELiOS tab of the Extended settings dialogue on the HELiOS tab. To do this, activate the Use central directory for configuration data checkbox and specify the central directory in the input field below.
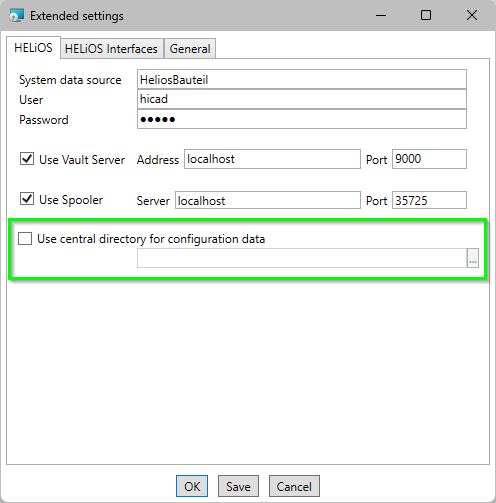
The configuration files are stored in this central directory so that they can be used across all computers and users.
If you are working with such a central directory, the user interface of the HELiOS.ConfigImport.exe tool will show you additional options:
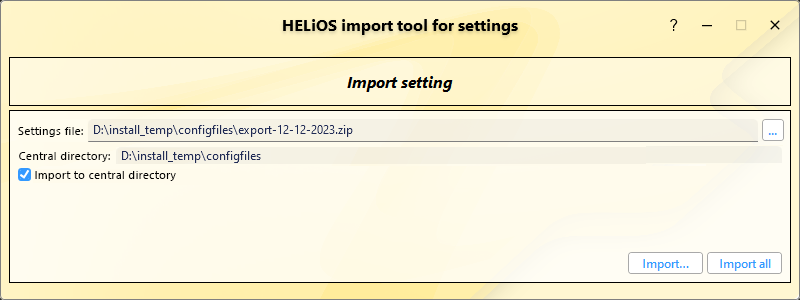
You can change the path to the Central directory here if necessary, should there be corresponding changes on your system, or deactivate the Import to central directory checkbox if the central directory should not be used when importing settings. In this case, the changes are applied locally for the logged-in user, not for all users of the system.
![]() Important:
Important:
Some interface configurations and settings such as masks and attribute mappings are saved by HELiOS independently of the user, but there are also user-specific settings such as the layout and position of tabs in the HELiOS user interface.
Settings imported via the HELiOS.ConfigImport.exe tool (or in the extended dialogue of the HELiOS installation) are adopted for all users of a workstation, unless a settings file exists locally for a user that is more current than the import file. In this case, this file will be taken into account the next time HELiOS is started.
HELiOS.ConfigImport.exe can not only be executed interactively, but can also be used to import data via batch import.
For example, a command line command for the batch import of a corresponding zip file (of the name "export-13-06-2022" in the path C:\Temp\) can look as follows:
HELiOS.ConfigImport.exe --nogui --uiconfig "C:\Temp\export-13-06-2022.zip"
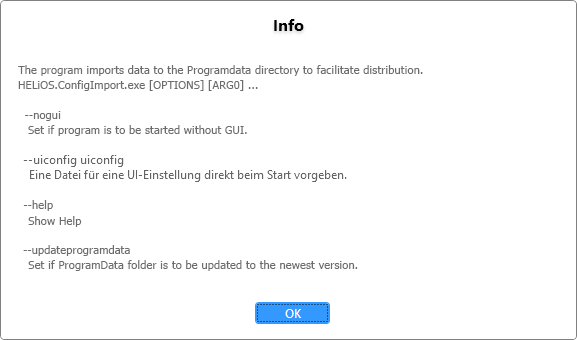
The command line prompt HELiOS.ConfigImport.exe--help shows you all possible arguments that can be set in connection with the program: