3-D Standard > HCM > Coinc...  > Equal distance
When assigning the Equal distance constraint to parts, one part will be transformed in such a way that the corresponding geometry elements will always have the same distance to each other.
When you call the function, the Equal distance dialogue window appears:
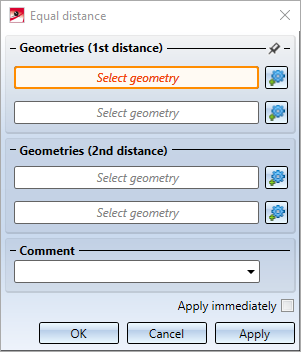
Select two distances here by identifying two pairs of geometries. The pin symbol of the first distance can be used for several constraints in succession: If the pin is activated ( ), the first distance remains selected after clicking Apply. If the pin is deactivated (
 ), both distances are cleared when you click Apply.
The other elements of the dialogue window are explained in the Dimensional and Positional Constraints topic.
When applying this positional constraint to the distances between two surfaces, it must be ensured when assigning the positional constraint that the relative position of the parts to each other already fulfils the constraint. If this is not the case, an error message indicating the error will be displayed.
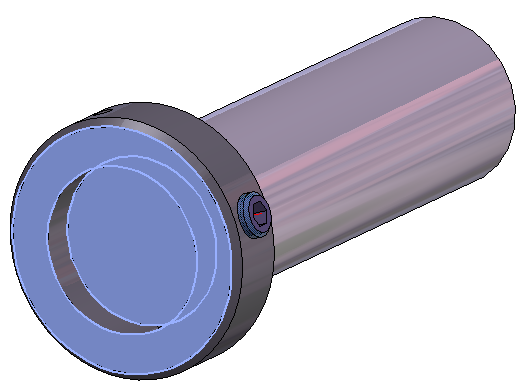
Example:
The ring should be placed centrally on the shaft. For this, an Equal distance constraint is assigned between one outer surface of the ring and one outer surface of the shaft.
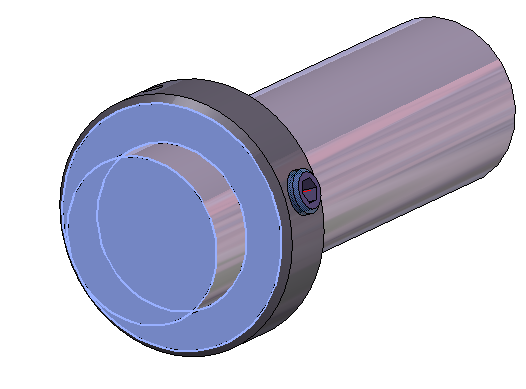
Left: The ring is in the correct relative position. The positional constraint can be generated.
Right: The ring is not in the correct position. An error will be displayed when the positional constraint is assigned.
After creating the constraint, you can reverse the dimension direction of the distance. Here, the dimension direction of the distance that was selected in second place will always be reversed (Exception: These parts are fixed so that the distance cannot be changed. Then the dimension direction of the first distance will be reversed). To do this, right-click the Equal distance constraint in the ICN and select Reverse one dimension direction from the context menu.

