Lines, Polylines and Tangents

Draw polyline
Sketch > Draw > Line 
With this function you draw a polyline of straight lines and arcs. The Sketching Tool is started for this purpose.
- Select the start point of the polyline.
- Select the end point of the first line.
- Then select the following points.
Instead of the end point and the following points, you can also enter the distance and the angle to the last point after pressing the space bar (see also Value input).
With the middle mouse button you can start a new polyline (in the same 3-D sketch) at any time without having to restart the function. Right-click to activate a context menu with further options.
Tips
Connect arc
Instead of using the Arc  function in the context menu, you can also click the last point again when drawing a polyline to connect an arc.
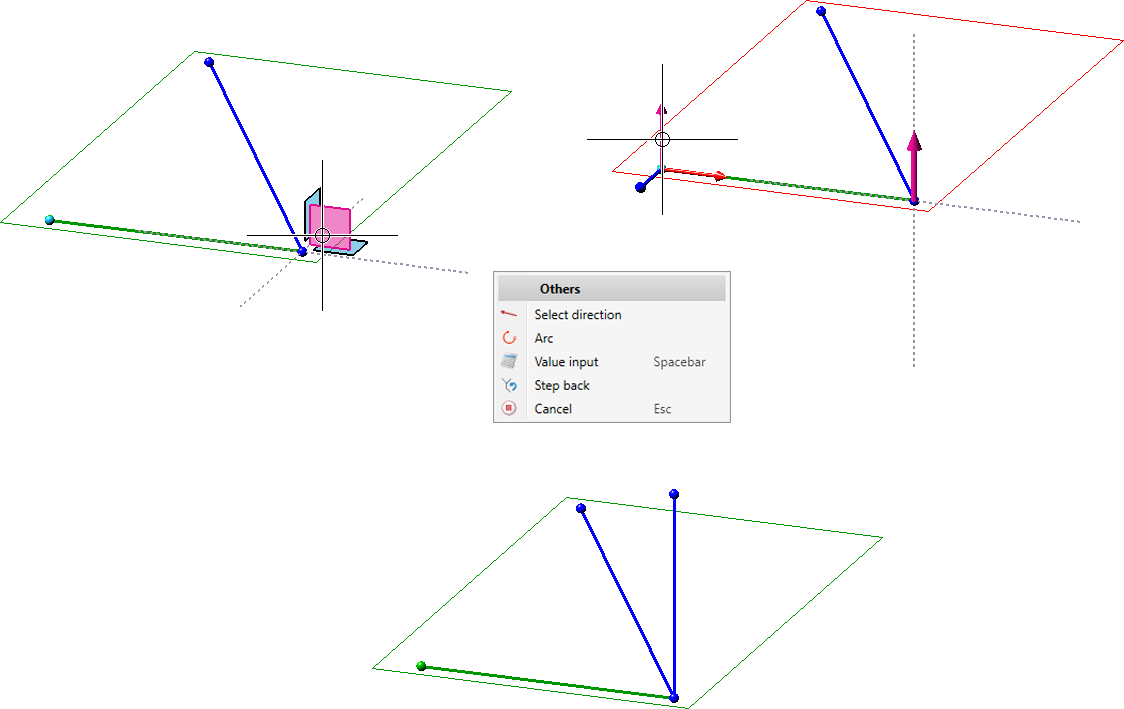
Select direction
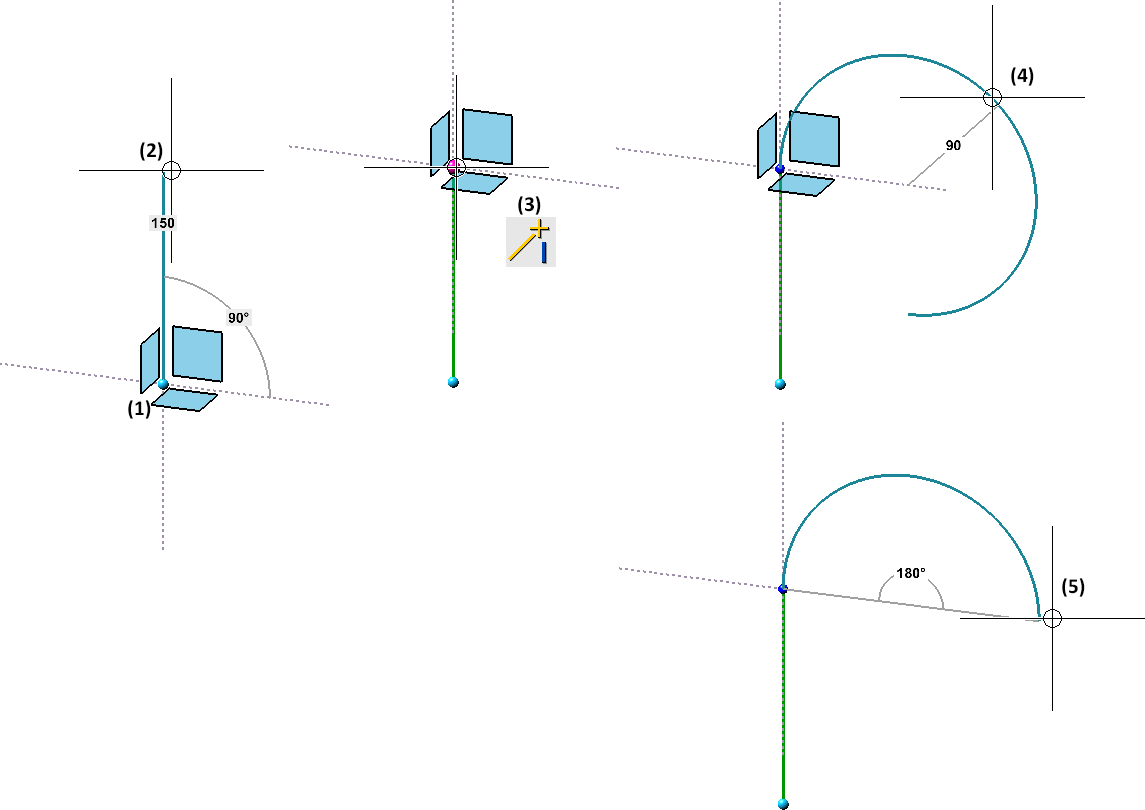
With the Select direction  function in the context menu you can determine the direction of the next line. This also works for drawing arcs. In this way you can also draw line segments as shown in the image below.
(1) first line, (2) select direction (right-click), (3) determine direction, (4) select last end point, (5) draw arc, (6) select end point of arc, (7) draw next lines
Tangential connection
Any line can also be connected tangentially. To do this, however, the Last line option must be active for the angle reference.
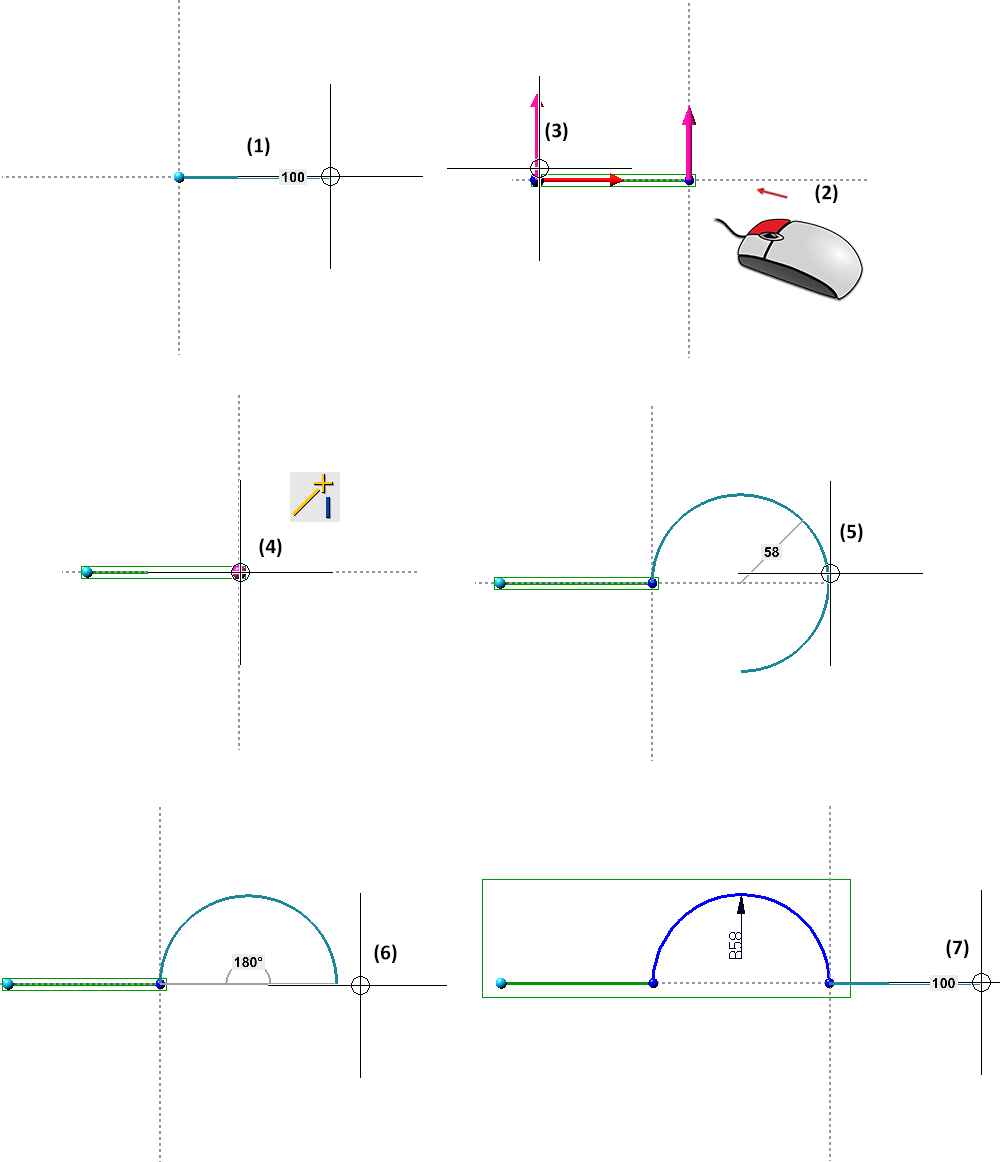
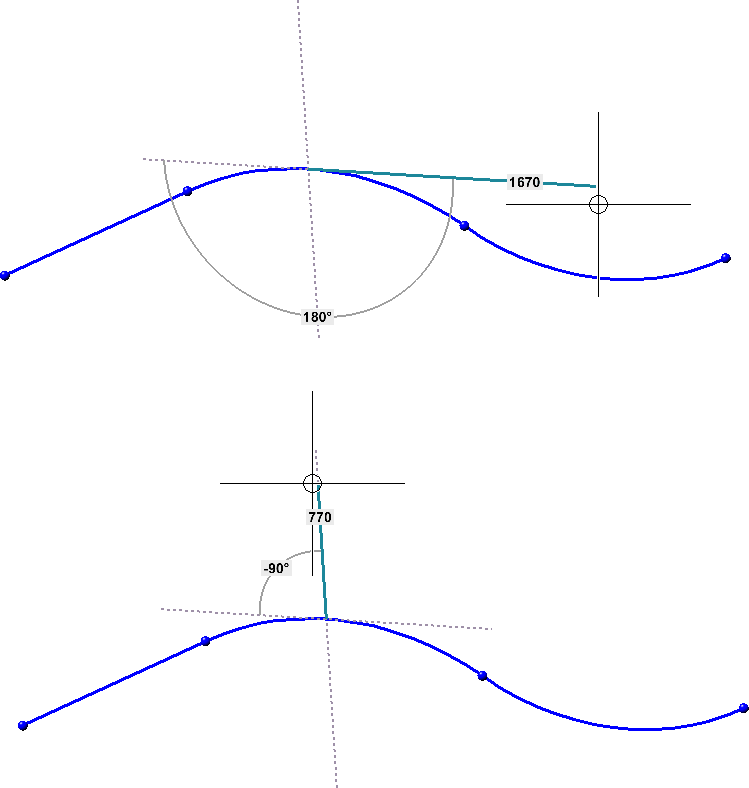
Continuing to draw vertically and tangentially on a line
You can also continue drawing vertically or tangentially in the middle of a line. To do this, simply select a point on the line with a point option (e.g. O, M, QP) as the first point and set the angle reference to Last line.
 For 3-D sketches you can change the drawing plane before the point / line selection.
Clicking  opens a pull-down menu with further functions for tangents.
Draw tangent
Sketch > Draw > Line > Tangent 
Use this function to draw lines tangential to points, lines or surfaces.
To determine the start point of the tangent, select a point or a line. The selected point will then be visualised by a blue point symbol. In the case of a line selection, this is the point on the line closest to the click point. Afterwards, a dynamic preview of the tangent will be displayed at the position of the cursor. You can then determine the end point of the tangent analogously. Please note that the point marked in blue is not necessarily the actual start point of the target line but can also be - depending on the cursor movement - the projection of this point into the sketch plane or the nearest tangential point.
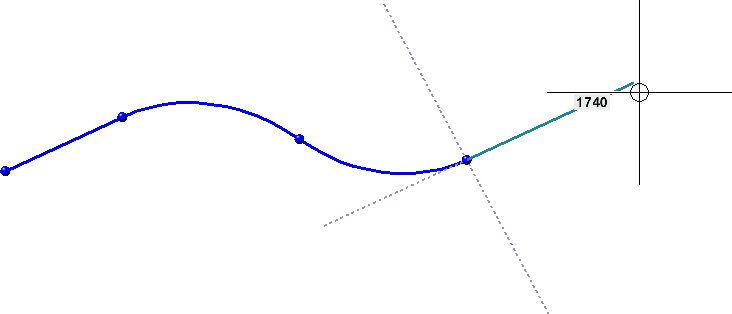
Example
(1) Selected line, (2) Visualised point, (3) - (5) Examples of possible tangents
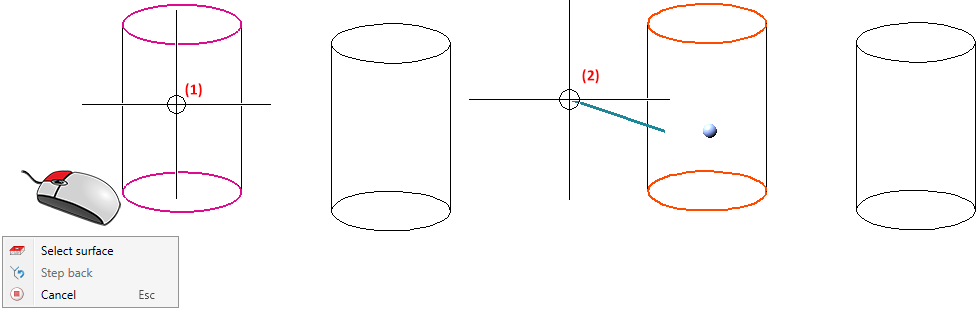
Tangent to surface
To draw a tangent from a point to a surface or vice versa, use the Select surface  function of the context menu. To do this, right-click either before defining the start or the end point and select the function from the context menu.
The following constellations of object selections are possible when determining the start and end points of a tangent:
|
First entry |
Second entry |
|---|---|
|
Point |
Point, line or surface |
|
Line |
Point or line |
|
Surface |
Point |
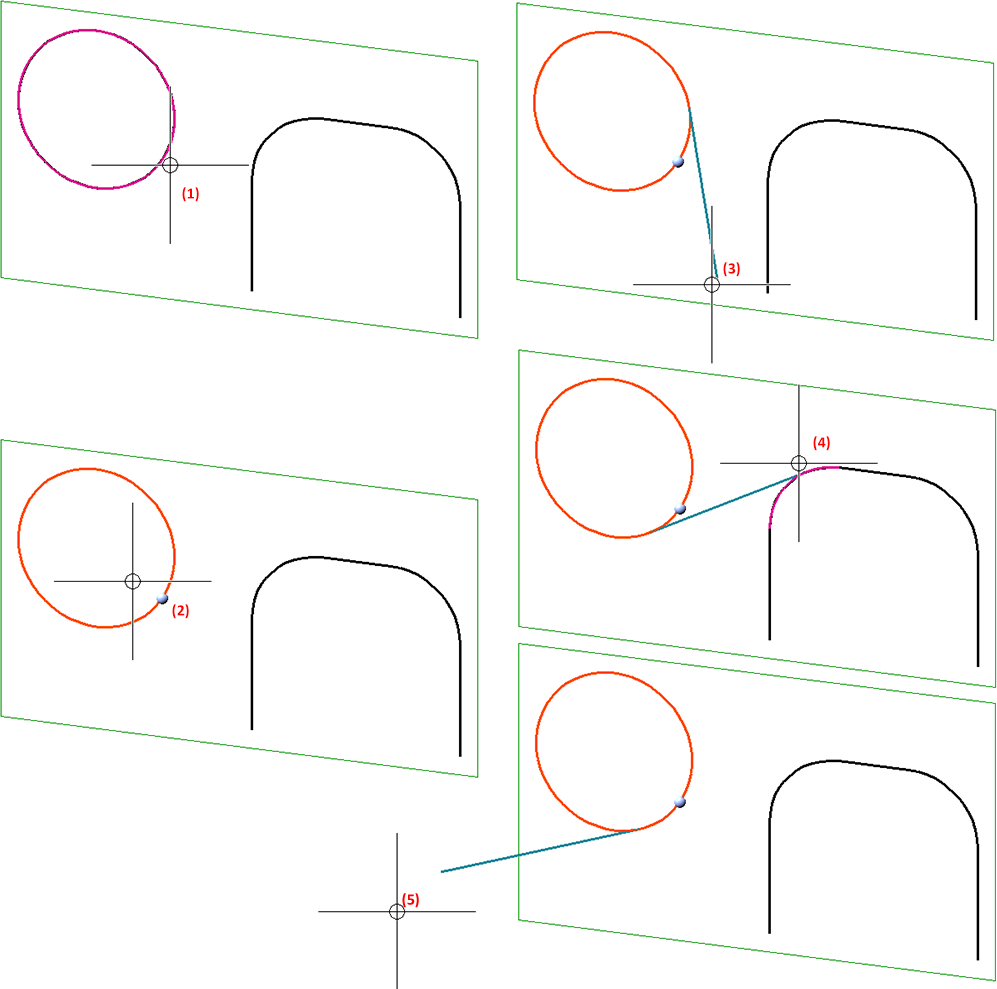
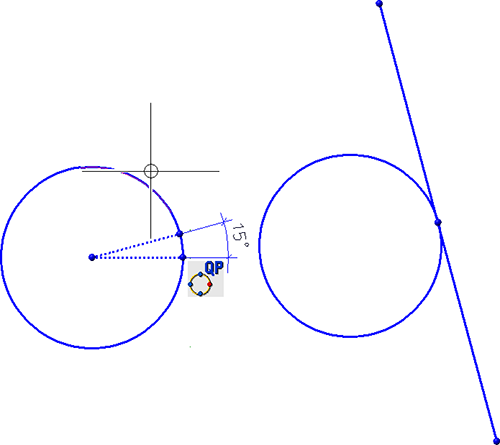
Example - Tangent to two lines
The tangential point (1) was chosen as the start point, which is also visualised (2). (3) and (4) are possible solutions.

Four possible tangents to a circle (1) and an arc (2)
Example - Tangent to a cylinder
In the illustration, the start point (1) has been selected. Then the Select surface function was activated in the context menu and the cylinder surface (2) was selected.
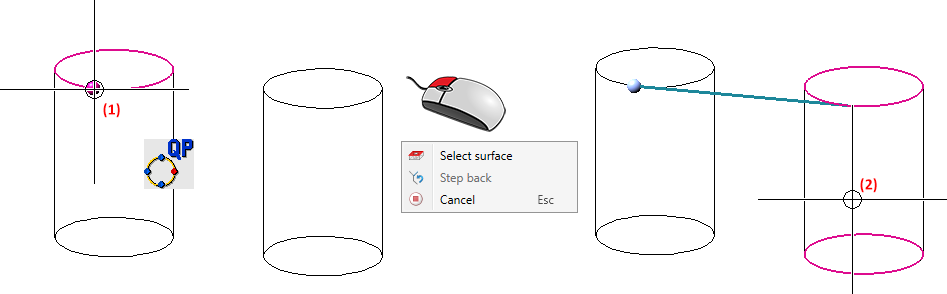
In the following illustration, before selecting the start point, the Select surface was activated in the context menu and the cylinder surface was selected (1). Then the end point (2) was determined.
![]() Please note:
Please note:
- If lines are selected for the start and end of the tangent in a 3-D sketch, then the two lines must lie within the same drawing plane.
-
If not set otherwise, HCM constraints will automatically be assigned, which can be suppressed by holding down the SHIFT key - as with other sketch functions.
-
You can also use the point options of the Autopilot settings toolbar for point determination.
Former functions
With HiCAD 2021 SP1 the Sketching Tools for sketches and 3-D sketches have been combined. In this context, functions that are now covered by the sketcher as well as rarely needed functions are no longer available.
|
Former |
New |
|---|---|
|
|
|
|
|
|
|
|
|
|
|
- |
|
|
|
|
|
|
|
|
For circles and straight lines: For other line types: |
|
|
|
|
|
|
|
|
|


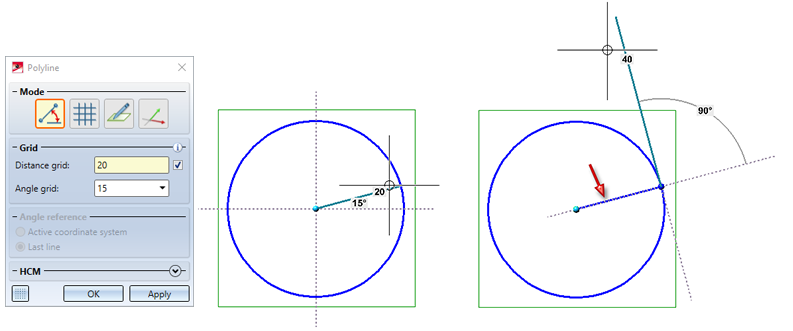
Example 1: Tangent, Angle-Circle-Length
Suppose you want to lay a tangent with a direction of 15°(relative to the zero direction) to a circle with a radius of 20.
Previously, you would have used the Tangent, Angle-Circle-Length  function, specified the angle of direction, identified the circle, selected the zero direction (e.g. the quad point shown) and then determined the length of the tangents.
As of HiCAD 2021, you have to proceed as follows. Draw an auxiliary line that has a length of 20 and runs from the centre of the circle at a 15° angle. To do this, set the grid accordingly. Then you can directly draw the tangent line. You will have to delete the auxiliary line manually.
Example 2: Vertical to 2 lines
Previously, if you wanted to create a perpendicular line on the two lines pictured, you simply used the Vertical to 2 lines  function.
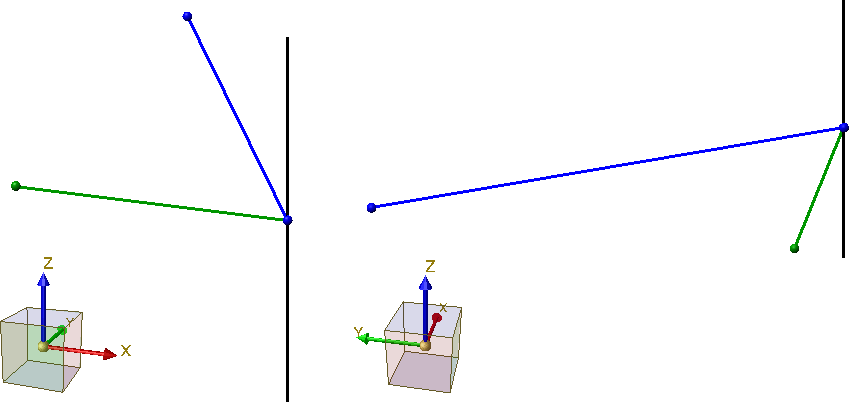
As of HiCAD 2021 SP1, you can do this as follows, for example. You define a processing plane by selecting the two lines. Then, you select the start point of a new line at the intersection of the two lines and select the drawing plane as shown. Before defining the end point, change the direction as shown. Then draw the perpendicular line.

Sketch Functions (3-D) • Sketching Tool for Planar Sketches (3-D) • Sketching Tool for 3-D Sketches (3-D)