Part Overlap
Overlap part

The Overlap part function enables you to define parts as an overlap contour.
- First identify the part that you want to overlap.
- Then choose the overlapping part, and right-click to end the identification.
To display the overlap, select Overlap > Visible > Hide hidden edges. You can also define whether you want the hidden lines to be displayed by means of another line type.
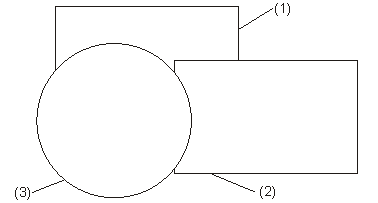
(1) Part 1, level 1
(2) Part 2, level 2
(3) Part 3, level 3

Define overlap contour
2-D Part > Overlap > Part  > Overlap
contour
> Overlap
contour 
The overlap contour is a prerequisite for representing overlaps. The visualisation level only takes effect when an overlap area has been defined.
- Identify the start of the contour.
- Assign a level to the contour.
- Specify whether you want the levels of the sub-parts to be adjusted to the main part.
You can now specify further contours in any order and define the overlap level.
- Right-click to end the identification.
To display the overlap, activate the Hidden Edges, Hidden function.
Define exclusion contour
2-D Part > Overlap > Part > Exclusion contour 
This function enables you to define the contour for an exclusion, e.g. a bore in a plate, in the active part.
The prerequisites are an overlap contour in the active part and a contour that can be defined as asubtarction.
- Identify the start of the contour for the exclusion.
- Right-click to end the identification.
- Choose Redraw
 from the toolbar to display the exclusion.
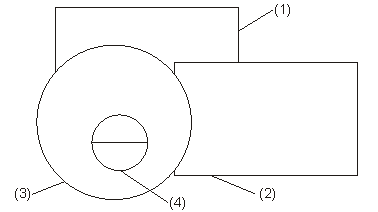
(1) Part 1, level 1
(2) Part 2, level 2
(3) Part 3, level 3
(4) Exclusion contour
