HELiOS Workspace
To transfer the CAD model structure to the HELiOS database you use the New in HELiOS  function (in the Input function group). When you call the function, the following dialogue window will be displayed:
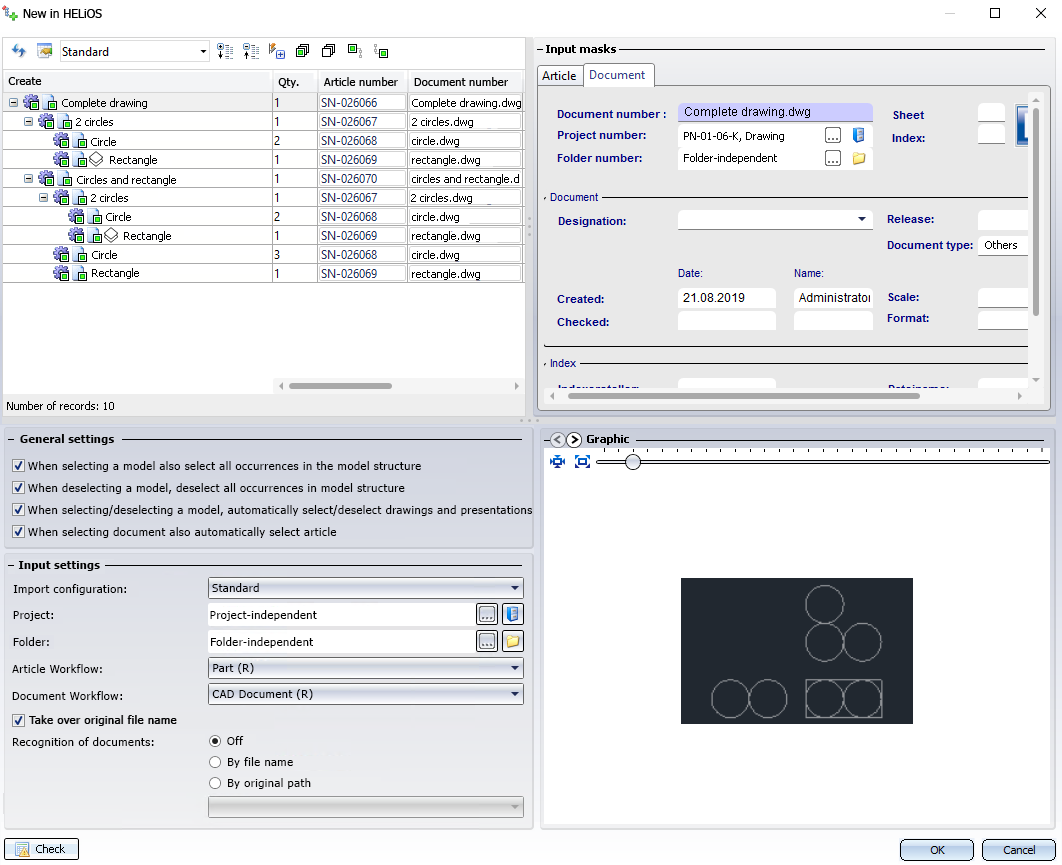

Create
In the structure tree beneath Create you can see the model structure with the AutoCAD file names and designations.
At the top of the window you can find some additional options :
-
Click
 and
and  to expand and collapse all levels of the entire structure.
-
 Select all marks all elements of the structure for derivation,
  Deselect all removes the marking again.
-
 Select all documents makes it possible to select only newly added documents with one click, if under General settings the option When selecting document also automatically select article has been deactivated.
-
Click on
 Do not automatically (de)select complete substructure upon (de)selection, if you want to select or deselect only one particular element of the structure, and not its entire sub-structure together with it. Click once more if you also want to select or deselect the sub-structure of the selected element.
-
Click on
 if you do not want superordinate models of the selected element to be checkmarked automatically. Please note that in some cases this dependency cannot be broken up; for instance, superordinate levels of released models must always be selected, too (this selection will happen automatically). Clicking on
  resets the option to the mode that automatically selects superordinate models when selecting an element in the structure.
General settings
|
When selecting a model also select all occurrences in the model structure |
If this checkbox is active, each additional occurrence in the model structure is automatically selected for the generation of the HELiOS data when clicking on a part or an assembly that has been inserted several times in the model drawing. If the option is deactivated, multiple models can also be saved individually. If the option When deselecting a model, deselect all occurrences in the model structure (see below) is inactive, it only has an effect on the selection and not on the deselection, i.e. you can use the option to select all occurrences with one click and then have the option to selectively deselect individual occurrences again. |
|
When deselecting a model, deselect all occurrences in the model structure |
This setting has the same effect as When selecting a model also select all occurrences in the model structure (see above) also when (re)selecting elements of the model structure. |
|
When selecting/deselecting a model, automatically select/deselect drawings and presentations |
With this checkbox you can determine whether drawings and/or presentations linked to a model are automatically selected or deselected in the dialogue when selecting or deselecting the model (active by default). |
| When selecting document also automatically select article |
If this option is set, the corresponding article is automatically selected when a document is selected. If you do not create article masters for all document masters, you should deactivate the checkbox. If you use the option |
Input settings
Beneath Input settings you can select an Import configuration for attribute mapping of the database transfer from a pull-down menu (if several configurations have been created), and determine a Project, Folder, Article Workflow and Document Workflow.
If you activate the Take over original file name checkbox, the file name of the CAD model drawing will be taken over to the HELiOS database.
![]() This only makes sense if file names are consistent and unique throughout. In case of multiple occurrences of file names the searching through the database on the basis of file names makes no sense.
This only makes sense if file names are consistent and unique throughout. In case of multiple occurrences of file names the searching through the database on the basis of file names makes no sense.
Further down in the dialogue window you can find several options for the Recognition of documents of already transferred documents:
- If Recognition has been switched Off, part will always be transferred to HELiOS as new parts, i.e. you can enter the same assembly multiple times. If you do not want this, you can choose between the two following options:
- By file name: Each document to be transferred will be searched in HELiOS first. If a HELiOS document with the same file name is found, the document will not be taken over, but the one that already exists in the database will be used instead.
![]() In this context the Take over original file name checkbox (s.a.) is important, since it ensures that HELiOS will not generate a "cryptic" file name. Only then can documents be recognized by the file name with the help of this option.
In this context the Take over original file name checkbox (s.a.) is important, since it ensures that HELiOS will not generate a "cryptic" file name. Only then can documents be recognized by the file name with the help of this option.
- By original path: When taking over data, HiCAD saves the original (complete) file path of documents. If this option has been activated, the documents for which this original file path has been set will be searched in HELiOS.
A recognition By file name can be useful if you want to take over (old) data located on a local directory, for instance, because they have been locally saved there by an engineer before their transfer. For a successive data transfer from a central directory (e.g. on a Server), in contrast, you would use the By original path option instead.
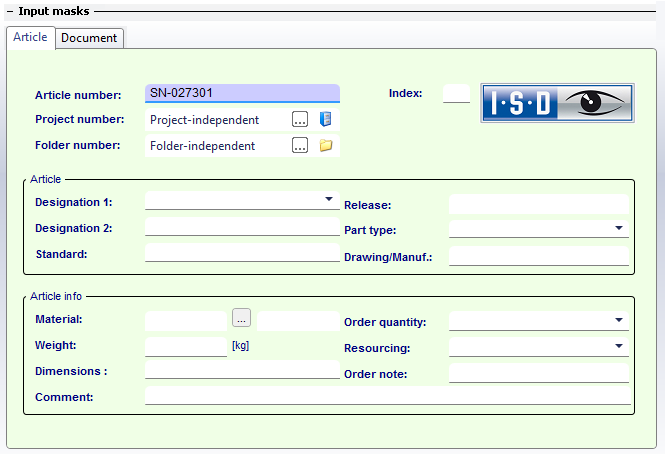
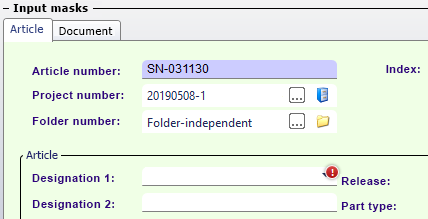
Input masks
In the Input masks area on the top right you can see the corresponding master data details for the active Article or Document.
If, when attempting to enter data via the dialogue, there are incorrect input fields such as missing mandatory attributes, the corresponding field in the mask area is marked with an exclamation mark.
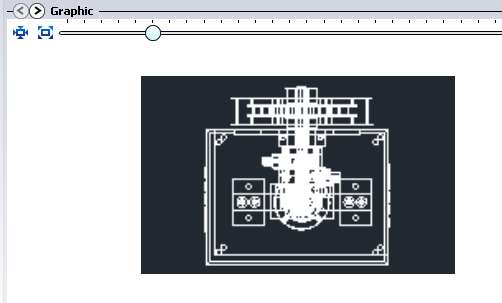
Graphic
In the Graphic preview at the bottom right, the document that is currently marked in the model structure is displayed. If the top part is active, you will see a graphic of the entire model drawing or HELiOS assembly; if you click on one of the subordinate assemblies or parts, only the currently active assembly/part will be shown in the Graphic window.
After clicking onto the Graphic area, you can also enlarge or downsize the graphic with the Zoom bar.
Check
Click on the Check button at the bottom left of the dialogue window before saving, to check whether all entries are correct and complete, or if there are any inconsistencies. If any mandatory entries are missing, an error message referring to the affected documents and/or articles will be displayed (also when you click on OK).
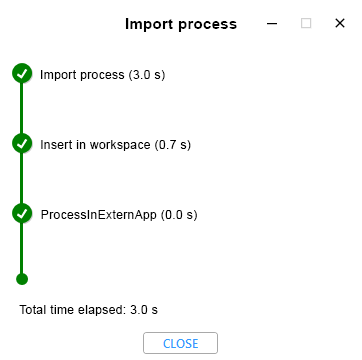
Import process
After executing the input dialogue with OK, a progress bar gives you further information on the stages the process goes through: object creation in HELiOS, insertion into the HELiOS workspace, replacement of local data and references in the CAD system with the corresponding HELiOS information and a final saving process.
After saving the model structure to HELiOS the original model drawing will be closed. You can then continue working in the HELiOS document.
