Preview Images
Preview images for tables
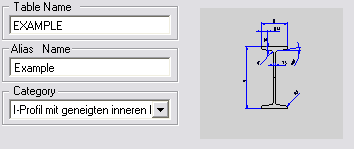
If you want to assign a preview image to a table, you need to proceed as follows:
- Create a BMP file in the size of 80 x 55 pixels.
- Save this file with the name of the corresponding table and the file name extension BMP in the KATALOGE/IMAGE folder.
Automatic preview images for parts and processings
If you assign 2-D or 3-D parts from HiCAD to a factory standards table (Save as part with catalogue entry) , the preview images are created as EMF files if desired. These will then be displayed if you move the cursor to the appropriate record of the table. The preview images for parts can be found in the HiCAD sub-directory KATALOGE/WERKSNORMEN/IMAGE.
You can also use BMP files instead of the EMF files. You need to create these manually (80 x 55 pixels). In this case, however, you need to change the icon name in the record of the part if necessary. Please remember that BMP files are preferred to EMF files in case of name identity.
If you click on a preview image with the right mouse button, it can be printed.
Preview images for parts and processings can also be assigned to a table via the ICON column. Enter the name of the EMF file that you want to be displayed as a preview image in the Catalogue Editor and during insertion via factory standards catalogue in HiCAD. This file must be located in the HiCAD subdirectory KATALOGE/WERKSNORMEN/IMAGE. Please remember that no preview images can be saved for shaded parts!
Manual preview images
For data records of other tables in the WERKSNORMEN (Factory standards) catalogue, too, e.g. for Bore patterns or Punching and Embossing tools, preview images can be created. These can be EMF or BMP files. Please also note here that in case of identical names the BMP files will have priority over the EMF names. The preview images must be located in the IMAGE sub-folder of the respective table folder, e.g. for Bore patterns in the sub-folder Kataloge\Werksnormen\Musterbohrungen\image. The preview images can be assigned to the corresponding data record in the table via the ICON column. To do this, simply enter the name of the EMF or BMP file (without file name extension).
Notes on the preview images for data records in tables
If the ICON column is empty or not available, the image of the corresponding table is still displayed as a preview image. If there is an entry in the ICON column, this must be a valid file name. In this case, the preview image defined by the specified file is displayed for the table row. If the file name is incorrect, no preview image is displayed for this table row.
Detailed preview images
It is also possible to create preview images for categories, similar to preview images for tables. These may be used for a detailed preview image. The preview images will be displayed as follows:
- If a table belongs to a certain category, double click on the preview image of the table to show the preview image of the category.
- If a HiCAD table is assigned to a category when created, the preview image of the category will be shown in the dialogue box. Double click to enlarge the preview image.
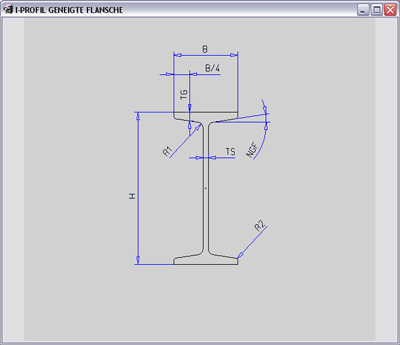
If you click on a preview image with the right mouse button, it can also be printed (p.p. function)
The preview images for categories need to fulfil the following conventions:
- The filed will be created as EMF files (Enhanced Windows Metafile).
- The files have the name of the category.
- The files are in the HiCAD sub-directory KATALOGE\IMAGE.
