Insert New Image (Mask Editor)
Insert control > Insert new image
You can add graphics to masks by clicking  Insert new image in the Insert control function group of the Mask Editor Ribbon.
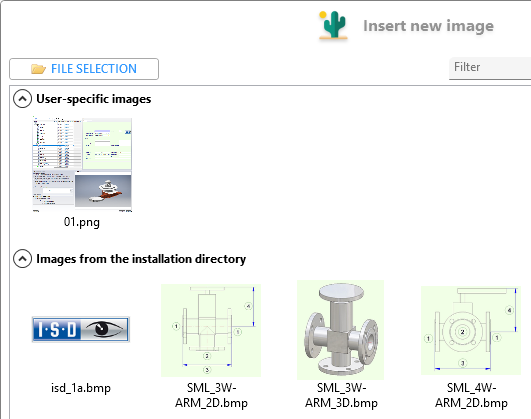
A selection dialogue opens:

By default, you will see a preview of all images located in the HELiOS installation directory.
If you want to insert a graphic that is located in another location, you just have to click on  FILE SELECTION. at the top of the window. The window explorer opens to select a graphic via another file path.
If a selection was made in this way, the drop-down heading User-specific images is also added to the window above Images from the installation directory, under which a user-specific file selection made once is offered for QuickAccess selection.
By marking an image and confirming with OK or double-clicking, a graphic is selected for placement in the open mask. There you can change the position or dimensions of the graphic by Drag & Drop.
 Hold down the SHIFT key to enlarge or downsize images by dragging while keeping the aspect ratio.
Like in the Windows Explorer, you can use the menu icons  in the selection window to switch between the display types List view, Small icons and Large icons.
In the Filter input field you can search specifically for file names (or parts of them). The listing in the window will be adjusted accordingly.
Before selecting an image, activate the As background checkbox at the bottom of the window if you want to set an image file as the background image of the mask.
The selected image will automatically be scaled as large as possible (aspect ratios will be kept).
![]() Please note:
Please note:
-
All common image file formats can be used.
-
If you use
FILE SELECTION to select an image that already exists in the mask editor as a user-specific image, a suffix is automatically appended to the file name so that existing image files are not overwritten.
-
You can also replace an image later by selecting the desired one and clicking on
 Select image under Element-specific in the Properties window.
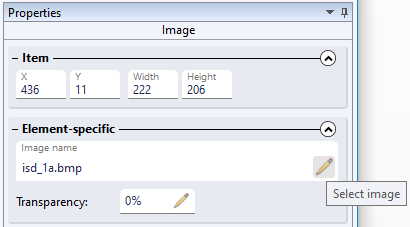
For Transparency you can enter a percentage value manually or, after clicking on the Set transparency symbol, use a scaling bar (see below) to assign a desired degree of transparency to the image. 0% = no transparency. The maximum possible value is 90%.
![]()
-
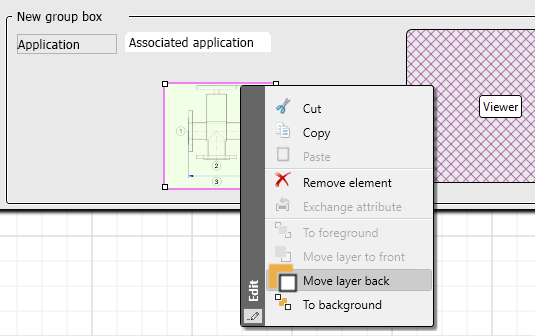
You can also move images in masks forward or backward, e.g. in the case of "overlaps", using the context menu of the right mouse button on the visibility layer.
-
By holding down the SHIFT key, you can scale images while maintaining the size ratio.

