Dimensional and Positional Constraints
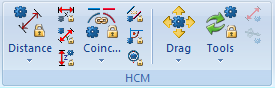
You will find the functions for adding new positional and dimensional constraints on the 3-D Standard tab in the left half of the HCM function group. The most frequently used functions are directly available, while the less frequently used functions are accessible via a menu.
The following constraints are available:
- Dimensional constraints
- Distance (direct or parallel to X-, Y- or Z-axis)
- Angle
- Positional constraints
- Coincidence
- Parallelism
- Perpendicular
- Fix/Unfix
- Forced fixing
- Tangent
- Concentricity
- Mid-point
- Equal angle
- Equal distance

Dialogue window
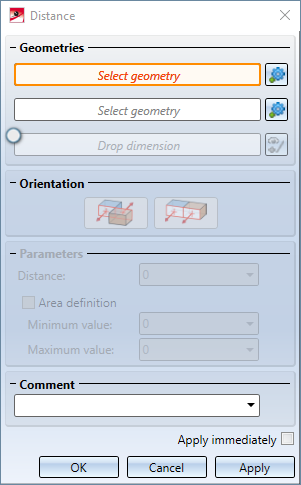
After selecting one of the functions, with the exception of the functions Fix / Unfix, Forced fixing, Equal angle and Equal distance, a dialogue window appears asking for the necessary information. This dialogue window shares a basic appearance for all functions in the HCM area, which then only differs in the information requested. The operating elements that are always available are:
- Geometries: Select the geometries used for the HCM constraint here. The exact queried geometries differ depending on the selected position or dimensional constraint. They are described on the individual sub-chapters for the respective constraints.
- Orientation: Here you can select the orientation of the dimensional constraints or the selected geometries.
- Comment: If desired, enter a comment, e.g. to explain the meaning of this HCM condition.
- OK: When all necessary information has been entered, a constraint is created and the dialogue window is closed. If entries are missing or incorrect, an error is reported and the dialogue window remains open.
- Cancel: Closes the dialogue window without creating a constraint.
- Apply: Creates a constraint if possible, but the dialogue window remains open.
- Apply immediately: If this option is activated, constraints are applied immediately, if possible. Example: A distance constraint is created immediately with the current distance after identifying two geometries.
While working with these functions, you can continue to interact with the drawing. If you select another constraint from the HCM area of the ribbon while the dialogue window is open, the dialogue window will be closed and the desired new dialog will be opened.
When selecting geometries for constraints, the component containing this geometry is now automatically displayed transparently after the selection of the first geometry to allow the selection of a possibly hidden second geometry. After executing the function the transparency is of course removed again.
Alternatively, you can temporarily hide individual areas of the drawing by hand while performing this function: Press the Alt key on the keyboard while pointing to the area to be hidden. This step can also be repeated to hide several areas. Pressing the key combination Ctrl+Alt will show such a hidden area. However, after the constraint is created, hidden areas are automatically shown again.
