Project: HiCAD Steel Engineering
"Civil Engineering functions" docking window > Steel Engineering > Connections > Front side to web/flange side > Front plate > Stirnplattenanschluss (doppelseitig) an Steg (2322)
Use this function to connect two beams via front plate connections to a third beam. The connection can be made to the web or to the flange - with or without filler plates.
Depending on the fitting situation, the connected beam will be automatically notched appropriately. Furthermore, weld seams can also be directly inserted and annotated.
The connection can be a user-defined connection or configured via predefined DAST tables supplied with HiCAD.
Supported beam and profile types are I-beams, U-beams, T-beams, Z-profiles, pipes and hollow profiles.
.
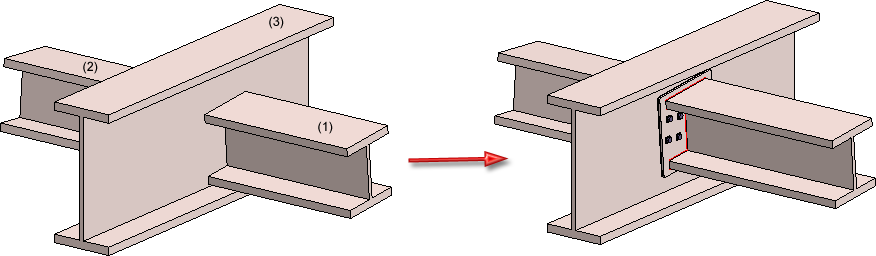
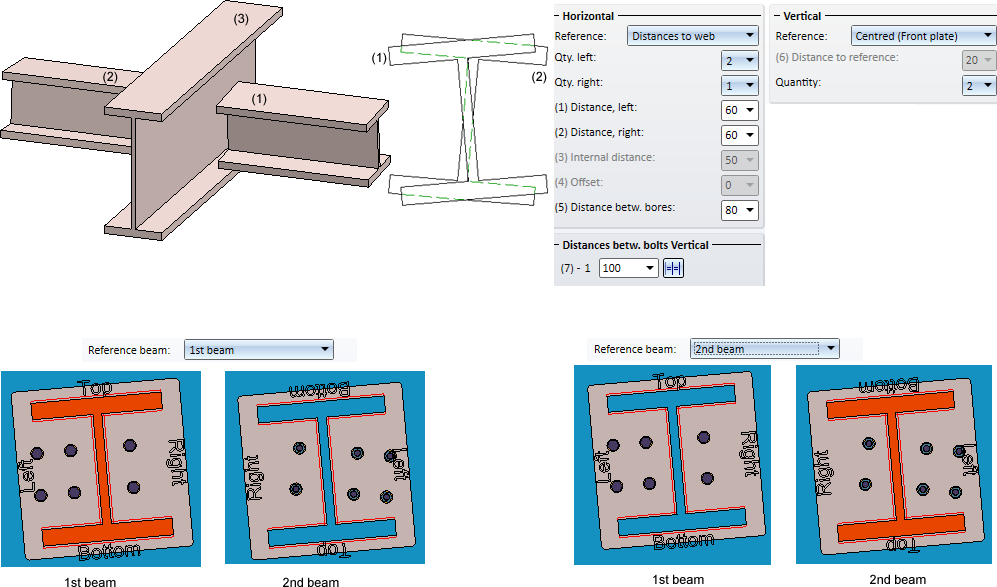
(1) 1st beam to be connected, (2) 2nd beam to be connected, (3) Target beam to which the connection is to be made
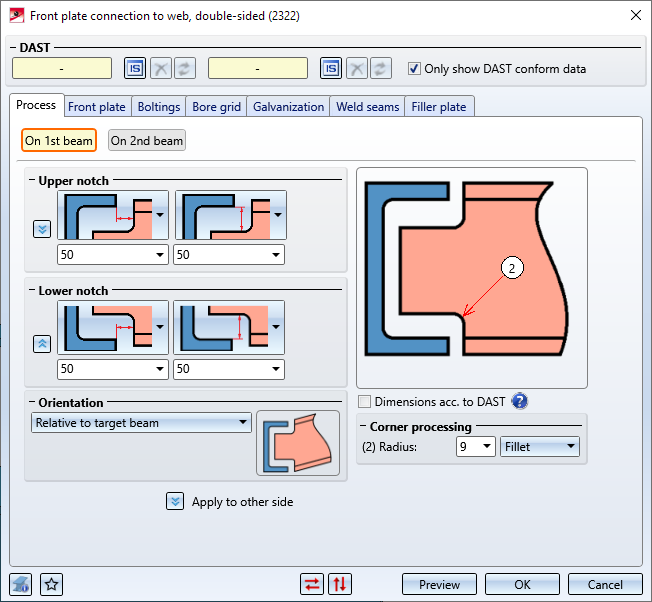
The dialogue window for the front plate connection will be displayed. The configuration of the front plate connection takes place via the tabs of this dialogue window.
The settings in the dialogue window can be saved as Favourites and reused at any time. To do this, click on the  at the bottom left of the window to activate the context menu. More about Favourites management can be found in the Manage Favourites topics of the HiCAD Basics Help.
The operation of the dialogue is largely similar to that of the Front plate connection to web/flange (2320) dialogue, with the following differences:
On 1st beam / On 2nd beam sub-tabs
In contrast to the Connection 2320 you have the option to define separate configurations for the two beams to be connected, via the On 1st beam and On 2nd beam sub-tabs of the
tabs. If you want to apply the same settings to both sides, click  or
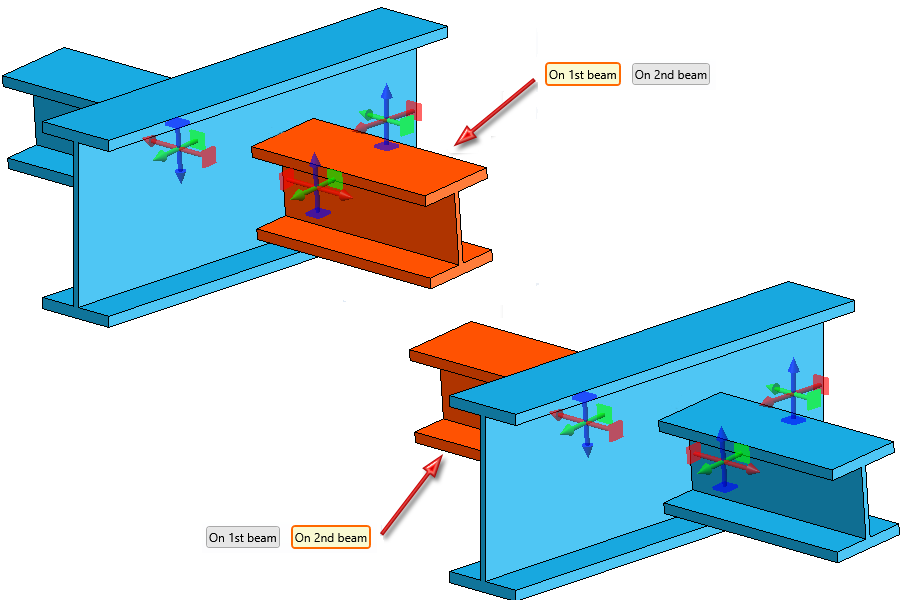
or  Apply to other side. Depending on the selected sub-tab (On 1st beam / On 2nd beam) the corresponding beam will be highlighted in the drawing.
Bore grid - Selection of reference beam
On the Bore grid tab you can choose via the Reference beam text box to which of the two beams to be connected the settings are to refer.
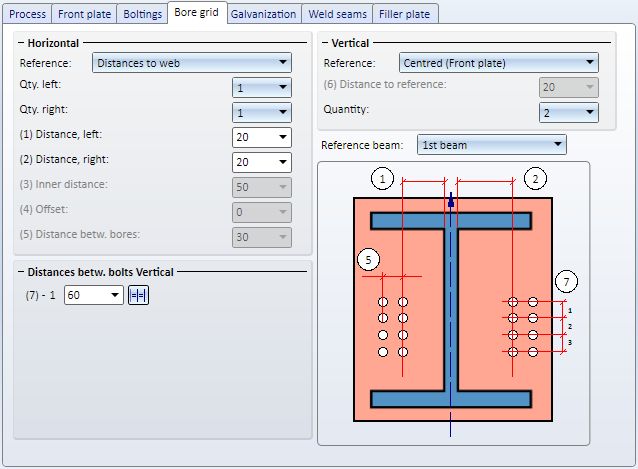
The selected reference beam will be highlighted in the drawing.
The following example shows two beams rotated in relation to each other, and the difference in the selection of the reference beam.
If the Boltings tab is active, the reference beam selected on the Bore grid tab will be highlighted in the drawing.
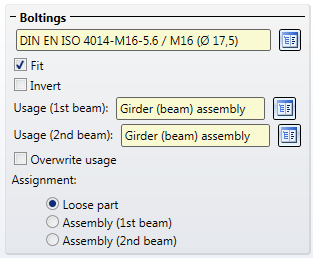
In the Usage fields you can specify which usage is to be assigned to the assembly of the 1st beam and the 2nd beam. If a usage has already been assigned to the assemblies of the beams, the Overwrite usage checkbox can be used to specify whether the existing usage is to be kept or replaced by the usage type selected on the Boltings tab.
Beneath Assignment you can specify to which assembly the bolting groups and the reinforcement plates are to be assigned.
If you activate the Assembly 1st beam/2nd beam, the Bolting groups will be assigned to the assembly of the 1st beam or 2nd beam, respectively.
If you activate Loose parts, the Bolting group will be inserted as a separate assembly on the same level as the assembly of the 1st/2nd beam.
Please note that the settings for the Usage and the Assignment must be made before the creation of the assembly structure of the connection. After clicking the Preview button, and also after insertion of the connection, a change of these settings will no longer be possible.
Weld seam
On this tab you can specify the settings for weld seams, separately for the first and the second beam.
![]() Please note:
Please note:


Connections + Variants (3-D SE) • Dialogue Window for Connections (3-D SE) • The Catalogue System for Connections and Variants (3-D-SE)
|
© Copyright 1994-2020, ISD Software und Systeme GmbH |
Data protection • Terms and Conditions • Cookies • Contact • Legal notes and Disclaimer