Project: HiCAD Element installation
When installing elements - especially with complex facades - it is often the case in practice that certain installation elements have the same options. In such cases, HiCAD offers the possibility to work with so-called selection groups to facilitate the selection of the areas to be occupied (rectangular or polygonal sketch areas) and the editing of installation elements with the same parameters. The advantage is that you can group installation elements with the same parameters and then select or deselect all elements of this group with one click.
The Selection groups area is available at the bottom of the Element installation dialogue window.
|
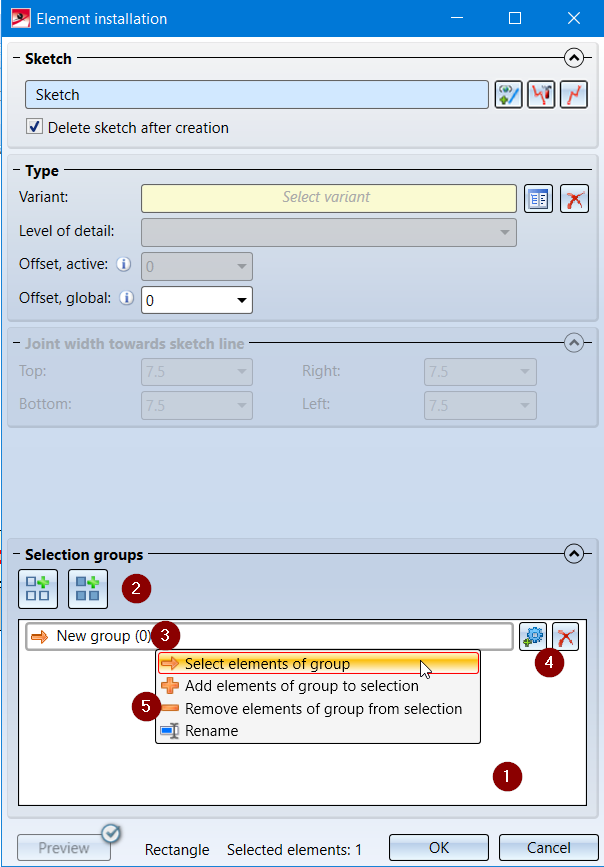
(1) |
Group list All currently defined selection groups are displayed here. Each group is listed in a separate row. |
||||||||
|
(2) |
With a click on this symbol you define a new selection group. A new group row (3) is inserted into the group list (1).
This function combines the current selection into one new group. |
||||||||
|
(3) |
Group row
A separate row is displayed for each group in the group list (4).
The number in brackets indicates how many elements belong to the group. Clicking on the |
||||||||
|
(4) |
Edit group
To add an element to a group, click on this icon and then select the areas / laying elements in the construction that you want to add to the group. Multiple selection is also possible by holding down the CTRL key. To finish the selection press the middle mouse button
Clicking on this icon will delete the group. To remove an element from the current group, first click on the |
||||||||
|
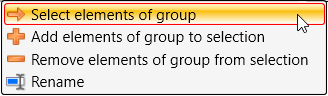
(5) |
Context menu Right-clicking on the
|
A concrete example:
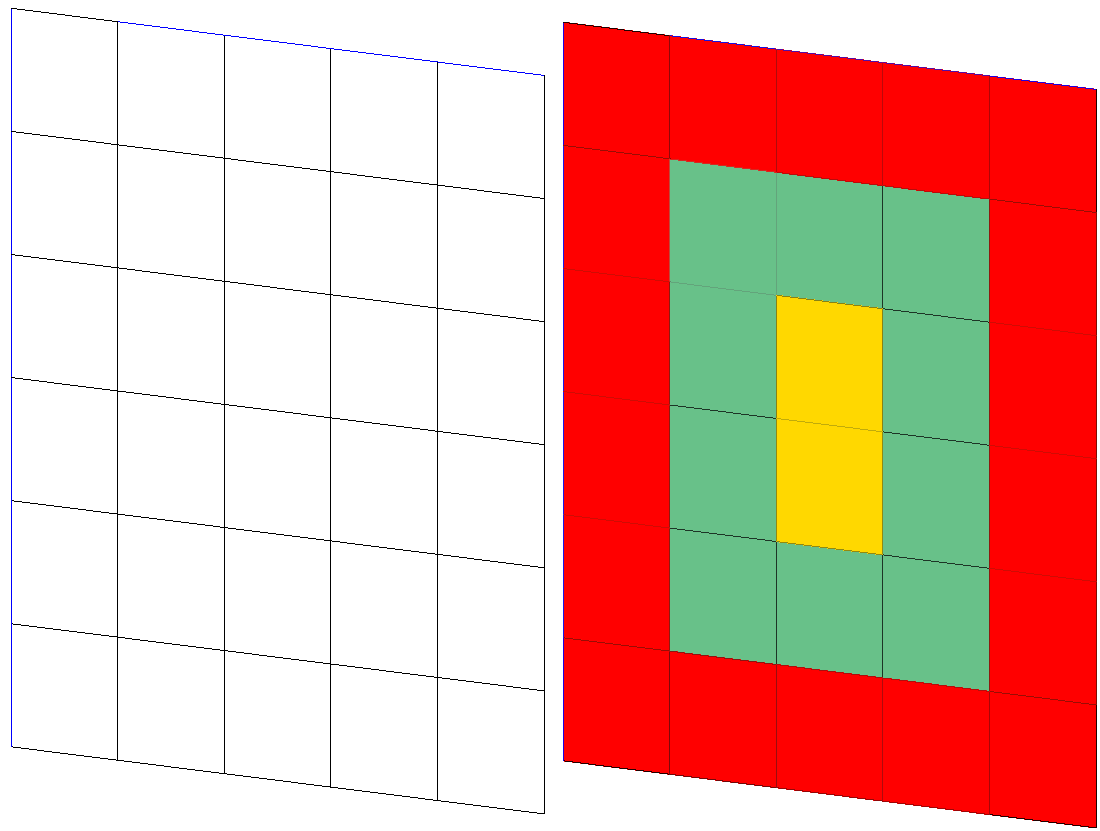
The following figure shows the element installation sketch on the left. Assume that, as shown in color on the right, the installation elements have the same parameters on the areas of the same color. In this case, the use of selection groups is recommended.
This can also be done directly before the first installation. (The installation chosen here serves only didactic purposes!)
So we start the element installation and identify our example sketch. All installation areas are marked.
With a click on  we create a new group. Then we click on
  (the current selection is removed) and select the installation areas in the construction with the CTRL key held down. The selection is finished with the middle mouse button and the group name is changed to Outside, for example.
Afterwards we click on the  symbol to select the outside elements and can then occupy these areas directly, e.g. with inserted ALUCUBOND panels.
Without leaving the dialogue window, we define another group, e.g. Inside, for the areas marked green and then occupy these areas with riveted ALUCUBOND panels.
The third group, e.g. Core, comprises the yellow marked areas, which we cover with riveted ALUCUBOND panels. Then we close the dialogue window with OK.
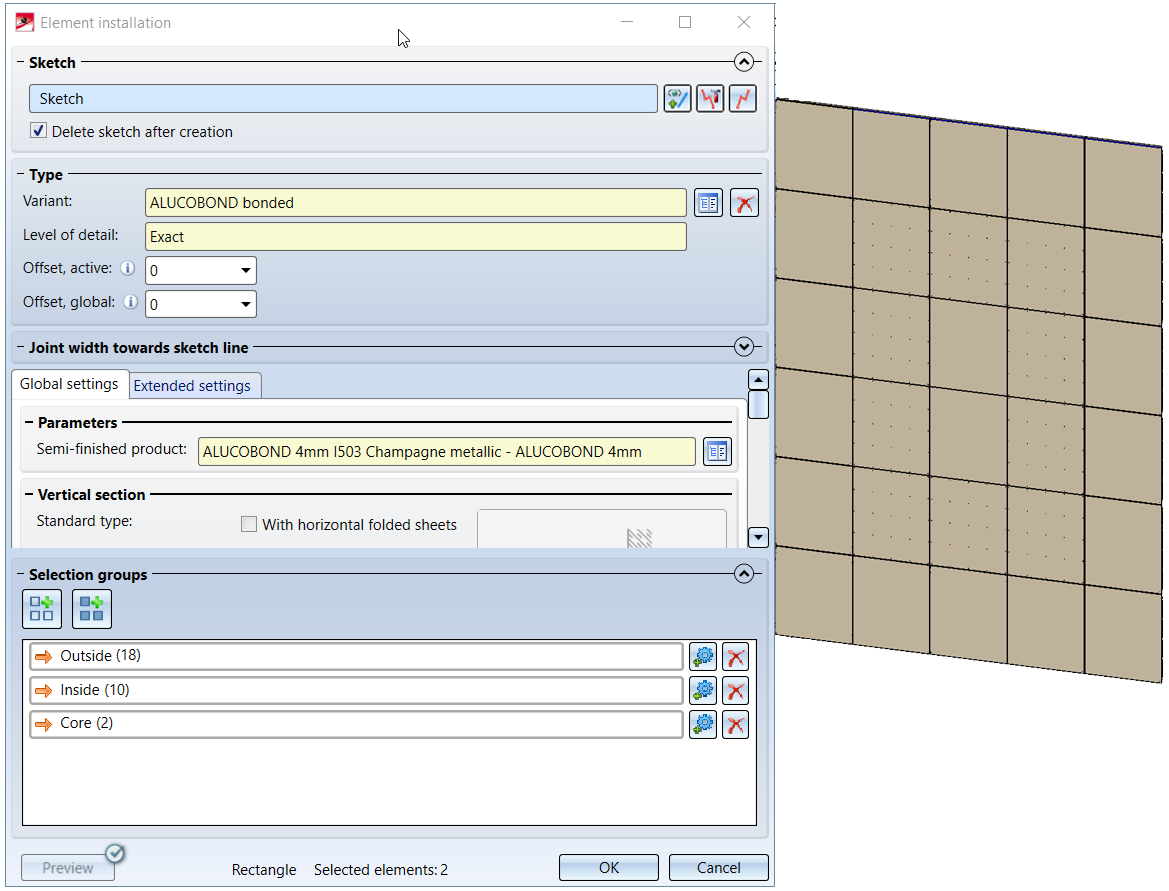
If you now edit this element installation later, then after a (double-click on the feature Element installation all installation areas will be selected. Since the previously defined selection groups are also available here, you can select and edit all external elements immediately by clicking on the group Outside and then on (in the group row Outside).
![]() Please note:
Please note:
Proceed likewise for selection groups of sub-structures.


Element Installation: Basic Procedures • Marking Colours • Element Installation: Example
|
© Copyright 1994-2020, ISD Software und Systeme GmbH |
Data protection • Terms and Conditions • Cookies • Contact • Legal notes and Disclaimer
 Create new group with selected elements