Edit Weld Seam
To change weld seams that already exist in the drawing, right-click the weld seam representation. A context menu containing the following functions will be opened:
|
Context menu functions |
|||
|---|---|---|---|
|
|
Seam, Edit |
Changes existing weld seams, e.g. the seam type, the representation, or the tag. If the weld seam was created with a Steel Engineering connection function based on a Design Variant, the dialogue window of the corresponding connection function will be opened. For all other 3-D weld seams, the same dialogue window as for weld seam insertion will be displayed. Proceed as follows:
The weld seam will be adjusted accordingly and the feature log will be updated. |
|
|
|
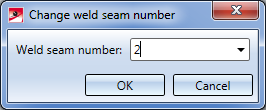
Change weld seam number |
Enables a manual changing of the weld seam number. Enter the new weld seam number and confirm with OK.
|
|
|
|
Seam, Delete |
Deletes the current weld seam. |
|
|
|
Insert weld symbol |
Inserts a weld symbol. The settings that you specified during weld seam insertion will be used. |
|
|
|
Hide all |
Hides all weld seams. This affects all views. If only the weld seams in the active view should be hidden the Hide/show elements in view function (Views > Properties) can be used. |
|


 Please note:
- You can also right-click the weld symbol and open a context menu if you want to edit a weld seam. In the context menu for weld seams and weld symbols, select Process weld seam. If the weld seam was created in Steel Engineering with a connection function based on a Design Variant, the dialogue window of the corresponding connection function will be opened when the weld seam is changed. For all other 3-D weld seams, the same dialogue window as for weld seam insertion will be displayed.
- The representation of weld seams can be changed via the Configuration Editor, at ... > Modelling > Weld seams.
- For weld seams created with HiCAD 2010 or older versions, the dialogue window of Version 2010 will be displayed!

