Project: HiCAD Steel Engineering
Civil Engineering functions > Steel Engineering >Stairs+Railings > Variant Editor for Railings
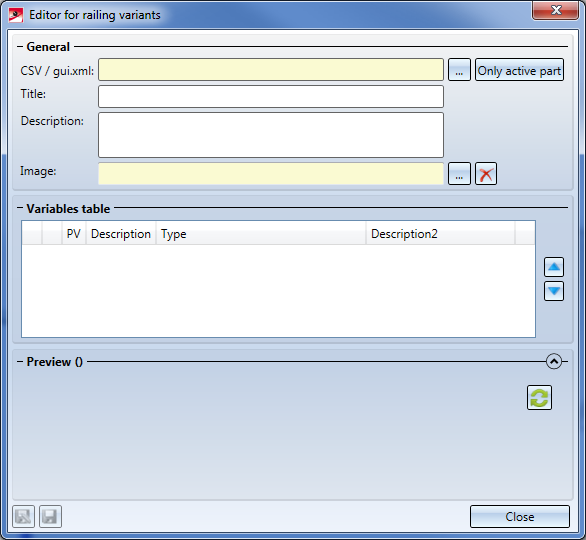
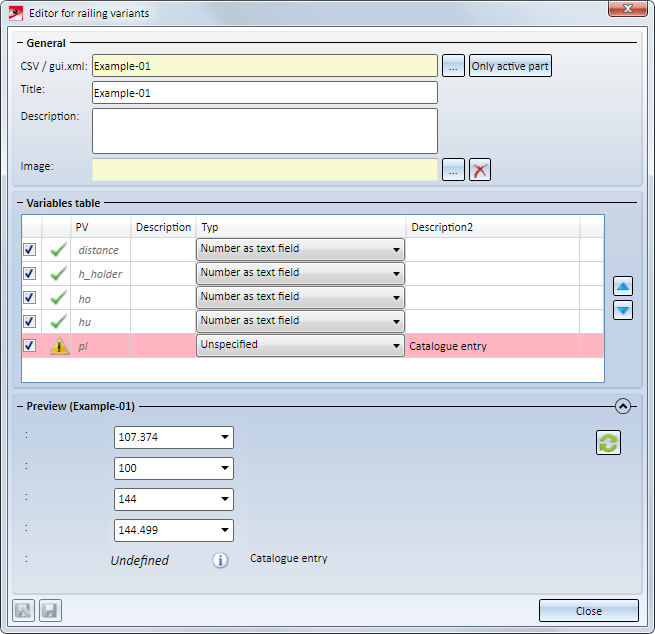
The Variant Editor for Railings allows you to save new railing variants or change existing ones. Here you determine what will be displayed on the corresponding tabs when selecting a customer-specific variant, and how the input fields are initialized there.
If you have defined the geometry of your component, assigned the required ISD variables, the desired free variables, HCM constraints etc., you can save the corresponding variant.
To do this, first activate the part or, in most cases, the corresponding assembly, and start the Variant Editor for Railings Editor in the Civil Engineering functions at Steel Engineering > Stairs +Railings > Railing.
Click on Active part
Let us assume that the assembly shown below is our railing component, all required variables have been defined and the assembly is active (the creation of this assembly and the assigning of the variables is described in detail in an extensive Example).
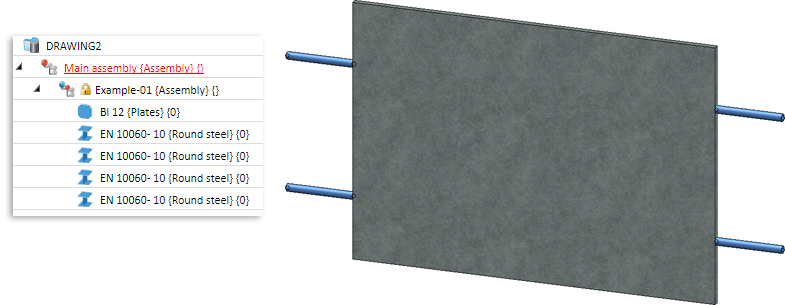
When you now click on Active part, the data of the assembly will be transferred as follows:
|
CSV / gui.xml |
The variant is saved under this name. The part name of the active assembly will be used here automatically. The following files will be created:
In the concrete example above , the files:
would be created. If a preview image has been selected, a same-named image file will be created. |
|
Title |
Here, too, the name of the active assembly will be displayed. This field can however be edited. The title shown here will be used in the selection boxes of the Railing Configurator. |
|
Description |
Here you can enter an arbitrary explanatory text which will also be shown in the Railing Configurator. |
|
Image |
Here you can determine a preview image for the variant, which will be shown beneath Preview when you open the variant in the Editor. The image will be saved automatically with the name of the variant to the folder of the variant. Click on the |
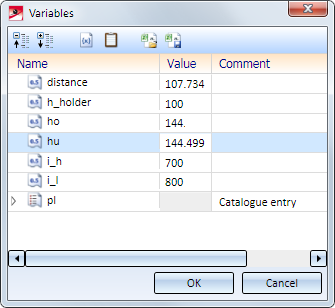
Here, all freely assigned variables of the selected assembly are displayed. The ISD variables are not shown here.
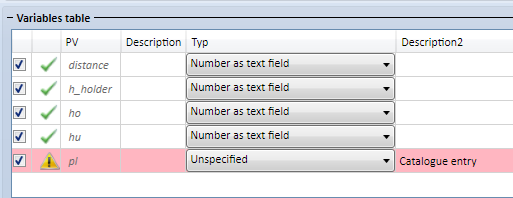
The variables table consists of the following columns:
|
Column 1 |
The utilization of the corresponding variables can be switched on or off by activating or deactivating their checkboxes. If the checkbox is deactivated, the corresponding variable will be removed from the Preview area. |
|
Column 2 |
Here it is indicated by a symbol whether the variable has been defined correctly |
|
PV |
Here the variables are listed. |
|
Description |
For each variant you can enter a text here, which will be displayed in the Preview area and, later, also in the Railing Configurator before the input field. |
|
Type |
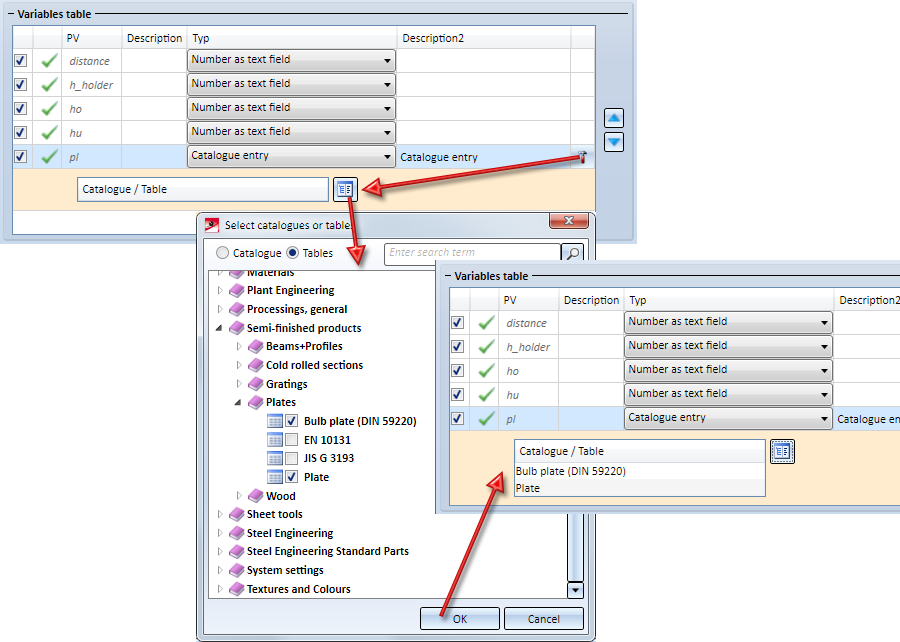
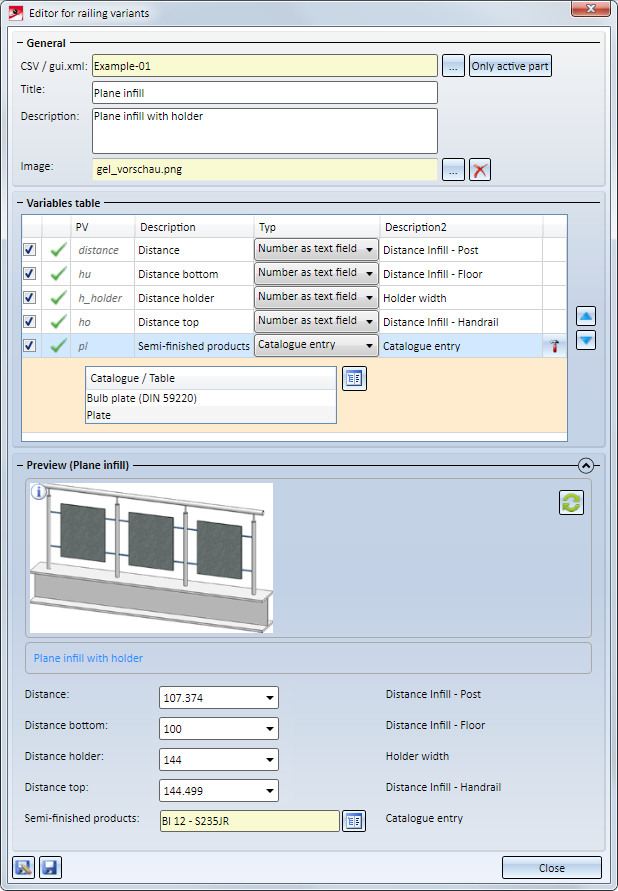
Contains the type of the variable that can also be changed here. Special here are the variables of the type List. If you have assigned such a variable to your railing component, it will be initially shown in the table as Unspecified. You can then choose Catalogue entry in the listbox and click on the
According to the setting shown below , only the tables Plate and Bulb plate will be offered for selection for the railing components in the Railing Configurator. |
|
Description2 |
The text specified here is displayed after the corresponding input field. If you have entered a comment when defining the variable, it will be taken over as Description2. |
Use the arrow symbols on the right hand side of the dialogue window to move variables up or down.
This area contains a preview of the data shown during selection of the railing components. These are:
If the preview graphic already exists and is changed subsequently, you can update the preview by a click on the  button.
Let us assume that you changed the value inputs in the dialogue window above as follows, and selected a corresponding preview image:
To save the variant in that state, choose Save as  and then the catalogue where the variant is to be saved. Since a planar infill is used in our example, select the Plane infills catalogue here and the ISD Examples table.
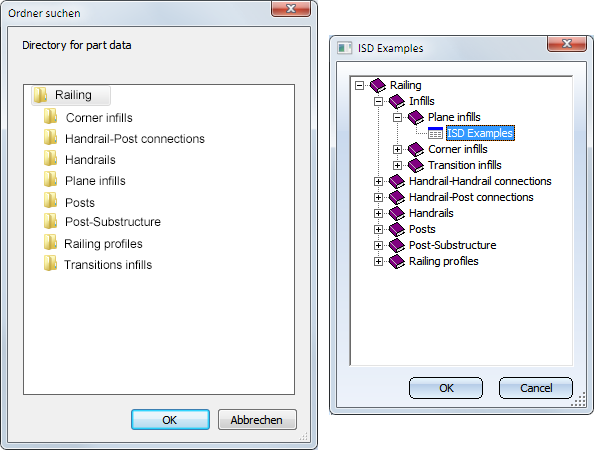
In the sub-folder Kataloge\Werksnormen\Stahlbau\Gelaender\EbeneFuellungwerksnormen of your HiCAD installation you can now find the files:
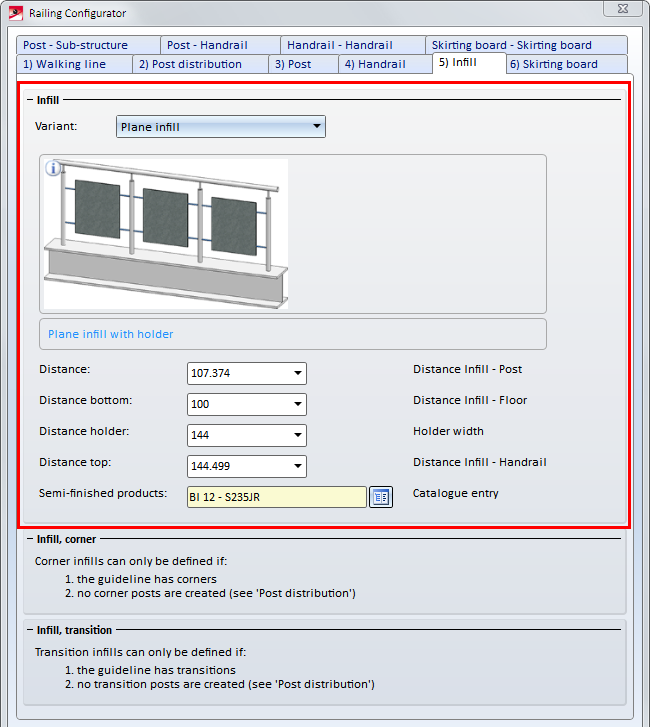
When you now choose this infill in the Railing Configurator, the effect will look as follows:
To edit an existing variant, load it via the  button.
If a railing component for which a variant already exists is active in the model drawing, you can click on the Active part to load the variant.
The dialogue window is then operated in the same way as described for the saving of new variants.
Then, Save the variant with a click on the same-named button  or choose Save as if you want to save the variant with a different name.


Example: Variant of a Planar Infill • Stairs and Railings (3-D SE) • Steel Engineering Functions
|
© Copyright 1994-2019, ISD Software und Systeme GmbH |
 , incorrectly, or is still undefined
  .
.  symbol to select the tables that you want to be offered in the Railing Configurator, e.g.: