Project: HiCAD 3-D
3-D Standard > Standard Processings > Bore/Thr.
Use the functions
to insert bores, threads, thread runouts and countersinks into your drawing.

3-D Standard > Standard Processings > Bores/Threads
Use this function to insert new borews, threads or countersinks.
Proceed as follows:
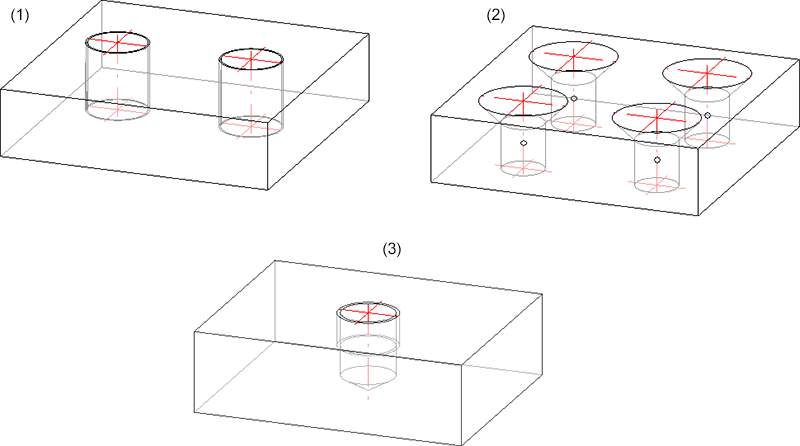
(1) Thread, (2) Countersink, (3) Thread runout
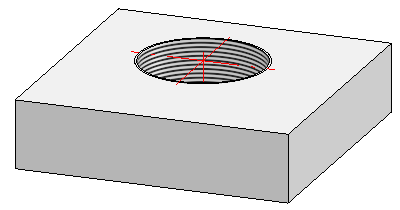
Representation with thread texture
 Please also read the notes on the representation of threads in shaded views.
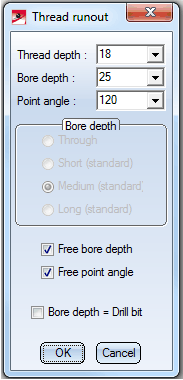
Notes on thread runouts
For different thread runouts, e.g. according to DIN 76, the Thread runout dialogue window will be displayed after exiting the catalogue system:
In this dialogue you can specify the thread depth and the bore depth. If you want to enter the bore depth explicitly, activate the Free bore depth checkbox and enter the bore depth manually in the corresponding input field.
Alternatively, you can specify the bore depth by activation one of the options Through, Short (standard), Rule (standard), or Long (standard). In this case, the Bore depth input field will be greyed out.
If the Free bore depth checkbox is activated, the additional checkbox Bore depth = Drill bit will be available. If you activate this checkbox, the drill bit will be the end point of the thread runout.
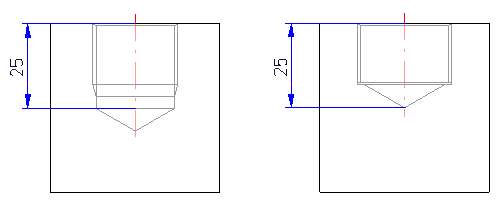
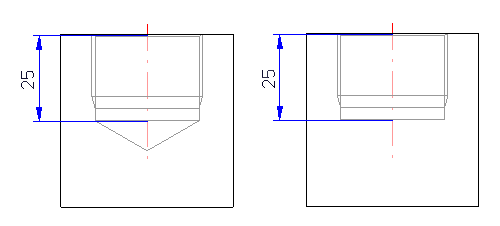
Left:  Bore depth = Drill bit; Right:
  Bore depth = Drill bit
The drill bit, too, can be entered explicitly if desired. Activate the Free point angle checkbox and enter the desired angle in the Point angle input field. If you enter a point angle of 180 degrees, the thread ends in a planar surface.
Left: Point angle = 120 degrees; Right: Point angle = 180 degrees)
![]() Please note:
Please note:
After a new HiCAD installation the new default setting will be Bore diameter. After an update installation from versions older than 2015 (2000.0) the previous default setting will be preserved, i.e. the bolt diameter will be used. If you do not want this, change the settings in the Configuration Editor accordingly.
3-D Standard > Standard Processing > Bore/Thread > Standard Processing, Copy
Use this function to copy already existing bores.
Proceed as follows:
This function is also available in the context menu for Standard Processings.

Standard Processings (3-D) • Settings for Bores (3-D) • Repeated Fitting of Standard Parts (3-D)
|
© Copyright 1994-2019, ISD Software und Systeme GmbH |