Project: HiCAD 2-D
You can define every 2-D part as a symbol. To do this, you choose a number between 1 and 9999 when creating the part. The name must be unique, i.e. a number that has already been assigned as a symbol name cannot be used again.
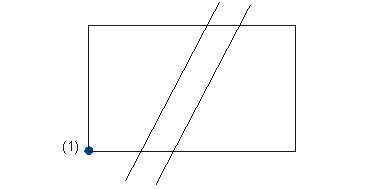
(1) Fitting point
The ID determines whether you are prompted for an angle of rotation or a stretching factor when inserting the symbol.
The following point designations are permitted:
The corresponding prompts for angles of rotation or stretching factors are made when symbols are inserted. By adding * to the fitting point ID, you mark the symbols for which you want an exclusion area to be effective for all graphical elements. Otherwise, only those graphical elements that lead exactly to the symbol reference point are cut with the exclusion area.
The ID is stored in layer 0 (i.e. not visible). The Layer 0 ON function that you activate via Drawing > Others > Visualisation makes it visible.
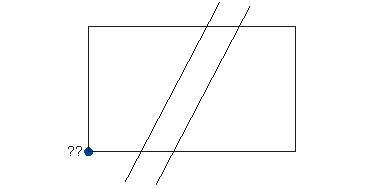
?? Fitting point ID
After defining a symbol, you need to insert it into the symbol table. The symbol table and its graphical representation have a drawing and configuration file that you will find in subdirectory sys:
You define the symbol in configuration file SYMTAB.SKF in the pop-up menu of the symbol table.
The graphic of the symbol is stored in SYMTAB.SZA.
By default, HiCAD makes symbol table SYMTAB.SZA with system path Z: available. To place symbol points, you do not need to have a symbol table in main memory. For graphic representation, however, you need to load the symbol table.
The symbol can be placed anywhere in this drawing, but, for reasons of clarity, should be inserted in an ordered sequence.
You now need to save the symbol graphic for the pop-up menu.
 > Conversion >Save
drawing as symbol graphic
> Conversion >Save
drawing as symbol graphic  to save the file SYMTAB.SZA to HiCAD.
 The pop-up menu is adjusted automatically.

You can create exclusions of a symbol by means of closed polylines - circle or rectangle. The polyline of an exclusion must be created in layer 0.
If the 2-D part defining the symbol does not have an element in layer 0, this symbol then has no exclusion area. The fitting point ID of a symbol is assigned a * if a an exclusion is defined for the symbol.
If layer 0 contains several closed composite edges, the first one is taken as the exclusion area.
Drawing > Save/Print > Save as > Conversion > Save drawing as symbol graphic
Activate this function to create the symbol graphic for this pop-up. Specify the background colour for the graphic and name the pages of the new symbol table. The pop-up is then automatically adjusted.

General Information on Symbols (2-D) • Surface Symbols and Symbols (2-D) • Symbol Table (2-D) • Texts in the Symbol (2-D)
|
© Copyright 1994-2019, ISD Software und Systeme GmbH |