Create New Assembly
3-D Standard > New > 3-D Assembly 
Proceed as follows to create a new assembly in 3-D:
- Open the 3-D Standard tab and select New > 3-D Assembly .
- The Part attributes mask will then be displayed. Enter the desired attributes.
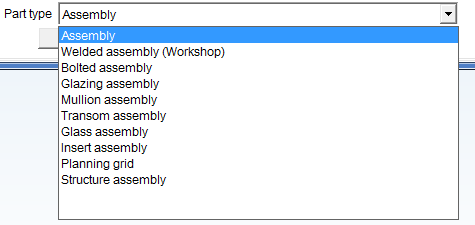
If desired, select the type of the assembly in the Part type listbox. You can choose between general assemblies, bolted or welded assemblies, and Steel Engineering- or Metal Engineering-specific assemblies.
- Specify the assembly points. Assemblies are indicated in the drawing by large red isolated points. These so-called "assembly points" enable a direct identification of assemblies in drawings.
- Now, create the parts that are to belong to the assembly. Create them as sub-parts to enable their direct assigning to the assembly.
- Make one of the parts the assembly main part: Right-click the desired part and select Part/Assembly structure > Into assembly main part in the context menu. This part will be marked with the
 symbol in the ICN.
 Please note:
- If a main assembly is active, the assembly will be assigned to this main assembly, i.e. it will be made a sub-part of the main assembly.
- If the assembly is to be subordinated to another assembly, or to another part, activate the desired assembly or part, and create the new assembly by selecting New > Assy.
 > Sub-part
  .
.
- Many functions automatically form assemblies, e.g. the mounting function for rectangular plates to Steel Engineering beams, the insertion of Steel Engineering connections, or the insertion of stairs and railings by means of the Staircase/Railing Configurator. In this case the assembly main part and the assembly will be determined automatically.
- Alternative function calls:
- Right-click on the drawing area or on the name of the drawing in the ICN and select the desired function in the context menu of the drawing.
- In the
Object snap mode, right-click a 3-D part in the drawing and select New > Assembly.
In the 2-D module there are no assembly parts and assembly main parts with explicit assembly identifiers. But, of course, the parts are structured in the same way into assemblies, sub-assemblies etc. You can, for instance, create a simple 2-D main part and call it "Assembly Turnbuckle", or create a sub-part and call it "Assembly Turned parts".


When Do You use Assemblies? • From Assembly From Existing Parts
|
© Copyright 1994-2018, ISD Software und Systeme GmbH
Version 2302 - HiCAD Basics
Date: 30/10/2018
|
> Feedback on this topic
|