
In the sheet area the production drawings are displayed. Production drawings can also be output on several sheets if you define several sheet areas.
Please note that the Sheet area, New function is only available if a sheet view is active. Therefore, activate a sheet view beforehand or right-click Sheetn and select Activate.

To be able to edit a Sheet area, you first need to activate it. To do this, right-click its name and select Activate. You can also click one of the views of the Sheet area in the ICN.
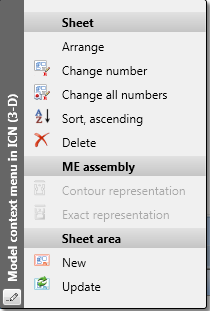
When you now right-click the name of the active Sheet area, a context menu with various editing functions will be opened. The content of the menu depnds on the current editing situation.


You can also change Sheet numbers for multiple selections (click while holding down the CTRL or SHIFT button). Right-click the selected Sheet areas, select Change numbers and choose a possible Sheet number (i.e. a number that does not exist yet). The selected Sheet areas will then be numbered consecutively, in the display order of the Sheet areas.
The display order of the Sheet areas can be changed conveniently via Drag & Drop. You can move individual Sheet areas as well as several Sheet areas in one step.
 The display order of the Sheet areas will be saved together with the drawing.

Activate View (3-D) • Model and Sheet Views (3-D) • Views (3-D)
|
© Copyright 1994-2018, ISD Software und Systeme GmbH |