Context menu functions

Seam, Edit
Changes existing weld seams, e.g. the seam type, the representation, or the tag.
If the weld seam was created with a Steel Engineering connection function based on a Design Variant, the dialogue window of the corresponding connection function will be opened. For all other 3-D weld seams, the same dialogue window as for weld seam insertion will be displayed. Proceed as follows:
- Change the weld seam as required.
- Click OK to close the window and apply the changes.
The weld seam will be adjusted accordingly and the feature log will be updated.

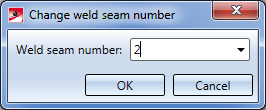
Change weld seam number
Enables a manual changing of the weld seam number.
Enter the new weld seam number and confirm with OK.

 Please note that after a manual changing of a weld seam number, an automatic assigning of item numbers will only be possible in the "Itemize all" mode. To hide or show weld seam numbers, use the Weld symbol, Edit function.

Seam, Delete
Deletes the current weld seam.

Insert weld symbol
Inserts a weld symbol. The settings that you specified during weld seam insertion will be used.

Hide all
Hides all weld seams. This affects all views.
If only the weld seams in the active view should be hidden the Hide/show elements in view function (Views > Properties) can be used.

