HeliosScan enables a direct (also automated) taking over of files as HELiOS documents that have, for example, been created with scanners.
If configured correspondingly, the taking over of the file will be triggered by an external event, such as the pressing of the button on the scanner that starts the scanning of a document.
HeliosScan.exe is called via a command line with the name of the file to be taken over (complete path required!), i.e. for example:
HeliosScan.exe D.\scan_documents_directory\document.pdf
HeliosScan.exe is located in the \exe\ directory of your HiCAD or HELiOS installation from which it will be started.
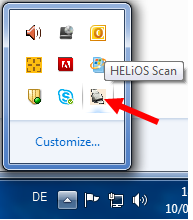
When HeliosScan is started on a computer for the first time, the selection of the license module and a HELiOS login may be required. In the Windows task bar, the HeliosScan icon, ...
...as well as the document data input mask will be displayed.
When you start HeliosScan.exe on your computer again, no login will be required any more, but the already started HeliosScan.exe will be used (the document data input mask appears immediately, and the icon in the task bar reports a new file).
To close HeliosScan, right-click the icon on the task bar and select the corresponding function.
For a direct taking over of the documents, the scanner software must allow the calling of a command line after successful scanning (i.e. Kodak i1200 scanner): In the Configuration input field enter "HeliosScan" as the target name, and below, the corresponding path of HeliosScan.exe.
If several documents are scanned individually, resulting in several individual files, the corresponding document data input masks will be displayed in succession.
Please note that one file per HELiOS document must be set for multi-page scans, i.e. do not use the setting for single page scans here.
If the scanner software offers no calling option via command line, the scanned file can, in any case, be saved to a specific directory and can be fetched, via directory monitoring, by HELiOS.
For this you need to specify an appropriate directory in the HeliosScan Settings dialogue. Right-click on the HELiOS Scan icon on the task bar, select Settings and enter the path of the directory in the Directory monitoring input field.
Activate or deactivate the Delete file after transfer? checkbox, depending on whether you want the documents in the transfer directory to be deleted or preserved after their transfer to HELiOS.
At the top of the window,below Menu item "Save to HELiOS" in File Explorer, you can add a menu item to the context menu of your Windows Explorer administrator rights required!). This function can be useful if the taking over of a file failed due to cancelling of the document dialogue, or due to an error during transfer without dialogue. To take over the file again, you can then use the Save to HELiOS option in the Windows Explorer, and execute it for the transfer directory. Click Remove to delete this option from the Windows Explorer context menu again.
 Please note:
The project selected in the Login window will be assigned to the scanned documents.
If several Workflows exist for the object type, a Workflow selection list appears.


|
© Copyright 1994-2018, ISD Software und Systeme GmbH |
